
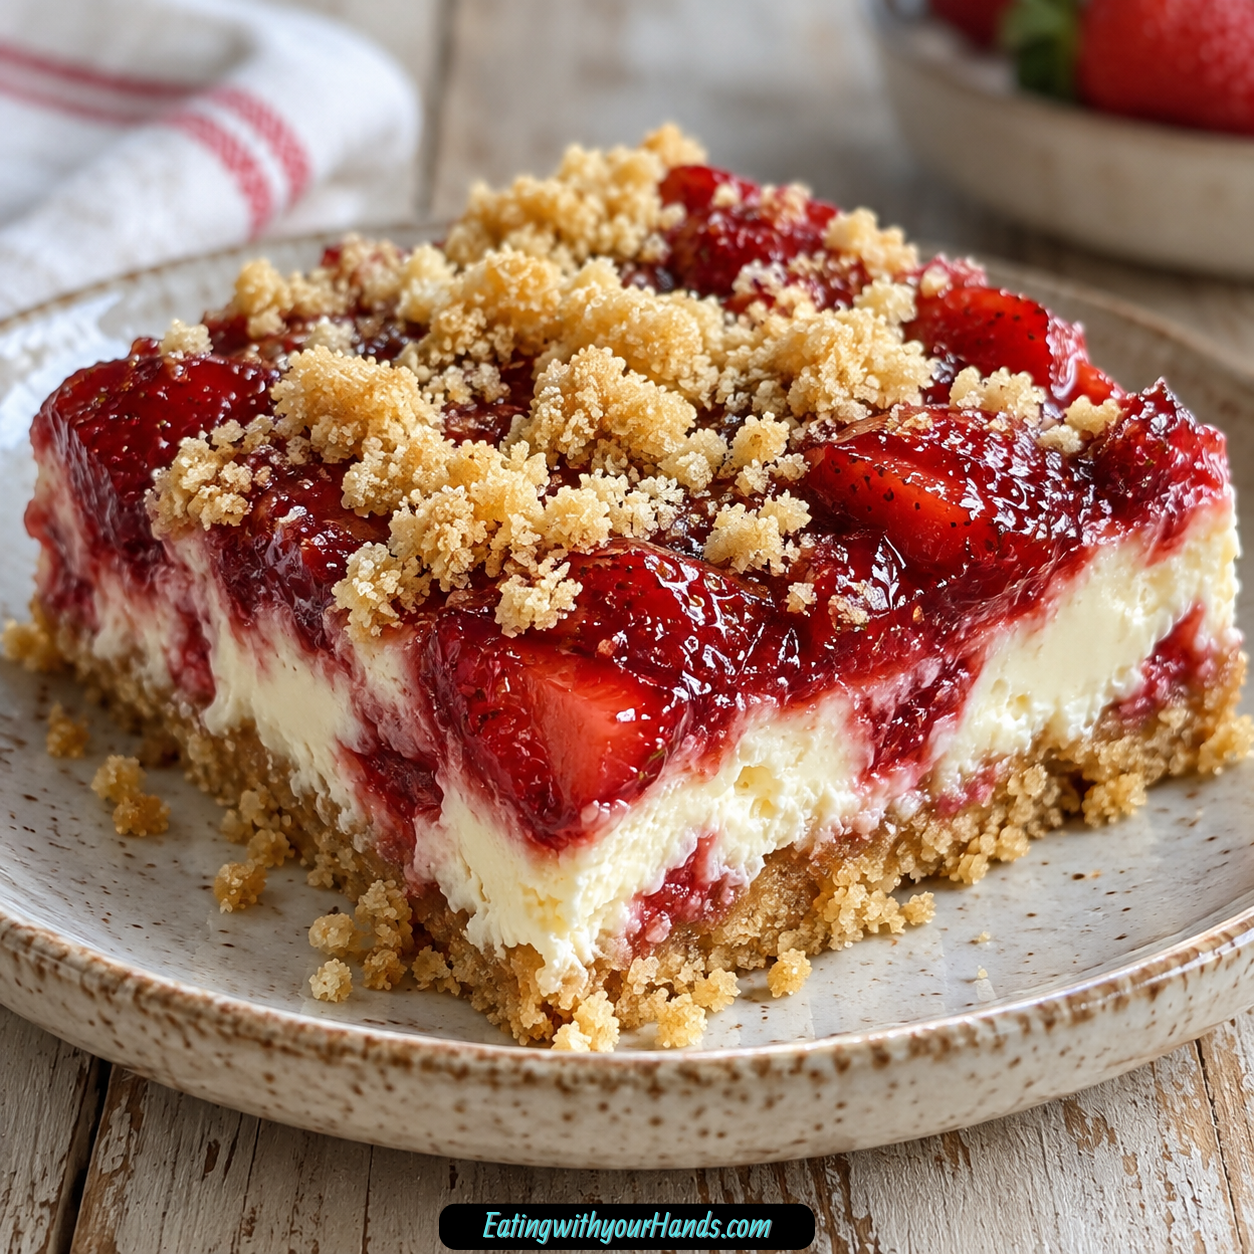
Strawberry Cheesecake Dump Cake is one of those desserts that feels almost impossible to resist once it comes out of the oven. It has a sweet strawberry filling on the bottom, a creamy cheesecake layer tucked through the middle, and a golden buttery cake mix topping that bakes into a crisp, tender crust.
This is the kind of recipe that looks and tastes like it should take far more effort than it actually does. With just six ingredients, one baking dish, and a few simple layers, you can make a warm dessert that feels generous, cozy, and party-ready.
The strawberries make the base juicy and bright. The cream cheese layer adds that classic tangy cheesecake flavor.
Then the dry cake mix and cold butter slices bake together into a golden topping. As the butter melts, it sinks into the cake mix and creates that signature dump cake texture: crisp in spots, soft in others, and deliciously buttery all over.
This dessert is especially perfect for family gatherings, potlucks, holidays, summer barbecues, or any night when you want something sweet without a complicated baking project. It travels well, serves a crowd, and can be served warm, at room temperature, or chilled for a firmer cheesecake texture.
One of the best things about Strawberry Cheesecake Dump Cake is how forgiving it is. The cheesecake layer does not need to be perfectly spread, the topping does not need to be stirred, and the center can stay a little gooey.
That gooey center is part of the charm. A dump cake is meant to be spoonable, soft, warm, and comforting.
Serve it with vanilla ice cream, whipped cream, or just a spoon and a quiet moment. This Strawberry Cheesecake Dump Cake is simple, nostalgic, sweet, creamy, buttery, and exactly the kind of dessert that disappears fast from the table.
Table of Contents
- Why You’ll Love This Strawberry Cheesecake Dump Cake
- Recipe Details
- Ingredients
- Ingredient Notes
- Optional Swaps, Variations, Add-Ins, and Serving Ideas
- Classic Strawberry Cheesecake Dump Cake
- Vanilla Cake Mix Strawberry Dump Cake
- White Cake Mix Version
- Yellow Cake Mix Version
- Cherry Cheesecake Dump Cake
- Blueberry Cheesecake Dump Cake
- Apple Cheesecake Dump Cake
- Peach Cheesecake Dump Cake
- Crunchy Almond Topping
- Pecan Crunch Topping
- Graham Cracker Cheesecake Topping
- Gluten-Free Strawberry Cheesecake Dump Cake
- Basic Strawberry Dump Cake
- Firmer Cheesecake Layer
- Warm Strawberry Cheesecake Dump Cake
- Whipped Cream Serving
- Why This Recipe Works
- Directions
- Step 1: Preheat the Oven
- Step 2: Prepare the Baking Dish
- Step 3: Soften the Cream Cheese
- Step 4: Make the Cheesecake Mixture
- Step 5: Spread the Strawberry Filling
- Step 6: Add the Cheesecake Layer
- Step 7: Keep the Layers Rustic
- Step 8: Add the Dry Cake Mix
- Step 9: Cover the Surface Evenly
- Step 10: Slice the Cold Butter
- Step 11: Arrange the Butter Slices
- Step 12: Bake the Cake
- Step 13: Check for Doneness
- Step 14: Cool Before Serving
- Step 15: Serve Warm or Room Temperature
- Step 16: Chill for a Firmer Cheesecake Texture
- Step 17: Store Leftovers
- Step 18: Freeze if Needed
- Serving Ideas
- Storage
- Freezing
- Make-Ahead
- Helpful Notes for Best Results
- Variations
- Classic Strawberry Cheesecake Dump Cake
- Vanilla Strawberry Cheesecake Dump Cake
- White Cake Mix Strawberry Dump Cake
- Yellow Cake Mix Strawberry Dump Cake
- Cherry Cheesecake Dump Cake
- Blueberry Cheesecake Dump Cake
- Apple Cheesecake Dump Cake
- Peach Cheesecake Dump Cake
- Almond Crunch Strawberry Dump Cake
- Pecan Strawberry Cheesecake Dump Cake
- Graham Cracker Cheesecake Dump Cake
- Gluten-Free Strawberry Cheesecake Dump Cake
- Basic Strawberry Dump Cake
- Fresh Strawberry Direction
- Troubleshooting
- The Top Has Dry Cake Mix Patches
- The Center Is Gooey
- The Cheesecake Layer Looks Uneven
- The Cream Cheese Mixture Is Lumpy
- The Topping Is Too Pale
- The Edges Are Bubbling but the Top Is Not Golden
- The Cake Is Too Loose to Slice
- The Dessert Tastes Too Rich
- The Butter Did Not Melt Evenly
- The Topping Is Soft After Storage
- Frequently Asked Questions
- Can I use fresh strawberries instead of pie filling?
- What if I do not have cream cheese?
- Should I mix the cake mix with butter before adding it?
- Can I use margarine instead of butter?
- How do I know when it is done baking?
- Can I make this gluten-free?
- How long does it last in the fridge?
- Can I freeze Strawberry Cheesecake Dump Cake?
- Why This Recipe Works So Well
- Final Thoughts
- Strawberry Cheesecake Dump Cake Recipe
Why You’ll Love This Strawberry Cheesecake Dump Cake
This dessert is incredibly easy to make. You only need one mixing bowl for the cheesecake layer and one baking dish for everything else.
It uses just six ingredients. Strawberry pie filling, cream cheese, egg, sugar, cake mix, and butter create the whole dessert.
It has a dreamy flavor combination. Sweet strawberries, tangy cheesecake, and buttery cake topping work beautifully together.
It is great for parties and potlucks. A 9×13-inch dish serves a crowd and travels well.
It is flexible and forgiving. You can swap the pie filling flavor, use different cake mixes, or add texture on top.
It is comfort food at its best. Warm fruit filling, creamy cheesecake, and golden topping make every spoonful feel cozy.
Recipe Details
This recipe bakes at 350°F (175°C). Grease a 9×13-inch baking dish with butter or nonstick spray before layering the dessert.
The fruit base uses 2 cans, 15 oz each, strawberry pie filling. A filling with visible fruit chunks gives the best texture.
The cheesecake layer uses 8 oz full-fat cream cheese, softened. Full-fat cream cheese gives the creamiest texture and classic cheesecake flavor.
The cheesecake layer also includes 1 large egg at room temperature. The egg helps bind the cream cheese mixture into a custard-like layer.
The sweetener for the cream cheese mixture is ¼ cup granulated sugar. It sweetens the cheesecake layer without overpowering the strawberries.
The topping uses 1 box, 15 to 16 oz, white, yellow, or vanilla cake mix. Use the cake mix dry.
The butter amount is ½ cup cold unsalted butter, thinly sliced. Cold sliced butter is important because it melts slowly and evenly over the dry cake mix.
The cake bakes for 50 to 60 minutes. It is ready when the top is golden brown and the strawberry filling bubbles up around the sides.
After baking, let it cool for at least 20 minutes. This helps the layers set and makes serving easier.
Ingredients
For the Strawberry Base
- 2 cans strawberry pie filling, 15 oz each
For the Cheesecake Layer
- 8 oz full-fat cream cheese, softened
- 1 large egg, room temperature
- ¼ cup granulated sugar
For the Cake Topping
- 1 box white, yellow, or vanilla cake mix, 15 to 16 oz
- ½ cup cold unsalted butter, thinly sliced
Optional Toppings, Swaps, and Serving Ideas
- Vanilla ice cream
- Whipped cream
- Cherry pie filling
- Blueberry pie filling
- Apple pie filling
- Peach pie filling
- Vanilla cake mix
- White cake mix
- Yellow cake mix
- Sliced almonds
- Chopped pecans
- Crushed graham crackers
- Gluten-free cake mix
- Fresh strawberries
- Sugar
- Thickener
Ingredient Notes
Strawberry pie filling forms the sweet and juicy base. Choose a filling with visible fruit chunks if possible because it gives the dessert better texture.
Cream cheese creates the cheesecake layer. Full-fat cream cheese gives the richest flavor and creamiest consistency.
The cream cheese needs to be softened before mixing. Soft cream cheese blends more smoothly with the egg and sugar.
The egg helps the cheesecake layer bake into a soft, custard-like texture. Room-temperature egg blends more easily into the cream cheese.
Granulated sugar sweetens the cheesecake layer. The amount is small enough to keep the cream cheese tang noticeable.
White, yellow, or vanilla cake mix all work. Vanilla cake mix adds a richer depth of flavor that pairs beautifully with strawberry and cream cheese.
The cake mix should be sprinkled dry over the dessert. Do not prepare it according to the box and do not stir it into the filling.
Cold unsalted butter is essential for the topping. Thin slices melt slowly over the dry cake mix and help create a golden, crisp surface.
Do not use melted butter for this method. Sliced cold butter gives better coverage and texture.
Optional Swaps, Variations, Add-Ins, and Serving Ideas
Classic Strawberry Cheesecake Dump Cake
Make the dessert with strawberry pie filling, cream cheese, egg, sugar, cake mix, and sliced cold butter. This gives the full strawberry-cheesecake flavor with a golden topping.
Let it cool for at least 20 minutes before serving. The center may still be a little gooey, and that is part of the dessert.
Vanilla Cake Mix Strawberry Dump Cake
Use vanilla cake mix for the topping. It adds a rich flavor that pairs well with strawberry and cream cheese.
White or yellow cake mixes also work. Vanilla simply gives a little extra depth.
White Cake Mix Version
Use white cake mix for a lighter, sweeter topping. It lets the strawberry flavor stand out clearly.
This version is simple and classic. The topping bakes golden with the butter slices.
Yellow Cake Mix Version
Use yellow cake mix for a slightly richer topping. The flavor is warm and familiar.
This is a great option when you want a more classic dump cake feel. The buttery top tastes especially cozy.
Cherry Cheesecake Dump Cake
Swap strawberry pie filling for cherry pie filling. The cheesecake layer stays the same.
This creates a bright, sweet-tart dessert. Serve warm or chilled.
Blueberry Cheesecake Dump Cake
Use blueberry pie filling instead of strawberry. The creamy cheesecake layer works beautifully with blueberries.
This version is rich and fruity. Vanilla cake mix is especially nice here.
Apple Cheesecake Dump Cake
Use apple pie filling. The dessert becomes warmer and more fall-inspired.
White, yellow, or vanilla cake mix can all work. Serve warm for the best cozy texture.
Peach Cheesecake Dump Cake
Use peach pie filling for a softer fruit flavor. The cheesecake layer adds creaminess.
This variation is lovely for warm-weather gatherings. Serve with whipped cream if desired.
Crunchy Almond Topping
Sprinkle sliced almonds over the dry cake mix before baking. They add texture to the golden top.
Use a light amount so the butter can still reach the cake mix. The almonds toast as the dessert bakes.
Pecan Crunch Topping
Add chopped pecans before baking. They bring a nutty crunch.
This version tastes rich and buttery. It is especially good with vanilla or yellow cake mix.
Graham Cracker Cheesecake Topping
Sprinkle crushed graham crackers on top before baking. This adds a cheesecake-crust style flavor.
Use enough for texture but not so much that it blocks the butter from melting into the cake mix. The topping should still bake evenly.
Gluten-Free Strawberry Cheesecake Dump Cake
Use a gluten-free cake mix and double-check that the pie filling is gluten-free. The layering method stays the same.
The texture may vary depending on the cake mix. Bake until golden and bubbling.
Basic Strawberry Dump Cake
Skip the cream cheese layer if needed. The dessert will become a basic strawberry dump cake.
It will still be sweet and delicious. It just will not have the creamy cheesecake layer.
Firmer Cheesecake Layer
Chill the cake for 1 to 2 hours after baking and cooling. This helps the cream cheese layer firm up more like classic cheesecake.
Serve chilled or let it sit briefly before serving. The texture will be less gooey.
Warm Strawberry Cheesecake Dump Cake
Serve the cake warm after the 20-minute cooling period. The filling will be soft and spoonable.
Add vanilla ice cream for extra indulgence. The cold ice cream melts into the warm strawberry layer.
Whipped Cream Serving
Top each serving with whipped cream. It makes the dessert feel lighter and creamier.
Add it right before serving. This keeps the topping fresh.
Why This Recipe Works
This recipe works because the layers bake together without needing much mixing. The strawberry filling bubbles from below, the cheesecake layer softens and sets, and the butter melts into the dry cake mix on top.
The fruit filling creates the juicy base. It keeps the dessert moist and adds sweetness.
The cream cheese mixture adds tang and richness. Egg helps it bake into a creamy layer instead of remaining loose.
The dry cake mix becomes the topping. It absorbs butter and moisture during baking.
Cold butter slices are important because they melt slowly and spread across the dry mix. This creates a golden, crisp top.
The 9×13-inch dish gives the layers enough room to bake evenly. It also makes the dessert easy to serve for gatherings.
Cooling for at least 20 minutes matters. The filling is very hot, and the layers need time to settle.
The recipe is forgiving because dump cakes are meant to be rustic. A slightly gooey middle is not a flaw; it is part of the charm.
Directions
Step 1: Preheat the Oven
Preheat the oven to 350°F (175°C). Let it fully heat before placing the cake in the oven.
A steady oven temperature helps the topping brown evenly. It also helps the filling bubble properly.
Step 2: Prepare the Baking Dish
Grease a 9×13-inch baking dish with butter or nonstick spray. Coat the bottom and sides.
This helps prevent the fruit filling from sticking. It also makes serving easier later.
Step 3: Soften the Cream Cheese
Make sure the 8 oz full-fat cream cheese is softened before mixing. It should be easy to beat.
Soft cream cheese creates a smoother cheesecake layer. Cold cream cheese can leave lumps.
Step 4: Make the Cheesecake Mixture
In a mixing bowl, beat the softened cream cheese, 1 large room-temperature egg, and ¼ cup granulated sugar. Mix until smooth and creamy.
The mixture should look silky. This layer will bake into a tangy, velvety swirl.
Step 5: Spread the Strawberry Filling
Open both 15 oz cans of strawberry pie filling. Spread the filling evenly across the bottom of the greased baking dish.
Try to cover the whole bottom of the dish. This creates a juicy base for the dessert.
Step 6: Add the Cheesecake Layer
Drop spoonfuls of the cream cheese mixture over the strawberry filling. Space the spoonfuls across the dish.
Gently spread the cream cheese with a spatula. It does not need to look perfect.
Step 7: Keep the Layers Rustic
Do not worry if some strawberry filling shows through the cheesecake layer. Imperfect patches bake beautifully.
The finished dessert should have soft cheesecake pockets throughout. A rustic surface is part of its charm.
Step 8: Add the Dry Cake Mix
Sprinkle the dry cake mix evenly over the strawberry and cream cheese layers. Use the whole box.
Do not stir. The layers need to stay in place so the topping can form as it bakes.
Step 9: Cover the Surface Evenly
Use your hand or a spoon to gently spread the dry cake mix into an even layer if needed. Do not press it down firmly.
An even layer helps the butter melt across the surface. This creates better browning.
Step 10: Slice the Cold Butter
Thinly slice ½ cup cold unsalted butter. Keep the slices cold.
Cold butter melts slowly in the oven. This is what helps the cake mix become golden and crisp.
Step 11: Arrange the Butter Slices
Lay the butter slices across the top of the dry cake mix. Try to cover as much of the surface as possible.
The more evenly the butter is distributed, the more even the topping will bake. Small gaps are fine.
Step 12: Bake the Cake
Place the dish in the oven and bake for 50 to 60 minutes. The topping should become golden brown.
The strawberry filling should bubble up around the sides. That bubbling is a sign the layers are hot and baked through.
Step 13: Check for Doneness
Look for a golden top and bubbling edges. A little jiggle in the center is fine.
The middle can remain slightly gooey. That is normal for this kind of cake.
Step 14: Cool Before Serving
Remove the dish from the oven and let it cool for at least 20 minutes. The filling will be very hot.
Cooling helps the layers set. It also makes the dessert easier to slice or spoon.
Step 15: Serve Warm or Room Temperature
Serve the cake warm for a gooey texture. You can also serve it at room temperature after it cools.
Add vanilla ice cream or whipped cream if desired. Both pair beautifully with strawberry and cream cheese.
Step 16: Chill for a Firmer Cheesecake Texture
For a firmer cheesecake layer, chill the cake for 1 to 2 hours after baking and cooling. This helps the cream cheese set more firmly.
Serve chilled or let slices sit out briefly before eating. The texture will be closer to cheesecake.
Step 17: Store Leftovers
Cover leftovers with foil or transfer them to an airtight container. Refrigerate for up to 4 days.
Reheat individual portions in the microwave for 20 to 30 seconds. This brings back the warm, gooey texture.
Step 18: Freeze if Needed
Freeze cooled slices in airtight containers for up to 1 month. Thaw overnight in the refrigerator.
Warm before serving if desired. This helps revive the fresh-baked feel.
Serving Ideas
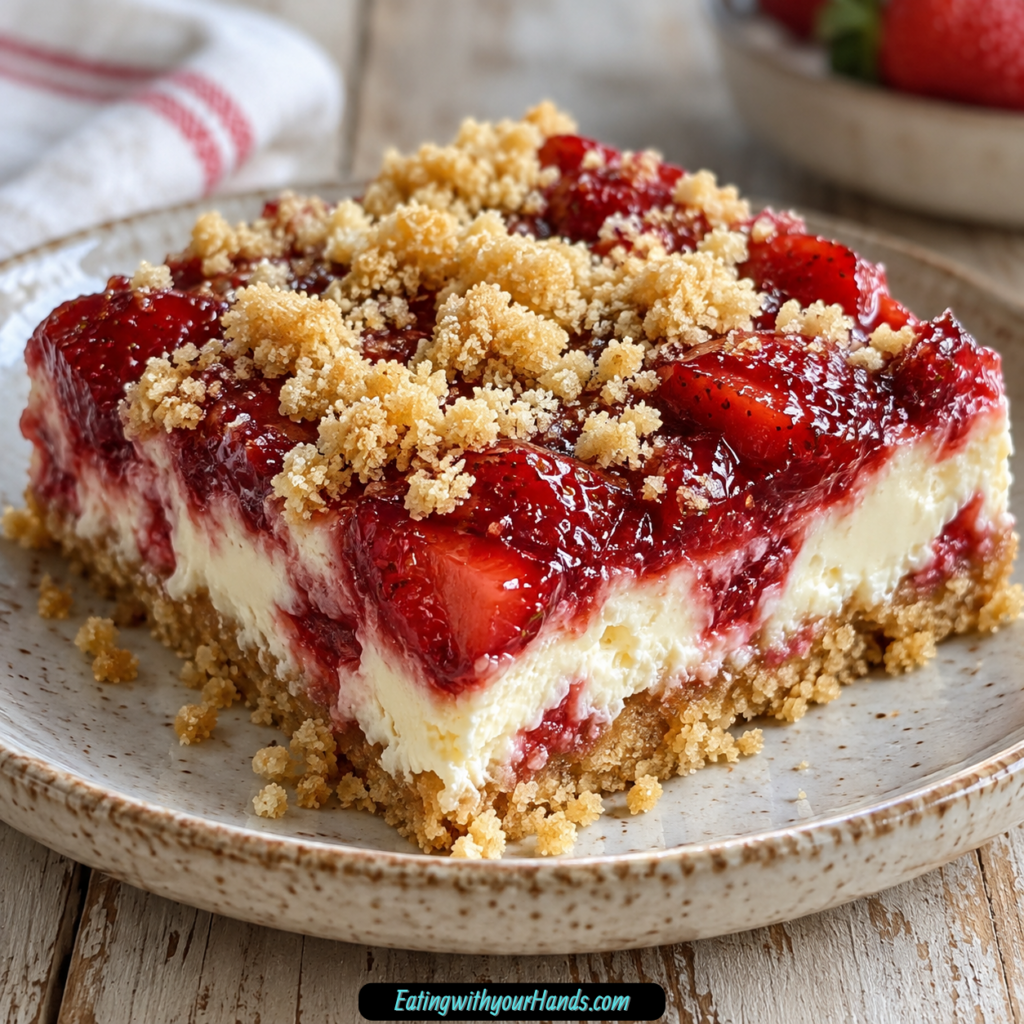
Serve Strawberry Cheesecake Dump Cake warm after it cools for at least 20 minutes. The strawberry filling will be gooey, and the topping will still taste freshly baked.
Add a scoop of vanilla ice cream for a classic warm-and-cold dessert. The ice cream melts into the strawberry and cheesecake layers.
A swirl of whipped cream also works beautifully. It makes each serving feel lighter and more finished.
Serve at room temperature for potlucks or family gatherings. It travels well and does not need fancy plating.
Serve chilled if you want a firmer cheesecake texture. The cream cheese layer sets more after time in the refrigerator.
Spoon it into bowls for a cozy dessert. The middle may be gooey, so bowls are often easier than plates.
For a cleaner slice, chill the cake first. The layers hold together better after resting and chilling.
Serve with coffee after a meal. The sweet strawberry and creamy cheesecake flavor make a lovely dessert pairing.
Storage
Store leftovers covered in the refrigerator. You can cover the baking dish with foil or transfer slices to an airtight container.
The cake keeps for up to 4 days. The topping may soften slightly over time, but the flavor stays delicious.
Reheat individual portions in the microwave for 20 to 30 seconds. This brings back the warm, gooey texture.
If you prefer a firmer cheesecake layer, eat it chilled. The texture changes in a pleasant way after refrigeration.
Do not leave the dessert uncovered in the refrigerator. It can dry out or absorb odors.
If storing in layers, use parchment if needed. This helps keep portions from sticking.
The dessert can be served straight from the fridge or gently warmed. Both textures are enjoyable.
Freezing
Strawberry Cheesecake Dump Cake can be frozen after baking and cooling. Freeze slices in airtight containers.
Keep frozen slices for up to 1 month. This is helpful for saving leftovers.
Thaw overnight in the refrigerator. Slow thawing protects the texture better.
Warm before serving if you want the gooey fresh-baked feel. Use the microwave for individual portions.
The topping may be softer after freezing. That is normal with dump cakes.
Freeze only after the cake has fully cooled. Warm cake creates condensation in the container.
Label the container if desired. This makes it easier to remember the dessert and date.
Make-Ahead
This dessert can be baked earlier in the day. Let it cool, then reheat individual portions later.
It is a great make-ahead choice for parties and holidays. The flavors hold well after resting.
If making ahead for a firmer cheesecake layer, chill for 1 to 2 hours after baking and cooling. This helps the cream cheese set.
Store covered in the refrigerator until serving. Warm portions if desired.
You can prepare toppings like sliced almonds, chopped pecans, or crushed graham crackers before assembly. Add them before baking.
If serving with whipped cream or ice cream, add those at the table. This keeps them fresh.
For potlucks, bake and transport in the same 9×13-inch dish. Cover well once cooled.
Helpful Notes for Best Results
Use cold butter, not melted butter. Thin cold slices melt slowly and help create a crisp golden top.
Do not stir the cake mix into the filling. The dry mix needs to sit on top.
Try to cover as much of the cake mix as possible with butter slices. This helps avoid dry patches.
Use full-fat cream cheese for the best cheesecake texture. Softened cream cheese mixes more smoothly.
The center may be a little gooey. That is normal and part of the dessert.
Cool for at least 20 minutes before serving. The layers set as the cake rests.
Use vanilla cake mix for extra flavor. White or yellow cake mix also works well.
For a firmer cheesecake layer, chill the cake for 1 to 2 hours after baking. This gives it a more classic cheesecake feel.
Variations
Classic Strawberry Cheesecake Dump Cake
Use strawberry pie filling, full-fat cream cheese, egg, sugar, white, yellow, or vanilla cake mix, and cold sliced butter. This gives the original creamy strawberry version.
Bake until golden and bubbling. Cool before serving.
Vanilla Strawberry Cheesecake Dump Cake
Use vanilla cake mix. It adds extra flavor depth.
This version pairs especially well with strawberry and cream cheese. The topping tastes richer.
White Cake Mix Strawberry Dump Cake
Use white cake mix for a lighter flavor. The strawberry filling stays the star.
This version looks bright and classic. Serve warm or chilled.
Yellow Cake Mix Strawberry Dump Cake
Use yellow cake mix for a buttery, familiar flavor. It makes the topping taste cozy.
This is a great everyday version. The golden top looks beautiful.
Cherry Cheesecake Dump Cake
Swap the strawberry pie filling for cherry pie filling. The cheesecake layer stays the same.
This version is sweet, tangy, and colorful. It is great for holidays.
Blueberry Cheesecake Dump Cake
Use blueberry pie filling instead of strawberry. The cream cheese layer pairs nicely with blueberry.
Serve warm with whipped cream. The topping stays buttery and crisp.
Apple Cheesecake Dump Cake
Use apple pie filling. The dessert becomes cozy and fruit-forward.
Yellow or vanilla cake mix works well here. Serve warm.
Peach Cheesecake Dump Cake
Use peach pie filling for a softer, sunny flavor. The cheesecake layer adds creamy contrast.
This version is lovely for gatherings. Add whipped cream if desired.
Almond Crunch Strawberry Dump Cake
Sprinkle sliced almonds on top before baking. They add crunch and a toasted flavor.
Do not cover the top too heavily. Butter still needs to reach the cake mix.
Pecan Strawberry Cheesecake Dump Cake
Add chopped pecans to the topping before baking. They bring nutty crunch.
This makes the dessert taste richer. It works especially well with yellow cake mix.
Graham Cracker Cheesecake Dump Cake
Sprinkle crushed graham crackers over the top before baking. This adds a cheesecake-crust flavor.
Use a light layer. The cake mix still needs to bake properly.
Gluten-Free Strawberry Cheesecake Dump Cake
Use gluten-free cake mix. Double-check that the strawberry pie filling is gluten-free.
Bake as directed. Texture may vary depending on the cake mix.
Basic Strawberry Dump Cake
Skip the cream cheese mixture. Layer strawberry filling, dry cake mix, and butter.
The dessert will not have the cheesecake layer, but it will still be delicious. It is a simpler variation.
Fresh Strawberry Direction
Fresh strawberries need to be cooked down with sugar and thickener to mimic pie filling. This takes extra effort.
Canned filling is easier for this recipe. It gives the right texture with less work.
Troubleshooting
The Top Has Dry Cake Mix Patches
The butter may not have covered the surface evenly. Next time, slice the butter thinly and spread the pieces across as much of the top as possible.
Small dry spots can happen in dump cakes. Serve with whipped cream or ice cream if desired.
The Center Is Gooey
A little gooeyness is normal. That is part of the dump cake texture.
If the edges are bubbling and the top is golden, the dessert is ready. It will set more as it cools.
The Cheesecake Layer Looks Uneven
That is fine. Spoonfuls and swirls bake beautifully.
The layer does not need to be perfect. Rustic pockets of cheesecake are part of the dessert.
The Cream Cheese Mixture Is Lumpy
The cream cheese may not have been soft enough. Use softened cream cheese and beat until smooth.
Room-temperature egg also blends more easily. Cold ingredients can make the mixture less smooth.
The Topping Is Too Pale
Bake a little longer until golden. The total bake time is 50 to 60 minutes.
Make sure the butter slices are spread across the top. Butter helps browning.
The Edges Are Bubbling but the Top Is Not Golden
The topping may need more time. Continue baking and watch closely.
You can also check whether dry areas lack butter. Butter coverage affects browning.
The Cake Is Too Loose to Slice
Let it cool at least 20 minutes. For cleaner slices, chill it for 1 to 2 hours.
This helps the cheesecake layer firm. It also makes serving neater.
The Dessert Tastes Too Rich
Serve smaller portions. Add whipped cream or serve at room temperature instead of very warm.
You can also choose white cake mix for a lighter flavor. The recipe is naturally indulgent.
The Butter Did Not Melt Evenly
The slices may have been too thick or uneven. Thin slices melt more evenly.
Try to cover the top as much as possible next time. This creates a better crust.
The Topping Is Soft After Storage
That is normal after refrigeration. Reheat portions gently if you want a warmer texture.
The topping will not be as crisp as fresh-baked after storing, but it will still taste good. Serve with ice cream if desired.
Frequently Asked Questions
Can I use fresh strawberries instead of pie filling?
Fresh strawberries need to be cooked down with sugar and thickener to mimic the texture of pie filling. It can be done, but canned filling is much easier for this recipe.
The canned filling gives the right sweetness and thickness. It also keeps the recipe simple.
What if I do not have cream cheese?
You can skip the cream cheese layer and make a basic strawberry dump cake. It will still be delicious.
The dessert just will not have the creamy cheesecake flavor. The strawberry filling and buttery topping still work well.
Should I mix the cake mix with butter before adding it?
No, do not mix the cake mix with butter first. Sprinkle the dry cake mix over the filling, then arrange cold butter slices on top.
The butter melts in the oven and creates the crisp topping. No mixing is needed.
Can I use margarine instead of butter?
Real butter gives the best flavor and texture. Margarine may not brown or crisp the same way.
Cold unsalted butter is the preferred choice. Thin slices work best.
How do I know when it is done baking?
The edges should be bubbling, and the top should be golden brown. A little jiggle in the center is fine.
The dessert sets more as it cools. Let it rest for at least 20 minutes.
Can I make this gluten-free?
Yes, use a gluten-free cake mix and double-check that the pie filling is gluten-free. The method stays the same.
The texture may vary depending on the mix. Bake until golden and bubbling.
How long does it last in the fridge?
Store leftovers covered or in an airtight container in the refrigerator for up to 4 days. Reheat individual portions in the microwave for 20 to 30 seconds.
You can also enjoy it chilled. Chilling makes the cheesecake layer firmer.
Can I freeze Strawberry Cheesecake Dump Cake?
Yes, freeze cooled slices in airtight containers for up to 1 month. Thaw overnight in the refrigerator.
Warm before serving if desired. This brings back the gooey texture.
Why This Recipe Works So Well
Strawberry Cheesecake Dump Cake works because it uses simple layers that transform in the oven. The fruit filling bubbles, the cream cheese mixture sets, and the cake mix turns golden under slowly melting butter.
The strawberry pie filling gives the dessert body and sweetness. It also creates the juicy base that makes dump cake so comforting.
The cream cheese mixture adds tang and creaminess. Egg helps it bake into a soft cheesecake-like layer.
The dry cake mix becomes the topping instead of a traditional batter. It absorbs butter and moisture as it bakes.
Cold sliced butter is the key to the golden top. It melts gradually and helps create crisp, buttery patches across the surface.
The 50 to 60 minute bake time gives the layers enough time to heat through and bubble. The golden top and bubbling edges show that the dessert is ready.
Cooling helps the cake set. Without that rest, the layers can be too loose to serve neatly.
The recipe also works because it is easy to adapt. Different pie fillings, cake mixes, and crunchy toppings all fit the same basic method.
Most of all, this cake works because it turns a handful of everyday ingredients into something warm, creamy, fruity, and memorable. It tastes like a dessert that took more effort than it did, which is exactly why it belongs at gatherings.
Final Thoughts
Strawberry Cheesecake Dump Cake is made with strawberry pie filling, a smooth cream cheese layer, dry cake mix, and cold sliced butter baked into a golden topping. The dessert comes together in a 9×13-inch dish, bakes until bubbly and brown, then rests until the layers settle into a warm, gooey, creamy cake.
Serve it warm with vanilla ice cream, add whipped cream, chill it for a firmer cheesecake texture, or try variations with cherry, blueberry, apple, or peach pie filling. With its six-ingredient simplicity, no-fuss layering method, 4-day refrigerator storage, freezer-friendly slices, and sweet strawberry cheesecake flavor, this dump cake is the kind of dessert that keeps earning a place at the table.
Strawberry Cheesecake Dump Cake Recipe
Sweet, creamy, fruity, and incredibly easy to assemble, this Strawberry Cheesecake Dump Cake layers strawberry pie filling with a soft cheesecake mixture and a buttery cake mix topping. It bakes until golden and bubbly, then rests just long enough for neater slices that can be served warm or at room temperature.
Recipe Details
- Prep Time: 15 minutes
- Cook Time: 1 hour
- Total Time: 1 hour 15 minutes
- Servings: 9 servings
- Calories: 350 kcal
Ingredients
For the Strawberry Cheesecake Dump Cake
- ½ cup cold unsalted butter thinly sliced
- 1 box 15-16 oz white, yellow, or vanilla cake mix
- ¼ cup granulated sugar
- 1 large egg room temperature
- 8 oz full-fat cream cheese softened to room temperature
- 2 cans 15 oz each strawberry pie filling
Instructions
Step 1: Preheat the Oven
Preheat the oven to 350°F (175°C). Let it heat fully while you prepare the strawberry and cheesecake layers.
Starting with a hot oven helps the topping bake evenly. Keep the baking dish ready before you begin layering the dessert.
Step 2: Make the Cheesecake Mixture
In a bowl, beat the softened full-fat cream cheese, room-temperature egg, and granulated sugar until creamy. The mixture should look smooth and easy to dollop.
Using cream cheese softened to room temperature helps the filling blend more evenly. Mix until no large lumps remain.
Step 3: Add the Strawberry Layer
Spread the strawberry pie filling evenly in a greased 9×13-inch baking dish. Use both 15 oz cans so the bottom of the dish is covered with fruit filling.
Smooth the strawberries into an even layer. This becomes the sweet, bubbly fruit base of the dump cake.
Step 4: Add the Cheesecake Layer
Dollop the cream cheese mixture over the strawberry pie filling. Gently spread it over the strawberries without fully mixing the layers together.
The cheesecake mixture should sit over the fruit in soft patches. This creates creamy pockets throughout the dessert after baking.
Step 5: Add the Cake Mix
Evenly sprinkle the dry cake mix over the top. Use white, yellow, or vanilla cake mix as listed.
Do not prepare the cake mix as batter. It should be added dry so it can bake into a golden topping with the butter.
Step 6: Top with Butter
Distribute the cold unsalted butter slices over the cake mix. Cover the surface as evenly as possible.
Cold butter helps create a crisper, golden topping as it melts in the oven. Thin slices make it easier to spread the butter across the dry cake mix.
Step 7: Bake Until Golden and Bubbly
Bake for 50-60 minutes, until the top is golden and the filling is bubbly. Watch the topping near the end so it reaches a golden finish without overbaking.
The strawberry filling should bubble around the edges, and the cake mix topping should look baked through. Remove the baking dish from the oven once the top is ready.
Step 8: Rest Before Serving
Let the cake cool at least 20 minutes before serving. This resting time helps the layers set for cleaner slices.
Serve warm or at room temperature. Add a scoop of vanilla ice cream if desired.
Notes
- Use cold butter for a crisper, golden topping.
- Letting the cake rest helps the layers set for cleaner slices.
- You can swap strawberry pie filling for cherry or blueberry for variation.
- Best served warm or at room temperature – with a scoop of vanilla ice cream if desired!
Serving Suggestions
Serve Strawberry Cheesecake Dump Cake warm or at room temperature after it has rested for at least 20 minutes. The strawberry pie filling, creamy cheesecake layer, and buttery golden cake topping make each serving rich, fruity, and soft.
A scoop of vanilla ice cream can be added if desired, as noted. The ice cream pairs especially well when the cake is served warm and the strawberry filling is still slightly bubbly.
For cleaner slices, do not skip the resting time. Letting the cake sit helps the layers settle so the dessert is easier to portion into 9 servings.
Storage
How to Store
The recipe does not provide specific storage instructions or storage duration, so no exact storage time is added here.
Butter Tip
Use cold unsalted butter, thinly sliced. Cold butter helps the topping bake into a crisper, golden finish.
Cake Mix Tip
Use 1 box 15-16 oz white, yellow, or vanilla cake mix. Sprinkle it dry over the cheesecake and strawberry layers.
Cheesecake Tip
Use full-fat cream cheese softened to room temperature. Beat it with the egg and sugar until creamy before adding it to the cake.
Fruit Variation
You can swap the strawberry pie filling for cherry or blueberry. Keep the rest of the layering method the same.
Resting Tip
Let the cake rest at least 20 minutes before serving. This helps the layers set and makes the slices neater.

Fernando is the creator and writer behind the food blog Eating with your Hands. Living and working in cities like Paris, Barcelona, and Berlin, and being married to a Canadian foodie, has given Fernando a passion and interest in food and inspired him to run EWYH.