
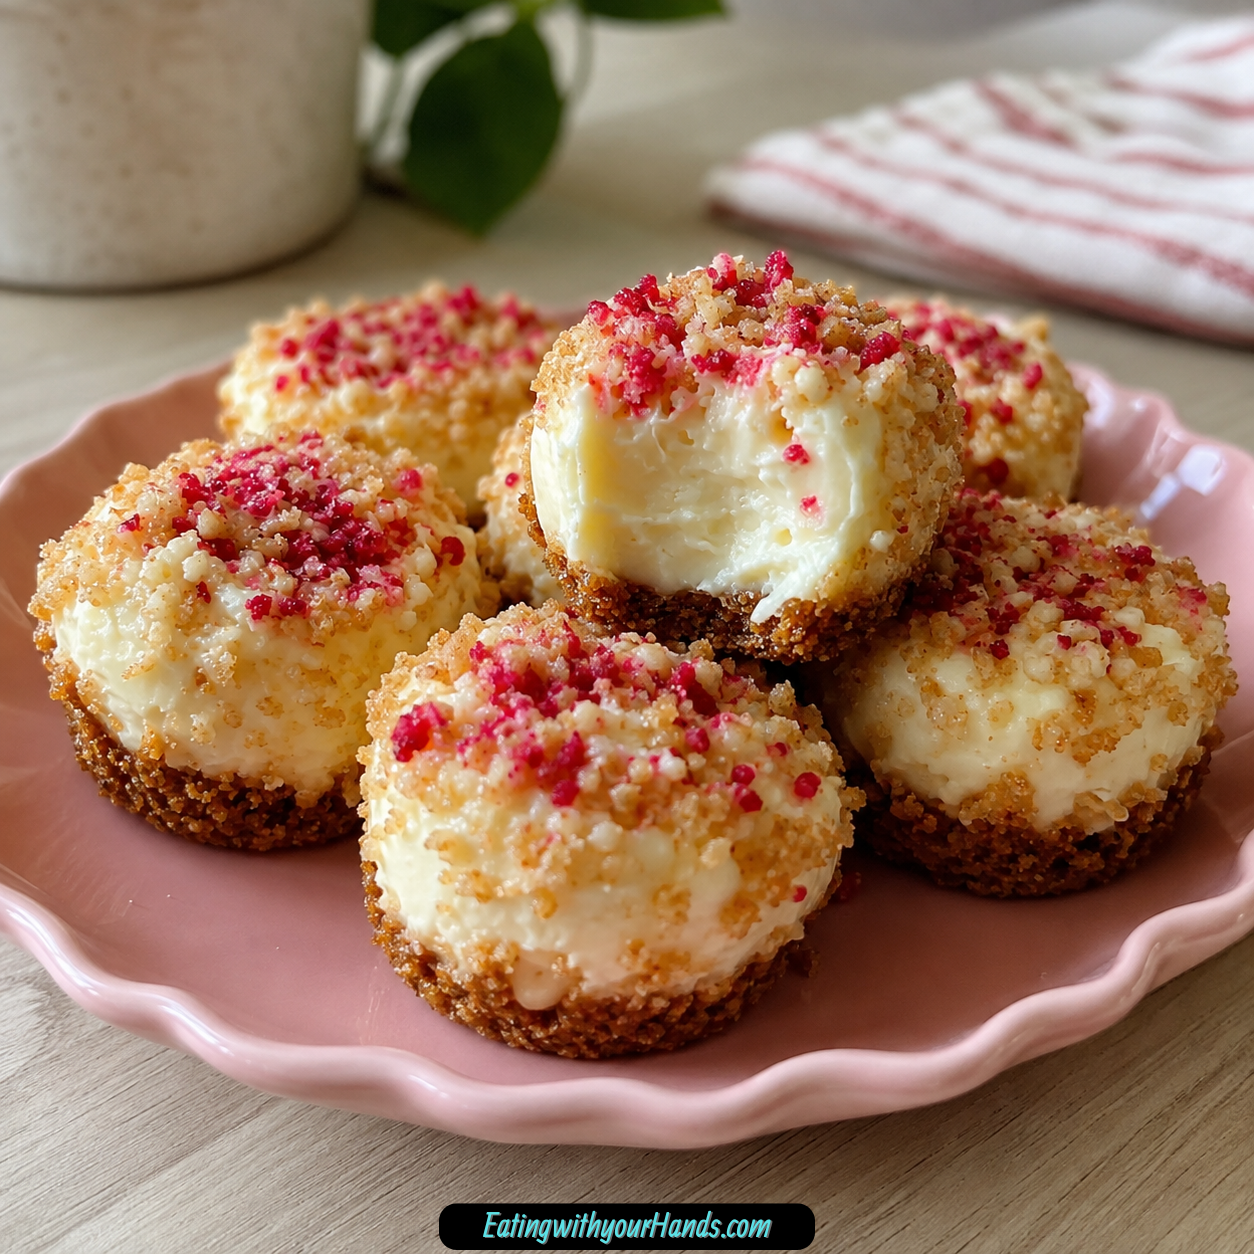
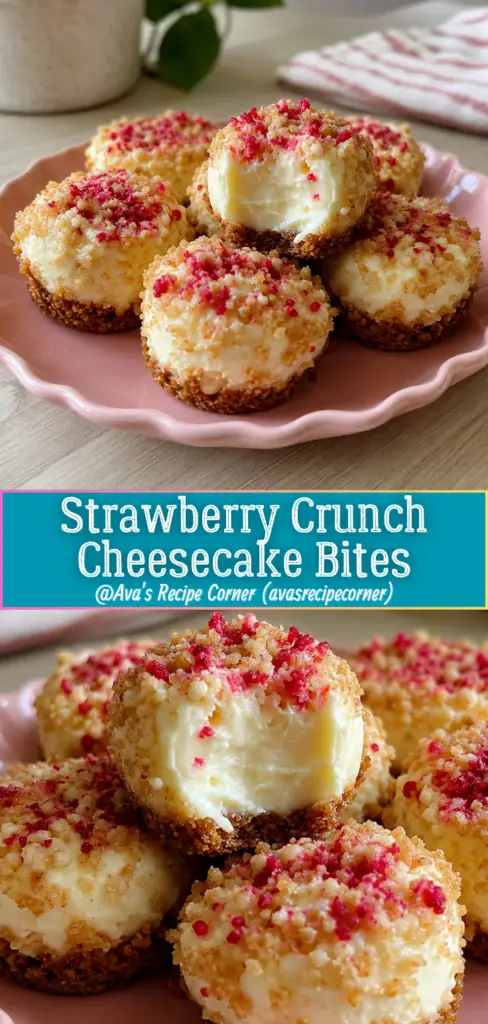
Strawberry Crunch Cheesecake Bites are the kind of little dessert that looks sweet and delicate on a platter but tastes full, creamy, and satisfying in every bite. They bring together a buttery graham cracker crust, a fluffy cheesecake filling, fresh chopped strawberries, and a surprising little crunch from crispy rice cereal.
I love no-bake desserts that feel pretty enough for a party but do not make the kitchen feel complicated. These bites have that soft, creamy cheesecake charm, yet they are portioned into small pieces that are easy to serve, easy to share, and almost too easy to keep reaching for.
The flavor reminds me of warm-weather gatherings, strawberry treats, and the kind of chilled dessert people love after a meal. The cream cheese gives that familiar tang, the powdered sugar makes the filling smooth and sweet, the whipped cream lightens everything, and the strawberries bring a fresh burst that keeps the bites from feeling heavy.
What makes them especially fun is the texture. The crust is compact and buttery, the filling is velvety, the strawberries are juicy, and the crispy rice cereal gives every bite a playful crunch.
These Strawberry Crunch Cheesecake Bites are perfect for spring and summer gatherings, baby showers, birthdays, dessert platters, or a light after-dinner treat. They look elegant, but the method is simple enough for a relaxed afternoon.
Table of Contents
- Why You’ll Love This Recipe
- Recipe Details
- Ingredients
- Optional Swaps, Variations, Add-Ins, and Serving Ideas
- Why These Strawberry Crunch Cheesecake Bites Work
- Directions
- Step 1: Prepare the Mini Cups or Molds
- Step 2: Mix the Graham Cracker Crust
- Step 3: Portion the Crust Into the Cups
- Step 4: Press the Crust Firmly
- Step 5: Chill the Crusts
- Step 6: Beat the Cream Cheese
- Step 7: Add Powdered Sugar and Vanilla
- Step 8: Whip the Heavy Cream
- Step 9: Fold the Whipped Cream Into the Cream Cheese
- Step 10: Add the Chopped Strawberries
- Step 11: Add the Crispy Rice Cereal
- Step 12: Fill the Chilled Crusts
- Step 13: Smooth the Tops
- Step 14: Chill for at Least 3 Hours
- Step 15: Carefully Unmold the Bites
- Step 16: Garnish if Desired
- Step 17: Serve Chilled
- Serving Ideas
- Storage
- Reheating
- Freezing
- Make-Ahead
- Helpful Notes for Best Results
- Variations
- Troubleshooting
- Frequently Asked Questions
- Why This Recipe Works So Well
- Final Thoughts
- Strawberry Crunch Cheesecake Bites
Why You’ll Love This Recipe
These cheesecake bites are completely no-bake. You do not need to turn on the oven, which makes them perfect for warm days or busy entertaining.
They are mini and elegant. The small portion size makes them easy to plate, serve, and enjoy without slicing a full cheesecake.
The texture is fresh, creamy, and light. Whipped cream, cream cheese, powdered sugar, vanilla, and strawberries create a smooth filling with fruity brightness.
The crunch factor makes them special. Crispy rice cereal adds an unexpected texture that keeps each bite interesting.
They are make-ahead friendly. Since the bites need to chill for at least 3 hours, you can prepare them ahead and keep them cold until serving.
They are also customizable. You can swap the fruit, change the crunch element, use a different crust direction, or add pretty finishing touches for different occasions.
Recipe Details
This is a no-bake cheesecake bite recipe. The crust is chilled rather than baked, and the filling sets in the refrigerator.
The crust is made with 1 cup graham cracker crumbs, 2 tablespoons sugar, and 4 tablespoons melted unsalted butter. The mixture should resemble wet sand before being pressed into the cups or molds.
About 1 tablespoon of crust mixture goes into each mini muffin cup or silicone mold. It should be pressed firmly with fingers or the bottom of a small glass to make a compact base.
The cheesecake filling is made with 8 oz softened cream cheese, ⅓ cup powdered sugar, ½ teaspoon vanilla extract, and ½ cup heavy whipping cream. The heavy cream is whipped separately until stiff peaks form, then folded into the cream cheese mixture.
The mix-ins are 1 cup fresh chopped strawberries and ¼ cup crispy rice cereal. They are folded gently into the cheesecake filling just until evenly distributed.
The filled molds chill for at least 3 hours. The bites are ready when they are fully set and firm to the touch.
The finished cheesecake bites should be served chilled. They can be stored in an airtight container in the refrigerator for up to 3 days, but freezing is not recommended.
Ingredients
Graham Cracker Crust
1 cup graham cracker crumbs
2 tablespoons sugar
4 tablespoons unsalted butter, melted
Cheesecake Filling
8 oz cream cheese, softened
⅓ cup powdered sugar
½ teaspoon vanilla extract
½ cup heavy whipping cream
Strawberry Crunch Mix-Ins
1 cup fresh strawberries, chopped
¼ cup crispy rice cereal
Ingredient Notes
Graham cracker crumbs create the buttery crust base. You can use store-bought crumbs or crush your own graham crackers.
Sugar adds a little sweetness to the crust. It helps the base taste more like a dessert crust instead of plain crumbs.
Melted unsalted butter holds the crust together and adds rich flavor. It should be mixed into the crumbs until the texture looks like wet sand.
Softened cream cheese creates the creamy cheesecake body. Full-fat cream cheese gives the creamiest result.
Powdered sugar sweetens and smooths the filling. It blends more easily than granulated sugar and helps keep the filling velvety.
Vanilla extract adds a warm, aromatic note. It supports the cream cheese and strawberry flavors without overpowering them.
Heavy whipping cream lightens the filling after it is whipped. Stiff peaks help the filling hold its shape.
Fresh strawberries add juicy bursts of flavor. Fresh berries work best because frozen strawberries can release too much moisture and affect the texture.
Crispy rice cereal gives the bites their signature crunch. It adds a fun contrast to the creamy filling and soft fruit.
Optional Swaps, Variations, Add-Ins, and Serving Ideas
Fruit Swaps
Fresh strawberries are the main fruit in this recipe. If strawberries are not in season, try raspberries, blueberries, or diced mango.
Each fruit gives the bites a slightly different personality. Raspberries make them tart, blueberries keep them sweet and simple, and mango gives them a tropical feel.
Crunch Alternatives
Crispy rice cereal gives the filling its playful crunch. You can also use crushed freeze-dried fruit or crushed cookies in place of the cereal.
Crushed freeze-dried fruit adds color and concentrated fruit flavor. Crushed cookies make the bites taste more dessert-like and rich.
Fancy Finishes
For a pretty finish, drizzle the chilled bites with white chocolate. You can also add a drizzle of chocolate before serving.
A swirl of strawberry jam can make the bites look more decorative. These small touches are optional but make them feel party-ready.
Topping Ideas
Top each bite with a small dollop of whipped cream. A strawberry slice on top also makes them look fresh and inviting.
Fresh strawberries can be used as a garnish on the serving platter. They make the dessert feel bright and finished.
Mold Options
Mini muffin cups or silicone molds work well. Silicone molds are especially helpful for easy release.
If you do not have a mini muffin pan or silicone mold, use cupcake liners in a regular muffin pan. Small ramekins can also work if portion size is not a concern.
Clean Release Tip
Silicone molds work best for clean unmolding. If using a metal pan, line with strips of parchment for easy lifting.
This helps protect the edges when removing the bites. Clean edges make the finished dessert look neater on a platter.
Why These Strawberry Crunch Cheesecake Bites Work
These bites work because every layer has a clear role. The graham cracker crust gives a buttery base, the cheesecake filling adds creamy tang, the strawberries bring freshness, and the cereal gives a light crunch.
The crust does not need baking because the melted butter helps the crumbs hold together. Chilling the crust while the filling is prepared gives it time to firm.
The cream cheese must be softened so it beats smoothly with the powdered sugar and vanilla. This prevents lumps and creates a velvety filling.
Whipping the heavy cream separately is important. It adds air and lightness, which keeps the filling from feeling too dense.
Folding is the gentle step that keeps the texture airy. The whipped cream, strawberries, and cereal should be folded in carefully so the filling stays light.
The 3-hour chill gives the bites structure. Without enough chilling time, they may taste good but will be too soft to unmold neatly.
Directions
Step 1: Prepare the Mini Cups or Molds
Set out your mini muffin cups or silicone molds before mixing the crust. Having the molds ready makes the assembly process smoother.
Silicone molds are especially useful because they release the cheesecake bites more easily. Mini muffin cups also work well for small, neat portions.
If you are using a metal pan, parchment strips can help with lifting later. This is a helpful step if you want clean edges when unmolding.
Step 2: Mix the Graham Cracker Crust
In a medium mixing bowl, stir together 1 cup graham cracker crumbs, 2 tablespoons sugar, and 4 tablespoons melted unsalted butter. Mix until the crumbs are evenly moistened.
The mixture should resemble wet sand. It should hold together slightly when pressed, but it should not look greasy or overly wet.
Take time to stir from the bottom of the bowl. Dry crumbs can hide underneath if the butter is not mixed in evenly.
Step 3: Portion the Crust Into the Cups
Spoon about 1 tablespoon of the graham cracker mixture into each mini muffin cup or silicone mold. Try to divide the crust evenly.
Even crust portions make the finished bites look more consistent. They also help each bite have the right balance of crust and filling.
Do not overfill the bottom with crumbs. The crust should be compact but not so thick that it overpowers the cheesecake layer.
Step 4: Press the Crust Firmly
Press the crust firmly into each cup using your fingers or the bottom of a small glass. The crust should become compact and level.
A firm press helps the crust hold together after chilling. Loose crumbs can fall apart when the bites are unmolded.
Keep the crust mostly flat. A smooth base makes it easier to add the cheesecake filling later.
Step 5: Chill the Crusts
Place the filled cups or molds in the refrigerator while you prepare the cheesecake filling. This helps the crusts firm up.
The butter in the crust sets as it chills. That gives the base a sturdier texture without baking.
Do not skip this short chilling step. It makes the bites easier to fill and easier to remove later.
Step 6: Beat the Cream Cheese
In a separate large bowl, beat 8 oz softened cream cheese until smooth. The cream cheese should be soft enough to mix easily.
Softened cream cheese is important for a creamy filling. If it is too cold, it can leave lumps.
Scrape the sides of the bowl as needed. This helps make sure the filling is smooth from edge to center.
Step 7: Add Powdered Sugar and Vanilla
Add ⅓ cup powdered sugar and ½ teaspoon vanilla extract to the cream cheese. Beat until completely smooth.
The powdered sugar sweetens the filling and blends into the cream cheese easily. The vanilla adds gentle warmth.
Keep mixing until the texture is creamy and lump-free. This mixture is the base of the cheesecake filling.
Step 8: Whip the Heavy Cream
In another clean bowl, whip ½ cup cold heavy whipping cream using a hand mixer or stand mixer. Beat until stiff peaks form.
The cream should hold its shape when you lift the beaters. That means it has enough structure to lighten the filling.
For best whipping results, use chilled beaters and a cold bowl. Cold tools help the cream whip more effectively.
Step 9: Fold the Whipped Cream Into the Cream Cheese
Gently fold the whipped cream into the cream cheese mixture. Use a spatula and a light touch.
Do not stir aggressively. The goal is to keep the whipped cream airy while combining it with the cream cheese.
Fold until the mixture looks even and smooth. The filling should feel lighter than plain cream cheese.
Step 10: Add the Chopped Strawberries
Add 1 cup fresh chopped strawberries to the cheesecake filling. Fold them in gently.
The strawberries bring fresh fruit flavor and little juicy bursts. They should be distributed evenly without crushing them too much.
Use fresh strawberries for the best texture. Frozen strawberries can release too much moisture and make the filling watery.
Step 11: Add the Crispy Rice Cereal
Add ¼ cup crispy rice cereal to the filling. Fold gently just until evenly distributed.
The cereal gives the bites their crunch factor. Do not overmix, because you want the cereal to stay light and crisp.
The filling should now look creamy, fruity, and textured. It should still feel airy enough to spoon into the molds.
Step 12: Fill the Chilled Crusts
Remove the chilled crusts from the refrigerator. Spoon the cheesecake filling over each crust.
Fill each cavity generously. You can slightly mound the filling if needed.
Try to divide the filling evenly so the bites set at the same rate. Even portions also make the platter look more polished.
Step 13: Smooth the Tops
Use the back of a spoon or a mini spatula to smooth the tops. The surface does not need to be perfect, but a neat top makes the bites look more elegant.
Gently press the filling into each cavity so there are no large air pockets. Avoid pressing so hard that the crust shifts.
A small mound is fine. These bites should look generous and creamy.
Step 14: Chill for at Least 3 Hours
Refrigerate the cheesecake bites for at least 3 hours. They need to be fully set and firm to the touch.
This chilling time gives the filling structure. It also helps the crust and cheesecake layer hold together.
Do not rush this step. The bites are easiest to unmold and serve when properly chilled.
Step 15: Carefully Unmold the Bites
Carefully remove the cheesecake bites from the molds. If using silicone molds, gently push from the bottom.
If using a metal pan with parchment strips, lift carefully. Work slowly so the edges stay neat.
If a bite feels too soft, return the pan to the refrigerator and chill longer. Firm bites release more cleanly.
Step 16: Garnish if Desired
Serve the bites as they are, or garnish them with fresh strawberries. You can also add a drizzle of white chocolate.
For added flair, top each bite with a small dollop of whipped cream or a strawberry slice. These little finishes make them look extra pretty.
If using a swirl of strawberry jam or a drizzle of chocolate, add it before serving. Keep the decoration light so the bites stay easy to pick up.
Step 17: Serve Chilled
Serve the Strawberry Crunch Cheesecake Bites chilled. Keep them cold until ready to serve so they maintain their structure and texture.
These bites are best when the filling is firm, creamy, and cool. The strawberries taste fresh, and the crust holds together better.
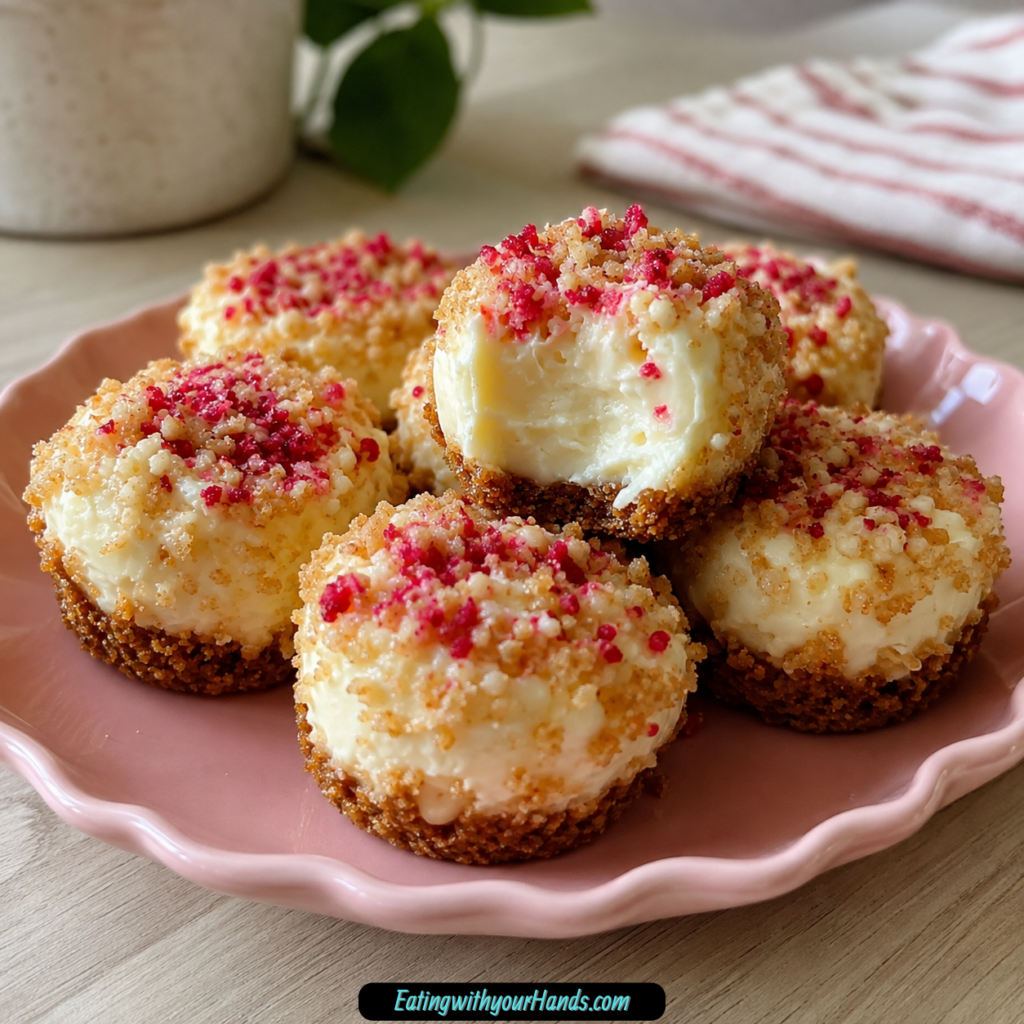
Place them on a platter for guests or serve them straight from the refrigerator. They are small, elegant, and ready to enjoy immediately.
Serving Ideas
Serve Strawberry Crunch Cheesecake Bites chilled on a platter. A garnish of fresh strawberries makes the presentation look bright and fresh.
A drizzle of white chocolate gives the bites a more elegant finish. You can also add a small dollop of whipped cream or a strawberry slice to each one.
These bites are lovely for spring and summer gatherings. They also fit baby showers, birthdays, dessert tables, and light after-dinner treats.
Because they are individually portioned, they are easy for guests to take and enjoy. There is no slicing a full cheesecake or cleaning a knife between cuts.
Keep them cold until serving. Their structure and creamy texture are best when chilled.
Storage
Store the cheesecake bites in an airtight container in the refrigerator for up to 3 days. Keep them cold until serving.
Because the filling contains cream cheese, whipped cream, and fresh strawberries, refrigeration is important. Cold storage helps maintain the structure.
Place the bites in a single layer if possible. If stacking is necessary, use care so the tops are not crushed.
Do not leave them sitting out for too long at room temperature. The filling is best when chilled and firm.
Reheating
These cheesecake bites do not need reheating. They are a chilled no-bake dessert.
Serve them straight from the refrigerator for the best texture. The filling should be cool, creamy, and set.
Do not microwave or warm them. Heat can soften the filling, loosen the crust, and change the texture.
Freezing
Freezing is not recommended for these cheesecake bites. The texture of fresh strawberries and whipped cream may change after thawing.
Fresh strawberries can release moisture once frozen and thawed. That can make the filling watery and affect the structure.
Whipped cream can also lose its light texture after freezing. For the best result, store the bites in the refrigerator and enjoy within 3 days.
If you want to prepare ahead, make them the day before your event and refrigerate until serving. This gives you the convenience of make-ahead prep without freezing.
Make-Ahead
These bites are perfect for preparing the day before an event. Make them, chill them until set, and keep them in the refrigerator until serving.
The required chill time is at least 3 hours, so making them ahead keeps the day of serving easier. The filling has time to firm and the crust has time to hold together.
Do not garnish too far ahead if using delicate toppings like whipped cream or strawberry slices. Add those closer to serving for the prettiest look.
Keep the bites cold until they go on the platter. This preserves the shape and texture.
Helpful Notes for Best Results
Let the cream cheese sit at room temperature for about 30 minutes before using. Softened cream cheese mixes more smoothly.
Use chilled beaters and a cold bowl when whipping the heavy cream. This helps the cream reach stiff peaks.
Drain or pat strawberries if they seem especially juicy after chopping. Fresh strawberries work best because frozen berries can release too much moisture.
Fold gently when adding the whipped cream, strawberries, and cereal. A light touch preserves the airy texture.
Use silicone molds for the easiest release. If using a metal pan, line with strips of parchment for easy lifting.
Avoid freezing these bites. Fresh fruit and whipped cream may become watery after thawing.
For a decorative finish, use strawberry jam, white chocolate, chocolate drizzle, whipped cream, or strawberry slices. Add delicate toppings close to serving.
Variations
Raspberry Cheesecake Bites
Use raspberries instead of strawberries when strawberries are not in season. Raspberries add a tart berry flavor.
Fold them gently so they do not break down too much. Their color makes the bites look bright and pretty.
Blueberry Cheesecake Bites
Use blueberries for a sweet, simple fruit variation. They bring a different berry flavor while keeping the cheesecake bite idea.
Blueberries are easy to fold into the filling. They also hold their shape well.
Mango Cheesecake Bites
Use diced mango for a tropical variation. Mango gives the bites a sunny fruit flavor.
This version feels especially nice for warm-weather gatherings. Keep the pieces small so they fold into the filling evenly.
Freeze-Dried Fruit Crunch Bites
Use crushed freeze-dried fruit instead of crispy rice cereal. This adds crunch and concentrated fruit flavor.
The color can also make the filling look more vibrant. Fold gently so the texture stays light.
Crushed Cookie Crunch Bites
Use crushed cookies in place of crispy rice cereal. This makes the bites richer and more dessert-like.
Crushed cookies add a different kind of crunch. They are a good option if you want a sweeter bite.
Strawberry Jam Swirl Bites
Add a swirl of strawberry jam before serving. This gives the bites a pretty finish and more strawberry flavor.
Keep the swirl light so the filling stays neat. This variation looks especially nice on a platter.
Chocolate-Drizzled Cheesecake Bites
Drizzle the bites with chocolate before serving. This adds a rich finish to the creamy strawberry filling.
White chocolate also works beautifully. It gives the bites a softer, more elegant look.
Troubleshooting
Why Is My Filling Lumpy?
The cream cheese may not have been softened enough. Let it sit at room temperature for about 30 minutes before mixing.
Beat the cream cheese with the powdered sugar and vanilla until completely smooth. Scrape the sides of the bowl as needed.
Why Is My Filling Too Loose?
The whipped cream may not have reached stiff peaks, or the bites may not have chilled long enough. Whip until the cream holds its shape when the beaters are lifted.
Refrigerate the bites for at least 3 hours. They should be firm to the touch before unmolding.
Why Is My Crust Falling Apart?
The crust may not have been pressed firmly enough. Press the graham cracker mixture compactly into each cup or mold.
The crust also needs time to chill. Place it in the refrigerator while preparing the filling.
Why Are My Bites Watery?
The strawberries may have been too wet, or frozen strawberries may have been used. Fresh strawberries are best for this recipe.
Frozen berries can release too much moisture and affect the texture. Keep the bites cold until serving.
Why Are the Edges Messy When Unmolding?
The bites may not be fully set, or the pan may not be lined for easy release. Chill longer if they feel soft.
Silicone molds work best for easy release. If using a metal pan, line with parchment strips for lifting.
Frequently Asked Questions
Can I Make These Ahead of Time?
Yes, these bites are perfect for preparing the day before an event. Store them in the refrigerator until serving.
Keep them cold so they stay firm. Add delicate garnishes close to serving if you want the freshest look.
What If I Do Not Have a Mini Muffin Pan or Silicone Mold?
You can use cupcake liners in a regular muffin pan. Small ramekins also work if portion size is not a concern.
Silicone molds are best for easy release. If using metal, parchment strips can help lift the bites out neatly.
Can I Use Frozen Strawberries?
It is best to use fresh strawberries. Frozen berries can release too much moisture and affect the texture.
Fresh strawberries give the bites a better structure and cleaner flavor. They also look prettier when used as garnish.
How Do I Get Clean Edges When Unmolding?
Silicone molds work best for easy release. If using a metal pan, line with strips of parchment for easy lifting.
Make sure the bites are fully chilled and firm before unmolding. Soft bites are harder to remove cleanly.
Are These Freezer Friendly?
Freezing is not recommended. Fresh fruit and whipped cream may become watery after thawing.
For best texture, refrigerate the bites and serve within 3 days. Make them the day before if you need to prepare ahead.
Can I Use a Different Fruit?
Yes, raspberries, blueberries, or diced mango can be used if strawberries are not in season. Each fruit changes the flavor slightly.
Use fresh fruit when possible. Keep pieces small so the filling stays easy to portion.
Can I Change the Crunch Element?
Yes, crushed freeze-dried fruit or crushed cookies can be used in place of crispy rice cereal. Both bring a different kind of texture.
Crispy rice cereal keeps the bites light. Crushed cookies make them richer, while freeze-dried fruit adds fruit flavor.
Why This Recipe Works So Well
Strawberry Crunch Cheesecake Bites work because they give you the flavor and feel of cheesecake without baking. The graham cracker crust, cream cheese filling, whipped cream, strawberries, and cereal all bring a different texture.
The crust sets in the refrigerator because melted butter binds the crumbs. Pressing it firmly makes it sturdy enough to support the filling.
The cream cheese mixture gives the dessert its tangy cheesecake flavor. Powdered sugar and vanilla smooth it out and make it sweet.
The whipped cream lightens the filling so the bites do not feel too heavy. Folding it gently keeps the texture airy.
Fresh strawberries make the bites juicy and bright. Crispy rice cereal adds the unexpected crunch that makes them playful.
The chill time ties everything together. After at least 3 hours, the bites become firm enough to unmold, serve, and enjoy neatly.
Final Thoughts
Strawberry Crunch Cheesecake Bites are the kind of no-bake dessert that feels cheerful, fresh, and quietly elegant. They have a buttery graham cracker base, a creamy cheesecake filling, juicy strawberries, and a little crunch that makes every bite feel fun.
I love them for warm-weather gatherings because they do not require the oven and they can be made ahead. They are small enough for easy serving but pretty enough to feel special on a dessert platter.
Make them for baby showers, birthdays, spring parties, summer get-togethers, or a simple chilled treat after dinner. Keep them cold, serve them with fresh strawberries or a drizzle of white chocolate, and enjoy the sweet little moment when creamy cheesecake, fruit, and crunch all meet in one bite.
Strawberry Crunch Cheesecake Bites

These Strawberry Crunch Cheesecake Bites are creamy, fruity, lightly crunchy, and completely no-bake. With a buttery graham cracker crust, whipped cheesecake filling, fresh strawberries, and crispy rice cereal, they are perfect for warm-weather desserts, brunch trays, parties, or anytime you want a chilled bite-sized treat without turning on the oven.
Recipe Details
- Prep Time: 20 minutes
- Chill Time: 3 hours
- Total Time: 3 hours 20 minutes
- Servings: 12 bites
- Calories: 180 kcal
Ingredients
For the Crust
- 4 tablespoons unsalted butter melted
- 1 cup graham cracker crumbs
- 2 tablespoons sugar
For the Cheesecake Filling
- ½ cup heavy whipping cream
- 8 oz cream cheese softened
- ⅓ cup powdered sugar
- ½ teaspoon vanilla extract
Mix-ins
- ¼ cup crispy rice cereal
- 1 cup fresh strawberries chopped
Instructions
Step 1: Make the Graham Cracker Crust
Combine the graham cracker crumbs, sugar, and melted butter. Mix until the crumbs are evenly coated.
Step 2: Shape the Crusts
Press the graham cracker mixture firmly into mini muffin cups or silicone molds to form the crusts.
Step 3: Beat the Cream Cheese Mixture
Beat the softened cream cheese, powdered sugar, and vanilla extract until smooth.
Step 4: Whip the Cream
In a separate bowl, whip the heavy cream until stiff peaks form.
Step 5: Fold the Filling Together
Gently fold the whipped cream into the cream cheese mixture until the filling is light, creamy, and combined.
Step 6: Add the Strawberries and Crunch
Fold in the chopped fresh strawberries and crispy rice cereal.
Step 7: Fill the Molds
Spoon the cheesecake filling over the prepared crusts, then smooth the tops.
Step 8: Chill Until Firm
Refrigerate for at least 3 hours, until the cheesecake bites are firm.
Step 9: Unmold and Serve
Carefully unmold the bites and serve chilled.
Notes
Use cold cream and a chilled bowl to whip the cream easily.
Fresh strawberries work best; avoid frozen strawberries to prevent excess moisture.
Add a drizzle of melted white chocolate for extra sweetness and decoration.
Store covered in the fridge up to 3 days.
These bites are not freezer-friendly due to texture changes.
Serving Suggestions
- Serve chilled on a brunch tray with fruit, muffins, or other bite-sized sweets.
- Add to a summer dessert table for a creamy strawberry treat.
- Serve in mini muffin liners for easy party portions.
- Pair with iced tea, lemonade, coffee, or sparkling water.
- Add a drizzle of melted white chocolate before serving if you want a sweeter decorative finish.
Storage
How to Refrigerate
Store the cheesecake bites covered in the fridge up to 3 days.
Freezing Note
These bites are not freezer-friendly due to texture changes.
Best Texture Tip
Keep the bites chilled until serving so the cheesecake filling stays firm and creamy.
Whipped Cream Tip
Use cold cream and a chilled bowl when whipping the heavy cream so it reaches stiff peaks more easily.

Fernando is the creator and writer behind the food blog Eating with your Hands. Living and working in cities like Paris, Barcelona, and Berlin, and being married to a Canadian foodie, has given Fernando a passion and interest in food and inspired him to run EWYH.