
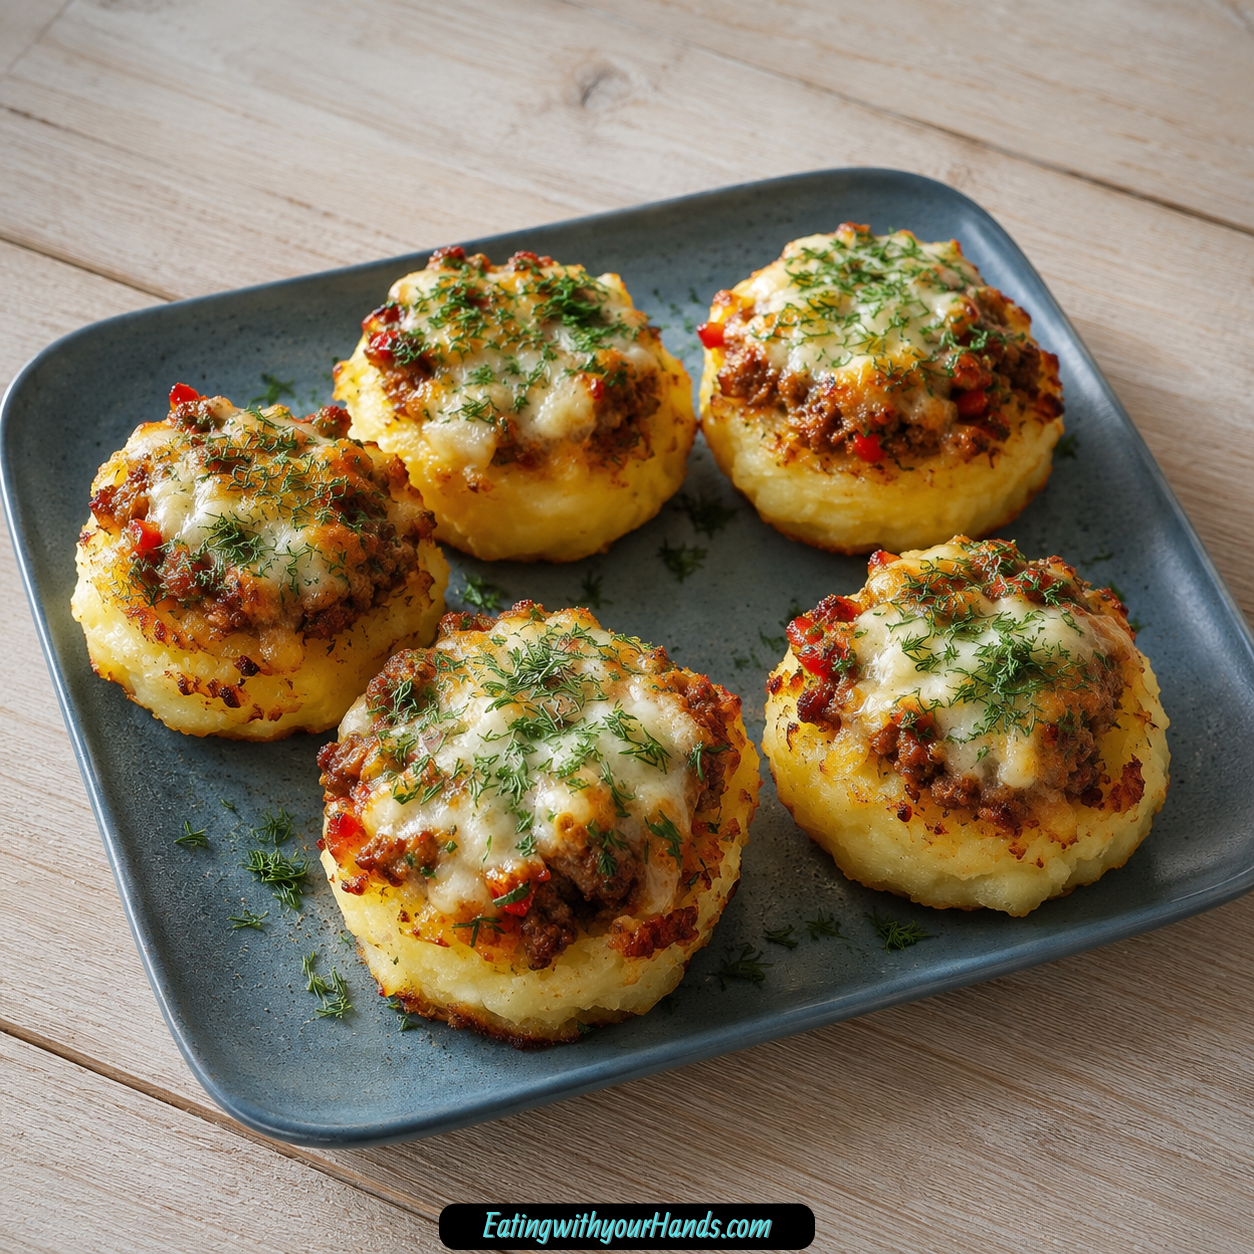

There are some recipes that feel comforting before they even reach the table. Stuffed Mashed Potato Nests are exactly that kind of dish, the kind that seems to promise warmth, fullness, and a little bit of joy from the very first step.
I love recipes like this because they manage to feel playful and deeply cozy at the same time. They take familiar ingredients and turn them into something that looks special, but still tastes like the kind of meal everyone wants seconds of.
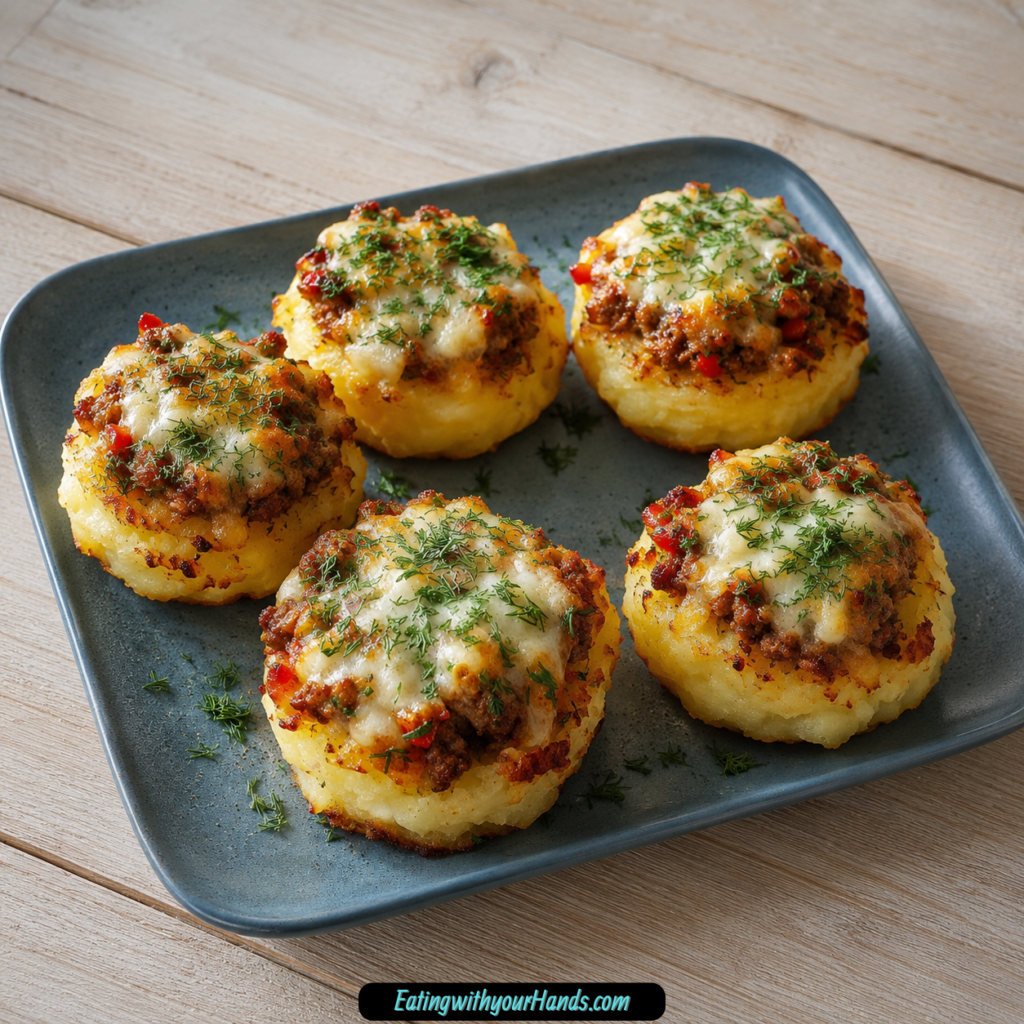
That balance is what makes these potato nests so memorable. They are crisp around the edges, soft in the middle, filled with a savory beef mixture, and finished with bubbling mozzarella that makes everything feel even more comforting.
What makes them even better is that they are not difficult in the least. They look like something you would spend far more time on, yet the method is straightforward and made up of steps that feel approachable from start to finish.
This is the sort of meal that fits easily into real life. It works for a weeknight dinner, a make-ahead lunch, a casual gathering, or even a game-night appetizer when you want something hearty and fun to serve.
I also love how flexible they are once you understand the basic idea. The potato base is cozy and familiar, the filling is rich and savory, and the cheese on top brings everything together in the most satisfying way.
If you are feeding kids, these little nests have instant appeal because of their shape alone. If you are serving adults, they still feel hearty, flavorful, and far more impressive than the amount of effort they require.
That is always the kind of recipe worth keeping close. Anything that delivers comfort, texture, and a little wow factor without turning dinner into a project deserves a permanent spot in the rotation.
Table of Contents
- Why Stuffed Mashed Potato Nests Are So Easy to Love
- Why This Recipe Works So Well for Real Life
- Recipe Details
- Ingredients for Stuffed Mashed Potato Nests
- A Few Things to Know Before You Start
- How to Make Stuffed Mashed Potato Nests
- Step 1: Preheat the Oven
- Step 2: Peel and Cut the Potatoes
- Step 3: Boil the Potatoes in Salted Water
- Step 4: Drain and Steam Dry the Potatoes
- Step 5: Mash the Potatoes With Butter and Seasonings
- Step 6: Prepare the Muffin Tin
- Step 7: Shape the Potato Nests
- Step 8: Bake the Empty Potato Nests
- Step 9: Brown the Ground Beef
- Step 10: Add the Onion, Garlic, and Bell Pepper
- Step 11: Stir in the Tomato and Tomato Paste
- Step 12: Fill the Baked Potato Nests
- Step 13: Add the Mozzarella Cheese
- Step 14: Bake Again Until the Cheese Melts
- Step 15: Cool Briefly and Remove From the Pan
- Step 16: Garnish and Serve
- Delicious Variations to Try
- Serving Ideas
- Storage and Reheating Tips
- Helpful Notes for the Best Potato Nests
- Frequently Asked Questions
- Final Thoughts
- Stuffed Mashed Potato Nests
Why Stuffed Mashed Potato Nests Are So Easy to Love
There is something especially satisfying about a recipe that combines several comfort foods into one dish. These nests bring together mashed potatoes, a savory beef filling, and melted cheese in a way that feels familiar but still a little more exciting than the usual dinner routine.
The potato part alone is enough to make people happy. Once baked, the edges turn lightly golden and slightly crisp, while the center stays soft and creamy, which means every bite has both structure and softness.
That contrast is one of the best parts of the whole dish. You get that delicate crispness on the outside, then the smooth mashed potato interior, and then the rich filling tucked right into the middle.
The beef filling gives the nests their heartiness. With onion, garlic, bell pepper, tomato, and tomato paste, it becomes savory, rich, and deeply comforting without needing anything complicated.
Then comes the mozzarella on top, which is really the finishing touch that makes the whole thing feel complete. It melts over the filling, turns stretchy and bubbly, and gives the nests that irresistible look that makes everyone want to eat them immediately.
Another reason these are so easy to love is that they fit so many different needs. They are substantial enough for dinner, fun enough for parties, and practical enough to reheat later without losing their appeal.
They also do not rely on fancy ingredients or special equipment beyond a muffin tin. That makes them feel accessible, which is often the secret behind the recipes people return to again and again.
Why This Recipe Works So Well for Real Life
Some comforting meals are wonderful in the moment but less useful once the day gets busy. These stuffed mashed potato nests are different because they are just as practical as they are satisfying.
They reheat well, which makes them great for meal prep or leftovers the next day. In fact, they are the kind of food that can make lunch feel much better than expected when you open the fridge and remember they are there.
They also work well in both casual and slightly dressed-up settings. You can serve them with a simple salad for dinner or arrange them on a platter for guests, and they somehow fit both situations naturally.
That flexibility is part of what makes them feel so valuable. When one recipe can work for weeknights, gatherings, and leftover lunches, it starts to become the kind of recipe you depend on rather than just try once.
And then there is the visual appeal. A muffin tin full of crisp potato nests topped with savory filling and cheese looks far more impressive than the simplicity of the ingredients might suggest.
That is always a nice kind of kitchen magic. You are working with potatoes, ground beef, vegetables, and cheese, but the finished dish feels like something much more styled and thoughtful.
Recipe Details
- Dish Style: Savory comfort food
- Best For: Weeknight dinner, hearty appetizer, meal prep, game night
- Oven Temperature: 375°F (190°C)
- Bake Time for Empty Potato Nests: 15 minutes
- Final Bake Time After Filling: 10 minutes
- Main Baking Pan: Muffin tin
- Topping: Shredded mozzarella cheese
Ingredients for Stuffed Mashed Potato Nests
The ingredient list is simple, which is one of the reasons this recipe feels so approachable. Everything here has a clear purpose, and each part builds toward that cozy, savory final result.
For the Potato Nests
- 3 to 5 large potatoes, about 4 cups mashed
Russets or Yukon Golds work best for creating a fluffy mashed potato base. They are the foundation of the nests, so their texture matters a great deal. - 3.5 tablespoons butter, melted
The melted butter adds richness and helps the potatoes mash into a smooth, flavorful mixture. It also supports that comforting, classic mashed potato taste. - Salt
Salt brings out the flavor in the potatoes and keeps the base from tasting flat. Since potatoes can absorb seasoning quietly, this ingredient matters more than people sometimes expect. - Smoked paprika
This adds a gentle smokiness that helps the potato nests feel more flavorful and warm. It also complements the savory filling beautifully. - Black pepper
Black pepper gives a little bite and depth to the potatoes. It helps balance the buttery softness with something slightly sharper. - Oregano
Oregano adds a subtle herbal note that pairs nicely with both the potatoes and the filling. It helps the nests feel a little more rounded in flavor. - Fresh dill, chopped
This is optional, but it adds a fresh green finish and a more polished look when serving. It is one of those little touches that makes the nests feel extra pretty.
For the Filling
- 1.1 pounds ground beef
Ground beef makes the filling hearty and satisfying. It gives the nests their savory center and helps turn them into a full meal rather than just a side. - 1 onion, finely chopped
Onion brings sweetness and depth once cooked. It softens into the filling and helps create that warm, comforting flavor base. - 2 garlic cloves, minced
Garlic adds savory richness and helps the filling smell and taste more complete. Even a small amount changes the depth of the whole dish. - 1 red bell pepper, diced
Red bell pepper adds color and a gentle sweetness. It balances the richness of the beef and keeps the filling from feeling too heavy. - 1 large tomato, diced
The tomato adds freshness and moisture to the filling. It helps everything come together while keeping the texture lively. - 2.5 ounces tomato paste
Tomato paste brings concentrated richness and helps coat the filling with a deeper savory flavor. It gives the mixture more body and makes it feel heartier. - Fresh parsley, chopped
Parsley adds brightness and fresh color at the end. It helps balance the richer elements of the dish when used as garnish. - Salt and black pepper
These season the filling and help every ingredient taste more like itself. Beef, vegetables, and tomato all need proper seasoning to feel complete.
For the Topping
- 3.5 ounces mozzarella cheese, shredded
Mozzarella melts smoothly and gives the tops of the nests that bubbly, stretchy finish. It is the ingredient that makes the final bake feel especially satisfying.
A Few Things to Know Before You Start
This recipe is not difficult, but a few small details make a big difference in how neatly the nests turn out. The biggest one is the texture of the mashed potatoes.
If the potatoes are too wet, the nests can feel softer and less structured. Letting them drain well and steam dry a little after boiling helps them mash into something sturdy enough to hold the filling.
The second important detail is baking the empty nests before filling them. That short bake gives them a chance to set, lightly crisp at the edges, and hold their shape better once the beef mixture is added.
That first bake is really what helps the recipe feel successful. Without it, the nests would still taste good, but they would not have the same shape or contrast in texture.
It also helps to grease the muffin tin well. Since mashed potatoes can cling once baked, that little bit of preparation makes removing the finished nests much easier.
How to Make Stuffed Mashed Potato Nests
The method is easy to follow, and each stage builds naturally into the next. Once you move through it once, the whole recipe feels very intuitive.
Step 1: Preheat the Oven
Begin by preheating your oven to 375°F, or 190°C. This gives it enough time to reach the right temperature while you prepare the potatoes and filling.
Starting with a fully heated oven matters because the potato nests need that initial blast of heat to set and begin turning golden. A properly preheated oven helps the edges bake evenly and gives the nests a better structure from the start.
Step 2: Peel and Cut the Potatoes
Peel the potatoes and cut them into even chunks, roughly 1 inch in size. Keeping the pieces similar in size helps them cook at the same rate, which makes the mashing step much smoother later on.
This is a simple detail, but it keeps you from ending up with some pieces still firm while others are falling apart. Even cooking means the mashed potato mixture will be more consistent and easier to work with.
Step 3: Boil the Potatoes in Salted Water
Place the chopped potatoes into a pot of cold salted water. Bring the pot to a boil and cook the potatoes for 15 to 20 minutes, or until they are fork-tender.
Starting them in cold water helps them cook more evenly from the inside out. The salted water seasons the potatoes while they cook, which gives you a much more flavorful base than plain boiling water would.
You will know they are ready when a fork slides into them easily without resistance. At that point, they should be soft enough to mash without any struggle.
Step 4: Drain and Steam Dry the Potatoes
Drain the potatoes thoroughly once they are cooked. Let them sit in the colander for a minute so excess moisture can escape.
This short steam-dry step is more important than it sounds. Drier potatoes make stronger nests, while extra water can leave the mashed mixture too loose to hold its shape well in the muffin tin.
If the potatoes still seem especially wet, you can return them briefly to the warm pot to let a little more moisture evaporate. That helps the texture stay fluffy rather than watery.
Step 5: Mash the Potatoes With Butter and Seasonings
Transfer the drained potatoes back to the pot and add the melted butter. Season with salt, smoked paprika, black pepper, and oregano, then mash until the mixture is smooth and well combined.
You can use a potato masher for a more rustic texture or a ricer if you want the mixture especially smooth. What matters most is avoiding overmixing, because overworked potatoes can become gluey instead of soft and fluffy.
Taste the potatoes and adjust the seasoning if needed. Since they form the whole structure of the recipe, they should already taste good before they ever go into the muffin tin.
Step 6: Prepare the Muffin Tin
Lightly grease a muffin tin with butter or spray. This helps the nests release more cleanly after baking and keeps the bottoms from sticking.
A well-greased pan makes a noticeable difference when it is time to lift the nests out later. Since the potatoes are pressed directly into the tin, this step is worth doing carefully.
Step 7: Shape the Potato Nests
Scoop about 1/4 cup of mashed potatoes into each muffin cup. Use your fingers or the back of a spoon to press the potatoes up the sides and create a hollow in the center, forming a nest shape.
The goal is to make a small well that can hold the filling later. Wetting your fingers slightly can help prevent sticking and makes shaping the nests much easier.
Try to keep the walls thick enough to hold together but not so thick that there is no room left for the filling. A balanced shape helps the final nests feel substantial without being all potato.
Step 8: Bake the Empty Potato Nests
Place the muffin tin in the oven and bake the potato nests for 15 minutes. During this time, the edges will begin turning lightly golden and the nests will start to firm up.
This first bake is what gives them the strength to hold the filling later. It also creates that first layer of texture, where the outside becomes a little crisp while the inside stays soft.
When you pull them out, they should look slightly set and just beginning to color at the edges. They do not need to be deeply browned at this stage.
Step 9: Brown the Ground Beef
While the potato nests are baking, heat a large skillet over medium heat and add the ground beef. Cook it until browned, breaking it up as it cooks so there are no large clumps.
This step creates the base of the filling and builds the heartiness of the recipe. If there is excess grease in the pan, drain some of it off, leaving a little behind if you want to keep some extra richness.
Take your time here and let the beef brown rather than simply turn gray. Better browning means better flavor throughout the filling.
Step 10: Add the Onion, Garlic, and Bell Pepper
Add the chopped onion, minced garlic, and diced red bell pepper to the skillet with the beef. Cook for about 5 minutes, stirring occasionally, until the vegetables soften and the onion becomes translucent.
This is where the filling starts to develop more depth. The vegetables soften into the beef and create a more layered, savory flavor than ground beef alone could give.
The onion adds sweetness, the garlic adds richness, and the bell pepper brings a little brightness. Together, they make the filling feel fuller and more balanced.
Step 11: Stir in the Tomato and Tomato Paste
Add the diced tomato and tomato paste to the skillet. Stir everything together until the beef and vegetables are well coated and the filling looks rich and cohesive.
Let the mixture simmer for about 2 minutes so the flavors can come together. This quick simmer helps the tomato paste blend into the beef and vegetables, making the filling richer and more unified.
Season with salt and black pepper to taste. Do not be shy here, because the filling needs enough seasoning to stand up against the mild mashed potato base.
Step 12: Fill the Baked Potato Nests
Remove the partially baked potato nests from the oven and carefully spoon the beef mixture into the center of each one. Divide the filling evenly so each nest gets a hearty amount.
Press the filling in gently, but do not pack it so tightly that it spills over the sides. You want the nests to feel generously filled without losing their shape.
At this stage, the recipe already starts to look especially inviting. The contrast between the golden potato edges and the savory filling tucked into the middle is part of what makes these so charming.
Step 13: Add the Mozzarella Cheese
Sprinkle shredded mozzarella over the top of each filled nest. Cover the filling well so the cheese can melt down into it and create that soft, gooey final layer.
This is the step that makes the finished nests feel extra comforting. The mozzarella adds richness, stretch, and that golden, bubbly look that makes the dish feel complete.
You can be generous here, because the cheese is part of what ties the filling and potato together. Once baked, it becomes the soft topping that makes the whole recipe feel especially satisfying.
Step 14: Bake Again Until the Cheese Melts
Return the muffin tin to the oven and bake the filled nests for 10 more minutes. Bake until the cheese is melted and beginning to turn golden in spots.
If you want a little extra browning on top, you can broil them for the last 1 to 2 minutes. Just keep a close eye on them, because cheese can go from perfect to overdone very quickly.
This final bake is where everything comes together. The potatoes crisp a little more, the filling settles in, and the mozzarella finishes the nests with that soft, bubbly top.
Step 15: Cool Briefly and Remove From the Pan
Once baked, let the nests cool for about 5 minutes before removing them from the muffin tin. This short rest helps them firm up slightly, which makes lifting them out easier.
Use a spoon or fork to carefully loosen and lift each nest. Because they are soft in the middle, handling them gently helps them stay intact and keeps their pretty shape.
Step 16: Garnish and Serve
Finish the nests with chopped fresh dill and parsley. These herbs add freshness, color, and a more polished appearance right before serving.
Serve them while hot, when the cheese is still soft and the filling is especially rich and comforting. That is when the textures are at their best and the whole dish feels most satisfying.
Delicious Variations to Try
One of the nicest things about stuffed mashed potato nests is how easily they can adapt. The basic version is already comforting and full of flavor, but a few small changes can shift the recipe in fun directions.
For a lighter option, you can use ground turkey or chicken instead of beef. The filling will still be hearty, though it may benefit from a little extra oil and seasoning to keep it moist and flavorful.
You can also make a vegetarian version by replacing the meat with sautéed mushrooms, zucchini, and spinach. Adding drained lentils or black beans gives that version more substance while keeping the same cozy feel.
Cheese is another easy place to change the mood of the recipe. Mozzarella is wonderfully melty, but cheddar, pepper jack, or feta can all bring a different personality to the nests.
If you enjoy more heat, add a diced jalapeño to the filling or a little cayenne to the potatoes. That creates a spicier version while still keeping the same basic structure.
There is even room to shift the whole recipe toward breakfast. Filling the nests with scrambled eggs, bacon bits, and Gruyère gives them an entirely new purpose while keeping the shape and comfort of the original idea.
A sweet potato variation also sounds especially cozy. Using half sweet potatoes for the nests with a filling of ground pork, apples, and sage changes the flavor profile completely while keeping the same nest format.
Serving Ideas
These nests are hearty enough to stand on their own, but they pair beautifully with lighter sides. A crisp green salad or roasted vegetables helps balance the richness and makes the meal feel more complete.
They are also very good alongside garlic bread or tomato soup if you want the dinner to lean fully into comfort food territory. That combination makes the whole meal feel especially cozy and satisfying.
For parties or casual gatherings, you can serve them as an appetizer. Making them in a mini muffin tin creates smaller bites that still deliver the same contrast of crisp potato, savory filling, and melted cheese.
A finishing drizzle of garlic aioli or a spoonful of sour cream can also be lovely. That extra creamy element works especially well if you choose to make a spicier version.
Storage and Reheating Tips
Leftovers should be cooled completely before storing. Once cooled, place the nests in an airtight container and refrigerate them for up to 3 days.
If stacking them, separate the layers with parchment paper to help prevent sticking. That small step protects their shape and makes reheating a little easier later.
For reheating, the microwave works fine for speed and convenience. Heat them for 1 to 2 minutes until warmed through.
For the best texture, though, reheating in a 350°F oven for 10 to 15 minutes works especially well. That helps the potato edges stay firmer and revives some of the crispness from the original bake.
You can also freeze unbaked nests without the filling for up to 2 months. Thaw them, fill them, and bake as directed, adding a few extra minutes if needed.
Helpful Notes for the Best Potato Nests
If your mashed potatoes seem too wet after boiling, let them drain longer or return them briefly to low heat to let extra moisture evaporate. This helps the nests hold their shape much better.
If you do not have a muffin tin, you can still make the recipe by shaping the nests freeform on a baking sheet. They may be flatter, but the flavor will still be just as comforting.
You can also use oven-safe ramekins if you want deeper potato bowls instead of classic muffin-shaped nests. That gives the recipe a slightly different presentation while keeping the same cozy spirit.
If smoked paprika is not your favorite, you can use thyme or rosemary in the potatoes instead. For the filling, a dash of Worcestershire sauce or soy sauce can add extra savory depth.
Greek yogurt can replace butter in the potatoes if you want a lighter option. Reduced-fat cheese can also be used, though the finished nests may be a little less rich and crisp.
Frequently Asked Questions
Can I make stuffed mashed potato nests ahead of time?
Yes, you can prepare the potato nests and the filling separately a day ahead. Store them covered in the refrigerator, then assemble and bake when you are ready to serve.
If they go into the oven chilled, they may need an extra 2 to 3 minutes of baking time. That little adjustment helps make sure everything is heated through properly.
How do I keep the nests from getting soggy?
The two best ways are drying the potatoes well after boiling and baking the empty nests first. Those two steps help build structure and prevent the potato base from becoming too soft.
Can I use instant mashed potatoes?
You can, though the texture will be softer than with real potatoes. A thicker style will work best if you go that route, but the original version with fresh potatoes will give the best results.
What should I do if the nests stick to the pan?
Grease the muffin tin well before adding the potatoes. Letting the nests cool for about 5 minutes before loosening them also helps them release more easily.
Final Thoughts
Stuffed Mashed Potato Nests are the kind of recipe that makes comfort food feel a little more playful without losing any of the warmth that makes comfort food so appealing. They are crisp, creamy, savory, cheesy, and satisfying in a way that feels both familiar and just a little more special than an ordinary dinner.
What makes them especially worth making is how much they offer without requiring anything complicated. With simple ingredients and a straightforward method, they create a dish that looks charming, reheats well, and feels generous enough for both everyday meals and casual gatherings.
That combination is hard not to love. When a recipe gives you cozy flavor, useful leftovers, and a little visual charm all at once, it starts to feel less like a novelty and more like something you genuinely want to keep making.
So grab the potatoes, heat the oven, and let the muffin tin do a little extra work tonight. Once you cut into those golden edges and hit the savory filling under a blanket of melted mozzarella, it is very easy to understand why these nests become such a favorite.
Stuffed Mashed Potato Nests

These Stuffed Mashed Potato Nests are hearty, savory, and comforting, with creamy seasoned mashed potatoes shaped into little nests and filled with a flavorful ground beef mixture. Each nest is topped with shredded mozzarella, then baked until the cheese melts and bubbles. This dish is perfect for dinner, family meals, or a cozy weekend recipe when you want something filling but fun to serve. The potato base is soft and buttery, while the beef filling adds rich flavor from onion, garlic, bell pepper, tomato, and tomato paste.
Recipe Details
- Prep Time: 30 minutes
- Cook Time: 25 minutes
- Total Time: 55 minutes
- Course: Dinner
- Cuisine: International
- Servings: 4 nests
Equipment
- Potato masher
- Muffin tin
Ingredients
For Topping
- 3.5 oz mozzarella cheese shredded
For the Filling
- Salt and black pepper to taste
- Fresh parsley chopped, for garnish
- 2.5 oz tomato paste
- 1 large tomato diced
- 1 red bell pepper diced
- 2 garlic cloves minced
- 1 onion finely chopped
- 1.1 lbs ground beef
For the Potato Nests
- Fresh dill chopped, for garnish
- Salt, smoked paprika, black pepper, and oregano to taste
- 3.5 tablespoon butter melted
- 3-5 large potatoes enough to yield about 4 cups of mashed potatoes
Instructions
Step 1: Prepare the Oven
Preheat the oven to 375°F (190°C).
Lightly prepare a muffin tin so the potato nests can be removed more easily after baking.
Step 2: Cook the Potatoes
Peel the potatoes and boil them until tender.
Drain well so the mashed potatoes do not become watery.
Step 3: Mash and Season
Mash the cooked potatoes with the melted butter.
Season with salt, smoked paprika, black pepper, and oregano to taste.
Step 4: Shape the Potato Nests
Press the mashed potatoes into the cups of the muffin tin.
Shape each portion into a nest with a small hollow in the center for the filling.
Step 5: First Bake
Bake the potato nests for 15 minutes, or until they become slightly firm.
Step 6: Brown the Beef
While the nests bake, cook the ground beef in a pan over medium heat until browned.
Break it apart as it cooks so the filling has an even texture.
Step 7: Add the Vegetables
Add the onion, garlic, red bell pepper, and tomato.
Cook until the vegetables soften and the mixture becomes savory and well combined.
Step 8: Add Tomato Paste and Seasoning
Stir in the tomato paste.
Season with salt and black pepper to taste, then cook for another 2 minutes.
Step 9: Fill the Nests
Spoon the ground beef filling into the baked potato nests.
Top each nest with shredded mozzarella cheese.
Step 10: Bake Again
Return the muffin tin to the oven.
Bake for another 10 minutes, or until the mozzarella melts and bubbles.
Step 11: Garnish and Serve
Garnish with fresh dill and fresh parsley before serving.
Serve warm while the potato nests are soft and the cheese is melted.
Notes
You can substitute ground beef with ground turkey or chicken for a lighter version.
For extra flavor, add a pinch of chili flakes to the filling.
Serving Suggestions
These stuffed mashed potato nests pair well with:
- Garden salad
- Roasted vegetables
- Steamed green beans
- Cucumber tomato salad
- Garlic bread
- Pickled vegetables
- Sour cream
- Extra fresh herbs
Storage
How to Store
Store leftovers in an airtight container in the refrigerator.
How to Reheat
Reheat in the oven until warmed through and the cheese softens again.
Best Texture Tip
Drain the potatoes well before mashing. Too much moisture can make the nests soft and harder to hold their shape.

Fernando is the creator and writer behind the food blog Eating with your Hands. Living and working in cities like Paris, Barcelona, and Berlin, and being married to a Canadian foodie, has given Fernando a passion and interest in food and inspired him to run EWYH.