

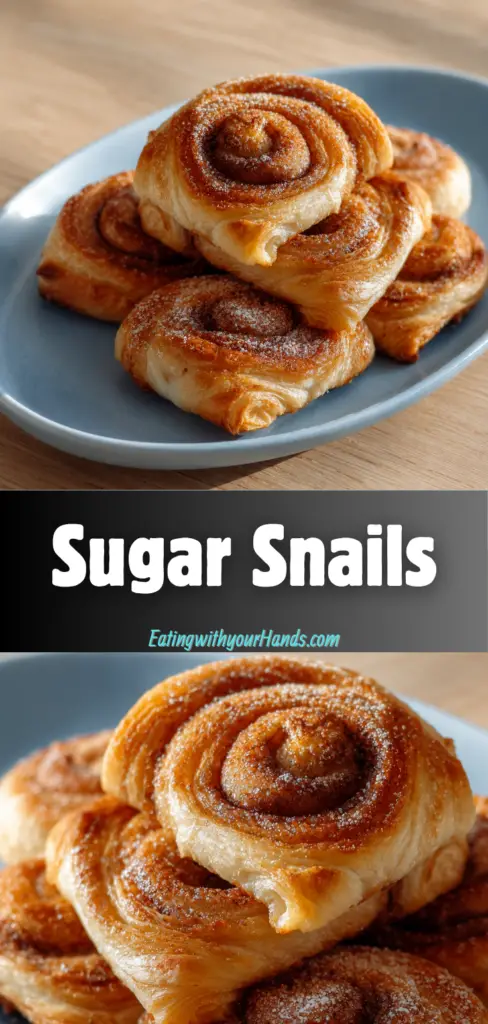
Some pastries have a way of making the whole kitchen feel warmer before they even come out of the oven. Sugar Snails are one of those simple, sweet treats that fill the air with cinnamon, melted butter, and the kind of cozy smell that makes everyone wander closer.
These little pastries are made with refrigerated puff pastry or crescent dough, brushed with melted butter, sprinkled with cinnamon sugar, rolled into a log, sliced into spirals, and baked until puffed and golden. They look charming, taste buttery and sweet, and come together with the kind of ease that makes them perfect for both everyday baking and special gatherings.
Every time I think of Sugar Snails, I think of the kind of kitchen memory that stays with you. Warm cinnamon, soft laughter, and a tray of pastries cooling just long enough for everyone to reach for one.
This recipe has that old-fashioned comfort without asking for much time or skill. It needs only 10 minutes of prep and about 15 minutes in the oven, which means you can have warm, flaky pastries ready in about 25 minutes.
The beauty of Sugar Snails is in their simplicity. A sheet of dough, melted butter, sugar, cinnamon, and a little optional vanilla turn into something that feels special enough for holidays but easy enough for an afternoon snack.
Serve them warm with coffee or tea, add them to a brunch table, or dust them with powdered sugar for a sweet finish. They are small, flaky, nostalgic, and exactly the kind of treat that makes people smile.
Table of Contents
- What Are Sugar Snails?
- Why You’ll Love Sugar Snails
- Recipe Details
- Ingredients You’ll Need
- A Closer Look at the Ingredients
- The Comfort Behind These Sweet Pastry Spirals
- Directions
- Step 1: Gather the Ingredients
- Step 2: Preheat the Oven
- Step 3: Prepare the Baking Sheet
- Step 4: Thaw the Dough
- Step 5: Lightly Flour the Work Surface
- Step 6: Roll Out the Pastry
- Step 7: Melt the Butter
- Step 8: Mix the Cinnamon Sugar
- Step 9: Brush the Dough with Butter
- Step 10: Add the Cinnamon-Sugar Filling
- Step 11: Add Optional Extras If Desired
- Step 12: Begin Rolling the Dough
- Step 13: Shape the Log
- Step 14: Slice the Sugar Snails
- Step 15: Arrange on the Baking Sheet
- Step 16: Check the Shape Before Baking
- Step 17: Bake the Sugar Snails
- Step 18: Remove from the Oven
- Step 19: Dust with Powdered Sugar
- Step 20: Serve Warm
- Helpful Tips for the Best Sugar Snails
- Common Mistakes
- Variations
- Serving Suggestions
- Storage Tips
- Freezing Instructions
- Make-Ahead Notes
- Frequently Asked Questions
- Final Thoughts
- Sugar Snails
What Are Sugar Snails?
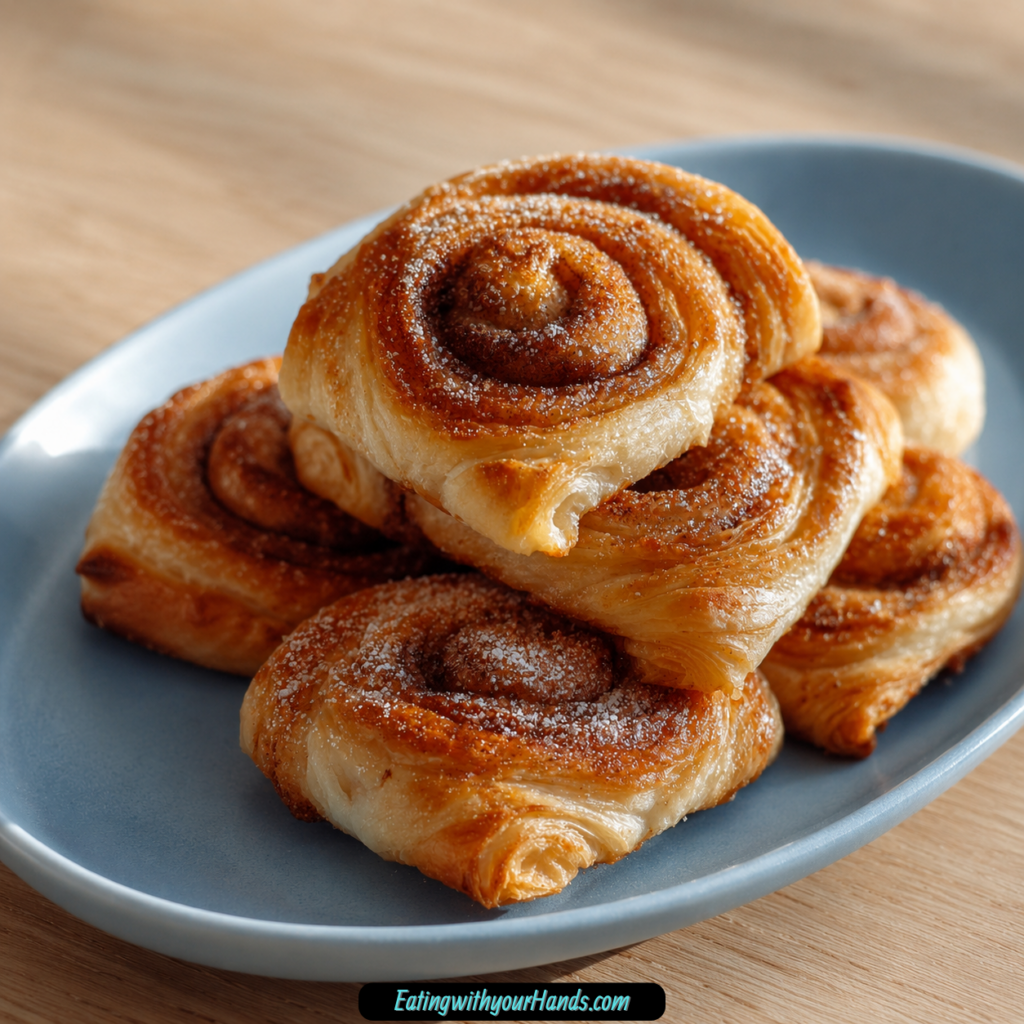
Sugar Snails are sweet pastry spirals made by rolling puff pastry or crescent dough with a cinnamon-sugar filling. Once sliced and baked, the pieces puff into golden, flaky little swirls that resemble small snails.
The filling is simple but comforting. Granulated sugar, ground cinnamon, melted butter, and optional vanilla extract create the warm, sweet flavor inside each spiral.
The pastries bake quickly at 375°F until puffed and golden brown. After a short cooling time, they can be dusted with powdered sugar if you want an extra sweet touch.
They are perfect for dessert, snacking, brunch, holidays, family get-togethers, or cozy afternoons. They also work well as a make-ahead treat because they can be prepared in advance and baked when ready.
Why You’ll Love Sugar Snails
Sugar Snails are quick to prepare. With only 10 minutes of prep and 15 minutes of baking, they are ready in about 25 minutes.
They use simple ingredients. Puff pastry or crescent dough, butter, sugar, cinnamon, optional vanilla, and powdered sugar are all you need.
They are beginner-friendly. You do not need special baking skills, and the rolling and slicing method is easy to follow.
They are perfect for gatherings. The small spiral shape makes them easy to serve at parties, holidays, brunches, and family get-togethers.
They can be made ahead. You can prepare them up to the point of baking and refrigerate them for up to 24 hours.
They are easy to customize. Add nuts, dried fruit, different spices, almond extract, mini chocolate chips, or a chocolate drizzle for a new twist.
Recipe Details
- Recipe name: Sugar Snails
- Prep time: 10 minutes
- Cook time: 15 minutes
- Total time: 25 minutes
- Servings: 8 pieces
- Oven temperature: 375°F (190°C)
- Main dough: Refrigerated puff pastry or crescent dough
- Main flavor: Cinnamon sugar and melted butter
- Texture: Flaky, golden, sweet, and lightly crisp
- Best served: Warm
- Optional finish: Powdered sugar dusting
- Storage: Airtight container at room temperature for up to 2 days
- Longer storage: Refrigerate for up to 1 week, though best fresh
- Freezer option: Freeze before baking for up to 1 month
- Make-ahead option: Prepare up to baking stage and refrigerate for up to 24 hours
Ingredients You’ll Need
For the Pastries
- 1 sheet refrigerated puff pastry or crescent dough, thawed
- ¼ cup unsalted butter, melted
- ⅓ cup granulated sugar
- ½ tsp ground cinnamon
- ¼ tsp vanilla extract, optional
Optional Finish
- Powdered sugar, for dusting, optional
A Closer Look at the Ingredients
Refrigerated puff pastry or crescent dough forms the base of the Sugar Snails. Puff pastry gives a flaky, delicate texture, while crescent dough creates a softer pastry-style bite.
Melted unsalted butter helps the cinnamon-sugar mixture stick to the dough. It also gives the pastries their rich, warm flavor.
Granulated sugar creates the sweet filling. As the pastries bake, the sugar warms with the butter and cinnamon to create a cozy center.
Ground cinnamon gives the pastries their familiar warmth. It is the main spice in the filling and the flavor that makes the kitchen smell so comforting.
Vanilla extract is optional, but it adds a soft aromatic note. A small amount can make the filling taste rounder and sweeter.
Powdered sugar is also optional. Dusting the warm pastries gives them a bakery-style finish and a little extra sweetness.
If you want a dairy-free option, coconut oil can replace butter. Margarine can also be used as a butter substitute.
For a gluten-free option, use gluten-free puff pastry if available. For extra crunch, chopped nuts or sunflower seeds can be added depending on your needs.
The Comfort Behind These Sweet Pastry Spirals
Sugar Snails are the kind of treat that proves simple baking can still feel meaningful. They do not require a long ingredient list or complicated technique, but they bring a warm homemade feeling to the table.
The pastry dough makes the recipe easy because it is already prepared. You only need to thaw it, roll it out gently, brush it with butter, and add the cinnamon-sugar filling.
The rolling step creates the spiral shape. Once the log is sliced, each piece becomes a little swirl of dough and sweet filling.
As they bake, the dough puffs, the butter melts into the layers, and the cinnamon sugar warms into a fragrant center. The result is crisp at the edges, tender inside, and sweet enough to feel like a treat.
They are wonderful because they feel familiar. The scent of cinnamon and butter has a way of making a kitchen feel like a memory.
Directions
Step 1: Gather the Ingredients
Start by gathering the puff pastry or crescent dough, melted butter, granulated sugar, ground cinnamon, optional vanilla extract, and powdered sugar if you plan to dust the pastries. Having everything ready makes the process smooth.
This recipe moves quickly because the dough is already prepared. Once the pastry is thawed and the oven is preheated, the filling and assembly take only a few minutes.
Set out a baking sheet, parchment paper, a rolling pin, a pastry brush, a bowl, and a sharp knife. These simple tools will help you shape and bake the Sugar Snails neatly.
Step 2: Preheat the Oven
Preheat your oven to 375°F (190°C). A properly preheated oven helps the dough puff and bake evenly.
Do not place the pastries into a cold oven. Baking in an oven that is not hot enough can lead to uneven cooking and less flaky texture.
Let the oven heat while you prepare the dough and filling. By the time the pastries are assembled, the oven should be ready.
Step 3: Prepare the Baking Sheet
Line a baking sheet with parchment paper. This helps prevent sticking and makes cleanup easier.
The cinnamon-sugar filling may bubble slightly as the pastries bake. Parchment paper helps catch any sweet bits that escape.
Set the prepared baking sheet near your work surface. You will transfer the sliced pastries to it before baking.
Step 4: Thaw the Dough
Take the refrigerated puff pastry or crescent dough out of the fridge and let it thaw according to the package instructions. The dough should be soft enough to roll but still cool.
If the dough is too cold, it may crack. If it becomes too warm, it can get sticky and harder to handle.
Handle the dough gently. Overworking it can make the finished pastries tough instead of flaky.
Step 5: Lightly Flour the Work Surface
Lightly flour your work surface to prevent sticking. Use only enough flour to keep the dough from grabbing onto the counter.
Too much flour can dry out the pastry. A light dusting is enough.
Place the thawed dough on the floured surface. Keep your rolling pin nearby.
Step 6: Roll Out the Pastry
Roll out the puff pastry or crescent dough until it is about ¼ inch thick. Use gentle pressure.
The goal is to even out the dough, not stretch or overwork it. A delicate hand helps keep the pastry flaky.
Try to keep the shape fairly even. This makes rolling and slicing easier later.
Step 7: Melt the Butter
Melt ¼ cup unsalted butter in a small microwave-safe bowl or saucepan. Let it cool slightly before brushing it onto the dough.
The butter should be melted and easy to spread. Cold butter will not coat the dough evenly.
Do not pour extremely hot butter onto the pastry. Slightly cooled melted butter is easier to control.
Step 8: Mix the Cinnamon Sugar
In a medium bowl, combine ⅓ cup granulated sugar and ½ tsp ground cinnamon. Stir until evenly mixed.
This mixture will become the sweet filling. Make sure the cinnamon is fully blended into the sugar so the flavor spreads evenly.
If using the optional vanilla extract, add ¼ tsp vanilla extract to the cinnamon-sugar mixture. Stir it in well.
Step 9: Brush the Dough with Butter
Brush the melted butter generously over the entire surface of the rolled-out dough. Cover the dough from edge to edge.
The butter helps the cinnamon sugar stick. It also gives the pastries rich flavor as they bake.
Use a pastry brush or the back of a spoon if needed. Make sure no large dry patches remain.
Step 10: Add the Cinnamon-Sugar Filling
Evenly sprinkle the cinnamon-sugar mixture over the buttered pastry. Try to cover every inch of the dough.
A consistent layer gives every bite the same sweet cinnamon flavor. Avoid dumping the sugar in one area.
If some mixture falls near the edges, that is fine. The filling will create those sweet, caramelized little spots as it bakes.
Step 11: Add Optional Extras If Desired
If you want to customize the filling, this is the time to add finely chopped nuts, dried fruit, or mini chocolate chips. Sprinkle them lightly over the cinnamon sugar.
Walnuts or pecans add crunch. Raisins or cranberries add chewy sweetness.
Do not overload the dough. Too much filling can make the log hard to roll and slice.
Step 12: Begin Rolling the Dough
Starting from one end, tightly roll the pastry into a log shape. Roll slowly and evenly.
Try to keep the roll firm without squeezing the dough too hard. Pressing too much can flatten the pastry layers.
Keep the seam at the bottom when you finish rolling. This helps the log stay closed while slicing.
Step 13: Shape the Log
Once rolled, gently adjust the log so it is even from end to end. Do not press it flat.
If the dough feels too soft, you can pause briefly before slicing. Cooler dough is easier to cut cleanly.
Keep the log on the floured surface. You will slice it into individual pieces next.
Step 14: Slice the Sugar Snails
Use a sharp knife to slice the log into 1-inch pieces. Each piece will become one Sugar Snail.
A sharp knife helps prevent the spirals from getting crushed. Use a gentle sawing motion if needed.
Try to keep the slices similar in thickness. Even pieces bake at the same rate.
Step 15: Arrange on the Baking Sheet
Place the sliced snails on the parchment-lined baking sheet. Leave some space between each piece.
The pastries will puff as they bake, so they need room to expand. Crowding can make them bake unevenly.
Set each piece cut-side up so the spiral is visible. This gives the finished pastries their classic snail shape.
Step 16: Check the Shape Before Baking
Look over the pastries before placing them in the oven. If any pieces are leaning or uneven, gently adjust them.
Do not press them down too much. The dough needs height to puff properly.
A little unevenness is fine. Homemade pastries should look charming and natural.
Step 17: Bake the Sugar Snails
Place the baking sheet in the preheated oven. Bake for about 15 minutes.
The pastries are done when they are golden brown and puffed. The edges should look crisp and the centers should look baked through.
Keep an eye on them near the end. Puff pastry can go from golden to too dark quickly.
Step 18: Remove from the Oven
Carefully remove the baking sheet from the oven. The Sugar Snails will be hot and delicate.
Let them stay on the baking sheet for 5 minutes. This cooling time helps them set and improves the texture.
Do not move them immediately if they seem too soft. They firm up slightly as they cool.
Step 19: Dust with Powdered Sugar
If desired, dust the warm Sugar Snails with powdered sugar. Use a light hand for a pretty finish.
Powdered sugar adds extra sweetness and makes the pastries look more finished. It is optional but lovely.
Dust them after the short cooling time so the sugar does not melt too quickly. Serve soon after.
Step 20: Serve Warm
Serve the Sugar Snails warm for the best flavor and texture. The pastry will be flaky, buttery, and fragrant.
They are delicious with coffee or tea. They also make a charming addition to brunch tables and dessert spreads.
Enjoy them while the cinnamon filling is still warm. That is when they taste their most comforting.
Helpful Tips for the Best Sugar Snails
Use high-quality puff pastry if possible. Better pastry gives a flakier texture.
Do not overwork the dough. Too much handling can make the pastries tough.
Keep the dough cool while working. Warm dough can become sticky and difficult to roll.
Use melted butter, not cold butter. Melted butter spreads evenly and helps the cinnamon sugar stick.
Let the pastries cool for at least 5 minutes after baking. This prevents a gooey texture and helps them set.
Bake only until golden brown and puffed. Keep a close eye on them to prevent burning.
Common Mistakes
Overworking the Dough
Overworking the dough can lead to tough pastries. Puff pastry and crescent dough both need gentle handling.
Roll only as much as needed to even out the dough. Less handling gives a better texture.
Not Preheating the Oven
Baking in a cold oven can cause uneven cooking. Always preheat to 375°F (190°C).
The right oven temperature helps the dough puff properly. This is especially important for puff pastry.
Skipping the Cooling Time
Eating the pastries too soon can make the texture feel gooey. Let them cool for at least 5 minutes.
This short rest helps the filling settle. It also makes the pastries easier to handle.
Using Cold Butter
Cold butter will not spread well over the dough. The butter should be melted so it can coat the pastry evenly.
If the butter is too hot, let it cool slightly. Warm melted butter is ideal.
Slicing with a Dull Knife
A dull knife can crush the spiral shape. Use a sharp knife for cleaner slices.
If needed, slice gently with a back-and-forth motion. This keeps the snails looking neat.
Variations
Add chopped walnuts or pecans for a crunchy texture. They give the pastries a nutty flavor.
Incorporate dried fruits such as raisins or cranberries into the filling. They add chewy sweetness.
Experiment with different spices like nutmeg or cardamom. This gives the Sugar Snails a unique flavor twist.
Use almond extract instead of vanilla extract for a different aromatic touch. A small amount changes the flavor beautifully.
Add mini chocolate chips to the filling for a chocolate version. This makes the pastries richer and more dessert-like.
For a dairy-free option, use coconut oil or margarine instead of butter. Choose whichever fits your needs.
For a gluten-free option, use gluten-free puff pastry if available. Follow the same rolling, filling, slicing, and baking method.
Add a pinch of salt to the filling to enhance sweetness. It helps balance the sugar and cinnamon.
For nut allergies, skip the nuts or use sunflower seeds for crunch. This keeps the texture interesting without using nuts.
Drizzle melted chocolate over the cooled snails for a delightful finish. This adds a pretty and sweet final touch.
Serving Suggestions
Sugar Snails are best served warm, straight from the oven after a short cooling time. The pastry is flakiest and most fragrant when fresh.
Pair them with a warm cup of coffee or tea. The cinnamon-sugar filling makes them perfect for an afternoon treat.
Add them to a brunch table with other simple pastries or fruit. Their spiral shape makes them look charming and inviting.
Serve them as a light dessert after dinner. A dusting of powdered sugar makes them feel special.
They are also lovely for cozy family get-togethers. The small size makes them easy to share.
For a sweeter presentation, drizzle melted chocolate over cooled pastries. This turns them into a more indulgent dessert.
Storage Tips
Store leftover Sugar Snails in an airtight container at room temperature for up to 2 days. Let them cool completely before storing.
They are best enjoyed fresh, but they can still taste good the next day. Reheating helps bring back some of the warmth and texture.
For longer storage, refrigerate them for up to 1 week. Keep in mind that they are still best fresh.
To reheat, place them in a warm oven for a few minutes until heated through. This helps refresh the pastry texture.
Avoid leaving them uncovered. Puff pastry can dry out if exposed to air for too long.
Freezing Instructions
Sugar Snails can be frozen before baking. Slice them first, then place the pieces on a baking sheet to freeze individually.
Once frozen, transfer them to an airtight container or freezer bag. They can be kept frozen for up to 1 month.
Bake them straight from the freezer when ready. Add a few extra minutes to the baking time.
Freezing before baking gives the best fresh-baked texture. It lets you enjoy warm pastries without starting from scratch.
Make sure the pieces are well sealed after freezing. This helps protect them from freezer dryness.
Make-Ahead Notes
Sugar Snails can be prepared up to the point of baking. Cover them and refrigerate for up to 24 hours.
When ready to bake, you can bake them straight from the refrigerator. You can also let them sit at room temperature for about 15 minutes before placing them in the oven.
This make-ahead option is helpful for brunch, holidays, or gatherings. You can do the rolling and slicing early, then bake fresh when guests arrive.
If preparing ahead, keep the dough covered so it does not dry out. A fresh pastry texture depends on keeping the dough protected.
Frequently Asked Questions
Can the Recipe Be Frozen?
Yes, Sugar Snails can be frozen before baking. Slice them and place them on a baking sheet to freeze individually.
Once frozen, transfer them to an airtight container or freezer bag for up to 1 month. Bake straight from the freezer and add a few extra minutes to the baking time.
Can Ingredients Be Substituted?
Yes, ingredients can be substituted. Margarine can be used instead of butter for a dairy-free option.
Brown sugar can be used if you do not have granulated sugar. It gives the filling a deeper flavor.
For gluten-free diets, use gluten-free puff pastry if available. Follow the same method for rolling, filling, slicing, and baking.
How Do I Store Leftovers?
Store leftover Sugar Snails in an airtight container at room temperature for up to 2 days. They are best enjoyed fresh.
If you want to keep them longer, refrigerate them for up to 1 week. Reheat them in a warm oven for a few minutes before serving.
Can the Recipe Be Made Ahead?
Yes, you can prepare Sugar Snails up to the point of baking. Cover and refrigerate them for up to 24 hours.
When ready to bake, bake them straight from the fridge or let them sit at room temperature for about 15 minutes first. Then bake as directed.
Can I Use Crescent Dough Instead of Puff Pastry?
Yes, refrigerated crescent dough can be used instead of puff pastry. The texture will be softer and less flaky.
Puff pastry gives a more delicate, layered texture. Crescent dough gives a tender, familiar pastry feel.
How Do I Keep the Pastries Flaky?
Handle the dough gently and avoid overworking it. Roll it only as much as needed.
Make sure the oven is fully preheated to 375°F (190°C). Proper heat helps the pastry puff and bake evenly.
Can I Add Nuts or Dried Fruit?
Yes, chopped nuts like walnuts or pecans can be added for crunch. Raisins or cranberries can also be added for chewy sweetness.
Keep additions light so the dough is still easy to roll. Too much filling can make slicing difficult.
Can I Add Chocolate?
Yes, mini chocolate chips can be sprinkled into the filling. You can also drizzle melted chocolate over the cooled pastries.
Chocolate gives the Sugar Snails a richer dessert-style finish. It is a fun variation for chocolate lovers.
Final Thoughts
Sugar Snails are the kind of pastry that brings warmth to the table with very little effort. They are flaky, buttery, sweet, and filled with the comforting flavor of cinnamon sugar.
The recipe is simple enough for beginner bakers but charming enough for holidays, brunches, parties, and cozy family afternoons. With just a sheet of dough, melted butter, sugar, cinnamon, and a few optional touches, you can create something that feels homemade and special.
They are best served warm, when the pastry is puffed and golden and the cinnamon filling is still fragrant. A dusting of powdered sugar or a drizzle of chocolate can make them even more delightful.
Most of all, Sugar Snails are about the small joy of sharing something sweet. They turn basic ingredients into warm memories, one little spiral at a time.
Sugar Snails

These Sugar Snails are sweet, flaky pastry treats made with puff pastry or crescent dough, melted butter, cinnamon sugar, and a light optional dusting of powdered sugar. The dough is rolled into a tight log, sliced into small spirals, and baked until golden, giving each piece a crisp outside and a soft, buttery center. They are quick to prepare and perfect for dessert, snacking, brunch trays, coffee breaks, or a simple homemade pastry when you want something warm and sweet without much effort.
Recipe Details
- Prep Time: 10 minutes
- Cook Time: 15 minutes
- Total Time: 25 minutes
- Course: Dessert, Snack
- Cuisine: Pastry
- Servings: 8 pieces
Equipment
- Oven
- Baking sheet
Ingredients
For the Filling
- ¼ teaspoon vanilla extract optional
- Powdered sugar for dusting (optional)
- ⅓ cup granulated sugar
- ¼ cup unsalted butter melted
- ½ teaspoon ground cinnamon
For the Pastry
- 1 sheet refrigerated puff pastry or crescent dough thawed
Instructions
Step 1: Preheat the Oven
Preheat your oven to 375°F (190°C).
Prepare a baking sheet and set it aside.
Step 2: Roll Out the Pastry
Roll out the puff pastry or crescent dough on a lightly floured surface.
Brush the surface evenly with the melted unsalted butter.
Step 3: Add the Cinnamon Sugar Filling
In a bowl, combine the granulated sugar, ground cinnamon, and optional vanilla extract.
Sprinkle the mixture evenly over the buttered pastry.
Step 4: Roll and Slice
Roll the pastry tightly into a log.
Slice the log into 1-inch pieces to create the snail-shaped spirals.
Step 5: Bake
Place the pieces on the baking sheet.
Bake for 15 minutes, or until the pastries are puffed and golden brown.
Step 6: Finish and Serve
Dust with powdered sugar before serving if desired.
Serve warm for the best texture and flavor.
Notes
Feel free to add nuts or dried fruits for extra flavor. Make sure to serve warm for the best taste.
Serving Suggestions
These sugar snails pair well with:
- Hot coffee
- Iced coffee
- Black tea
- Warm milk
- Fresh berries
- Vanilla ice cream
- Brunch pastry boards
- Fruit salad
Storage
How to Store
Store leftover sugar snails in an airtight container at room temperature for short-term storage.
How to Reheat
Warm them gently in the oven or air fryer for a few minutes to bring back the flaky texture. Avoid overheating so the sugar filling does not burn.

Fernando is the creator and writer behind the food blog Eating with your Hands. Living and working in cities like Paris, Barcelona, and Berlin, and being married to a Canadian foodie, has given Fernando a passion and interest in food and inspired him to run EWYH.