
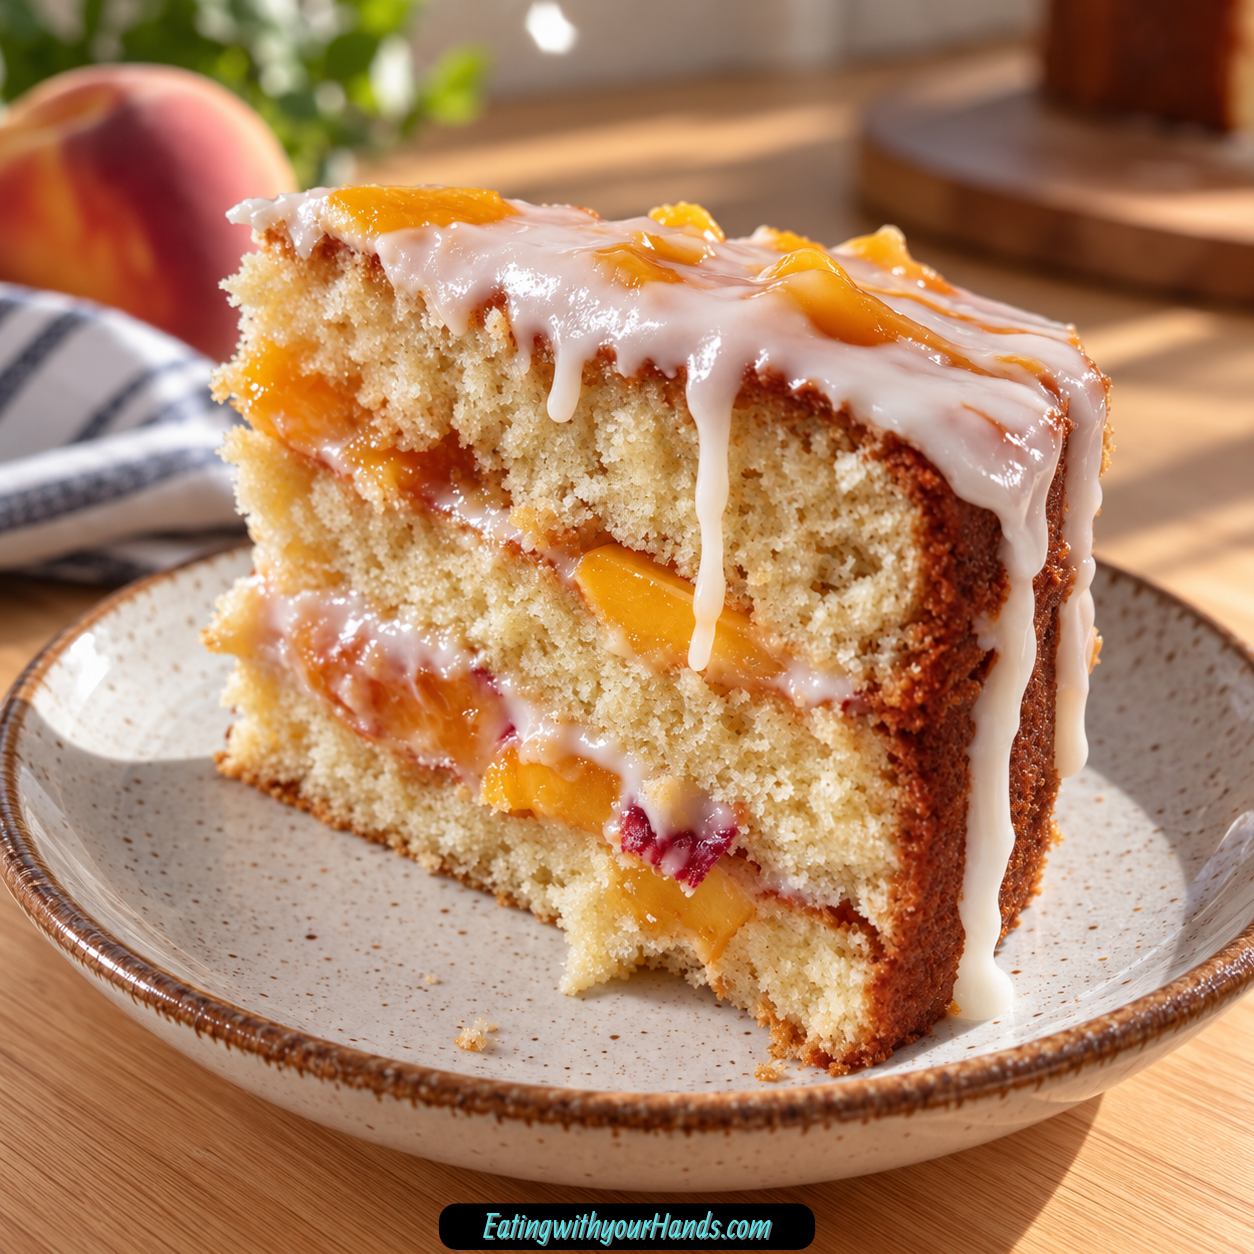

Some desserts seem to belong to a particular season, and this Summer Peach Cake will always feel like sunshine on a plate to me. Soft cake, juicy pieces of peach, a tender crumb from sour cream, and a simple peach glaze come together in the kind of dessert that feels made for long afternoons, picnic tables, and warm evenings.
Peaches also carry some of my strongest summer baking memories. My grandmother used to make this cake when the fruit was at its peak, and the sweet smell drifting through the house was enough to bring everyone toward the kitchen before the cake had even cooled.
What I remember most is how uncomplicated it felt. There was no elaborate decorating or towering layer cake involved, yet the golden crumb dotted with peaches always looked inviting enough to disappear quickly whenever it was shared.
That simplicity is exactly why I still make it. A few pantry ingredients, peaches, sour cream, butter, eggs, and a quick glaze are enough to create a cake that feels special without turning baking into an all-day project.
The fruit is really what gives the cake its personality. Small peach pieces are folded directly into the batter, so the flavor is not limited to a topping or a filling hidden in the middle.
Every slice has little pockets of fruit running through the crumb. The peaches also help give the cake the moist texture that makes it so easy to come back for another piece.
Then there is the glaze. Powdered sugar and reserved peach juice create a straightforward finish that adds sweetness without covering up the fruit beneath it.
I like that the cake can move easily between occasions. It is casual enough for an afternoon at home, pretty enough for a summer gathering, and simple enough to bring along when I know a dessert table could use something fruity.
Table of Contents
- Why You’ll Love This Summer Peach Cake
- Ingredients for Summer Peach Cake
- Why Properly Measuring the Flour Matters
- The Role of Softened Butter
- Why Sour Cream Makes the Cake Tender
- Choosing the Peaches
- Why the Peach Pieces Should Be Folded Gently
- How to Make Summer Peach Cake
- Step 1: Preheat the Oven and Prepare the Pan
- Step 2: Combine the Dry Ingredients
- Step 3: Cream the Butter and Sugar
- Step 4: Add the Eggs One at a Time
- Step 5: Add the Vanilla
- Step 6: Begin Alternating the Dry Ingredients and Sour Cream
- Step 7: Finish the Batter Without Overmixing
- Step 8: Fold in the Peaches
- Step 9: Transfer the Batter to the Pan
- Step 10: Bake Until Golden
- Step 11: Cool in the Pan
- Step 12: Cool Completely Before Glazing
- Step 13: Make the Peach Glaze
- Step 14: Glaze the Cake
- The Importance of Not Overmixing
- How to Tell When the Cake Is Done
- How to Keep Peaches From Sinking
- Using Fresh Peaches
- Using Frozen Peaches
- Greek Yogurt Variation
- Gluten-Free Variation
- Cinnamon or Nutmeg Variation
- Almond-Topped Variation
- Peach and Berry Variation
- Coconut Peach Variation
- Serving the Cake Slightly Warm
- Serving With Vanilla Ice Cream
- Serving at Picnics
- Storage
- Freezing Summer Peach Cake
- Frequently Asked Questions
- Summer Peach Cake Nutrition Information
- The Cake That Still Smells Like Summer to Me
- Summer Peach Cake Recipe
Why You’ll Love This Summer Peach Cake
The recipe is wonderfully approachable. Most of the mixing is straightforward, and there are no complicated pastry techniques standing between you and a finished cake.
Peach flavor appears throughout rather than only on top. One full cup of chopped peaches is folded directly into the batter, which means the fruit becomes part of every slice.
Sour cream gives the crumb a tender quality without making the cake feel excessively heavy. It creates the kind of softness that works especially well beside juicy pieces of peach.
The glaze is equally simple. Powdered sugar and reserved peach juice echo the fruit already inside the cake and give the surface a sweet finishing touch.
The cake also works with more than one form of peach. Canned peaches make it easy to prepare from pantry-friendly ingredients, while fresh peaches can be used when summer fruit is at its best.
And because several variations are easy to incorporate, one basic cake can take on different personalities. Cinnamon, nutmeg, almonds, berries, coconut, or a gluten-free flour blend can all shift the finished dessert in a new direction.
Ingredients for Summer Peach Cake
The ingredient list is intentionally familiar. Together, these ingredients create a soft peach cake with enough structure to hold the fruit and enough moisture to stay tender.
- 1 ½ cups all-purpose flour, spooned and leveled
- 1 ½ teaspoons baking powder
- ½ teaspoon baking soda
- ½ teaspoon salt
- ½ cup unsalted butter, softened
- ½ cup granulated sugar
- 2 large eggs, room temperature
- 1 teaspoon vanilla extract
- ½ cup sour cream
- 1 cup canned peaches, drained and chopped
- ½ cup powdered sugar
- 2–3 tablespoons reserved peach juice
The butter should be softened rather than melted. Leaving it at room temperature for about 30 minutes gives it the consistency needed for creaming with the sugar.
The eggs are also best at room temperature. They blend more smoothly into the butter mixture during the creaming stage.
Why Properly Measuring the Flour Matters
The recipe uses 1 ½ cups all-purpose flour. Spoon the flour into the measuring cup and level the surface rather than packing it down.
Too much flour can change the crumb and make the cake feel heavier. A lighter hand with measuring helps preserve the soft texture that suits the peaches.
The flour also works with baking powder and baking soda to build the cake’s structure. Keeping those dry ingredients evenly combined helps them distribute throughout the batter.
If using the standard recipe, resist the urge to add extra flour merely because the batter contains fruit. The listed amount is the foundation for the intended texture.
The Role of Softened Butter
Half a cup unsalted butter creates richness and helps form the cake’s tender crumb. It needs to be soft enough to cream with the sugar but should not be melted.
Creaming the butter and sugar for about 2 minutes adds lightness to the mixture. This is one of the most important early steps for the finished texture.
Melted butter would behave differently and is not the intended method here. Real butter is also the one ingredient that is kept without a substitution.
Give the butter enough time at room temperature before starting. About 30 minutes is the suggested resting period.
Why Sour Cream Makes the Cake Tender
Half a cup sour cream is added gradually with the dry ingredients. Its moisture gives the cake a soft, tender texture that feels especially good around the peach pieces.
The sour cream is not meant to dominate the flavor. Instead, it supports the crumb and balances the sweetness.
Plain Greek yogurt can replace sour cream when needed. Use it as the alternate creamy ingredient in the batter.
Whichever option you choose, add it in stages rather than all at once. Alternating it with the dry ingredients helps keep the batter light.
Choosing the Peaches
The standard recipe uses 1 cup canned peaches that have been drained and chopped. Save the peach juice because 2–3 tablespoons are used later in the glaze.
Fresh peaches can also be used. About 2 medium peaches are enough, and they should be peeled and chopped before folding them into the batter.
Fresh fruit gives the cake a very seasonal character when peaches are at their best. Canned peaches make the recipe possible even when perfect fresh fruit is not available.
Frozen peaches are another option. They need to be thawed completely and patted dry before going into the batter.
Why the Peach Pieces Should Be Folded Gently
The chopped fruit goes into the batter near the end. Fold rather than beat so the pieces stay intact.
A spatula is ideal for this stage. Lift the batter around the peaches until they look evenly distributed.
Aggressive mixing can crush softer peach pieces. It can also overwork the batter after the flour has already been added.
Stop once the fruit looks spread throughout the bowl. The batter does not need prolonged mixing to become perfectly uniform.
How to Make Summer Peach Cake
The process is simple, but the order matters. Preparing the dry ingredients separately, creaming the butter properly, alternating the additions, and folding the peaches at the end all help create the intended light texture.
Step 1: Preheat the Oven and Prepare the Pan
Preheat the oven to 350°F or 175°C. Grease a 9-inch pan thoroughly before mixing the batter.
Pay attention to the bottom and sides so the baked cake releases cleanly. A well-prepared pan saves frustration later when the cake is ready to move to a rack.
Set the pan aside while you prepare the batter. Having it ready means the mixed batter can go straight into the oven.
Step 2: Combine the Dry Ingredients
Place the 1 ½ cups all-purpose flour, 1 ½ teaspoons baking powder, ½ teaspoon baking soda, and ½ teaspoon salt in a bowl. Whisk just until evenly combined.
There is no need to mix aggressively. The purpose is simply to distribute the leavening and salt throughout the flour.
Set the bowl aside once the mixture looks uniform. It will be added gradually to the butter mixture later.
Step 3: Cream the Butter and Sugar
Place the softened ½ cup unsalted butter and ½ cup granulated sugar together. Beat for about 2 minutes until the mixture becomes light and fluffy.
Take the time to complete this step rather than rushing directly to the eggs. The texture created here contributes to the lightness of the finished cake.
Scrape the bowl as needed so no dense butter remains around the sides. Once the mixture looks fluffy, move on to the eggs.
Step 4: Add the Eggs One at a Time
Add the first room-temperature egg to the creamed butter and sugar. Mix until it is incorporated before adding the second egg.
Repeat with the remaining egg. Adding them separately gives each one time to blend smoothly into the mixture.
Avoid dumping both eggs in at once. The gradual addition keeps the batter easier to manage.
Once the eggs are incorporated, the mixture is ready for vanilla. The batter should look smooth and cohesive.
Step 5: Add the Vanilla
Pour in the 1 teaspoon vanilla extract. Mix only until the vanilla is distributed.
The vanilla supports the peach flavor rather than becoming the dominant note. It adds a familiar warmth to the butter-and-sugar base.
Do not continue beating unnecessarily once it is mixed in. The dry ingredients and sour cream still need to be incorporated.
Step 6: Begin Alternating the Dry Ingredients and Sour Cream
Add a portion of the dry mixture to the butter mixture. Stir gently until it is only partly incorporated.
Follow with some of the ½ cup sour cream. Continue alternating between dry ingredients and sour cream.
Begin with the dry mixture and end with the dry mixture. This sequence helps maintain the intended light batter.
Step 7: Finish the Batter Without Overmixing
Once the final dry ingredients are added, stir only until the batter comes together. A few small lumps are acceptable.
Do not keep mixing simply to make the batter look perfectly smooth. Overmixing can work against the soft texture you want.
Scrape the bottom and sides gently to make sure there are no obvious pockets of dry flour. Then stop.
The batter is now ready for the peaches. From this point forward, use a gentle folding motion.
Step 8: Fold in the Peaches
Add the 1 cup drained and chopped canned peaches to the batter. Use a spatula to fold them through carefully.
Turn the batter over the fruit rather than stirring rapidly. Continue only until the peach pieces appear reasonably well distributed.
Try not to mash the fruit. Distinct peach pieces are part of what makes each slice appealing.
If you want help preventing the peaches from sinking, they can first be tossed with 1 tablespoon flour. Fold them into the batter after that light coating.
Step 9: Transfer the Batter to the Pan
Spoon the batter into the greased 9-inch pan. Spread it evenly toward the edges.
Smooth the surface gently without pressing down hard. The batter should remain light rather than compacted.
Take a moment to make sure the fruit is not all concentrated in one section. A relatively even distribution produces better slices.
Once the batter is level, place the pan in the preheated oven. The cake will need about 30–35 minutes.
Step 10: Bake Until Golden
Bake at 350°F for approximately 30–35 minutes. Begin checking near the 30-minute mark.
Insert a toothpick near the center. A few moist crumbs are fine, but there should be no wet batter attached.
If the cake needs more time, check again every 2 minutes. This helps prevent accidentally overbaking it.
The finished cake should look golden. Remove it from the oven once the center passes the toothpick test.
Step 11: Cool in the Pan
Let the cake rest in its pan for about 10 minutes. This short cooling period gives the crumb time to settle before the cake is moved.
Do not immediately turn a piping-hot cake onto a rack. Giving it those 10 minutes makes handling easier.
After the resting period, move the cake to a cooling rack. Let it continue cooling before glazing.
Step 12: Cool Completely Before Glazing
Allow the cake to cool completely. This is important if you want the glaze to stay visible on the surface.
Glaze poured over a hot cake will soak in more quickly. The flavor will still be good, but the appearance will be less defined.
Patience at this stage gives you a prettier finish. The glaze is meant to sit across the top rather than disappear completely into the crumb.
Step 13: Make the Peach Glaze
Place the ½ cup powdered sugar in a small bowl. Add 2 tablespoons reserved peach juice and stir.
Add more of the reserved juice as needed, up to 3 tablespoons. Mix until the glaze reaches a drizzle-friendly consistency.
Keep the glaze simple. Its role is to add a final layer of peach sweetness without overwhelming the cake.
Once smooth, it is ready to use immediately. Do not pour it on until the cake has cooled.
Step 14: Glaze the Cake
Drizzle the peach glaze over the cooled cake. You can create neat lines or let it fall more casually across the surface.
Allow the glaze to settle before slicing. Some will naturally move down the sides.
The cake is now ready to serve. Each slice should show a golden crumb with pieces of peach running through it.

The Importance of Not Overmixing
Once flour enters the batter, less mixing is better. Stir only until the ingredients have come together.
A few small lumps do not mean something has gone wrong. Continuing to beat the batter simply to remove them can make the finished crumb less tender.
The same rule applies after the peaches are added. Fold gently and stop once they are distributed.
This is one of the easiest ways to protect the light texture. The cake does not need aggressive mixing to bake evenly.
How to Tell When the Cake Is Done
Begin checking the center after about 30 minutes. Insert a toothpick close to the middle of the cake.
A few moist crumbs can cling to the toothpick. Wet batter means the cake still needs additional baking time.
Check again every 2 minutes when more time is necessary. This keeps you from adding an unnecessarily long block of baking time.
The surface should also look golden. Use the toothpick result rather than color alone as your main guide.
How to Keep Peaches From Sinking
Chopped peaches can be tossed with 1 tablespoon flour before being folded into the batter. The light coating helps the pieces stay better distributed.
Do not heavily bread the fruit. You only need enough flour to coat the surface lightly.
Fold the coated pieces in gently. Avoid leaving them sitting in the batter while you perform additional mixing.
Even distribution is the goal. Every slice is more satisfying when peach pieces appear throughout instead of collecting near the bottom.
Using Fresh Peaches
About 2 medium fresh peaches can replace the canned fruit. Peel and chop them before adding them to the batter.
Fresh peaches are especially appealing when summer fruit is fragrant and ripe. Their flavor makes the cake feel closely tied to peach season.
Fold the chopped pieces in exactly as you would canned peaches. Keep the pieces distinct rather than crushing them into the batter.
The cake method remains the same. Bake at 350°F and begin checking after about 30 minutes.
Using Frozen Peaches
Frozen peaches can also be used. Thaw them completely before beginning.
Pat the thawed fruit dry with paper towels to remove excess moisture. Frozen peaches generally release more liquid than fresh or well-drained canned fruit.
An extra tablespoon of flour can be added when using frozen peaches to compensate for that additional moisture. Keep the rest of the batter preparation the same.
Fold the fruit in gently. Expect the peaches to be softer than freshly chopped fruit.
Greek Yogurt Variation
Plain Greek yogurt can replace the sour cream. Use it in the same role within the batter.
It keeps the creamy component that helps the cake stay tender. The flavor and texture may differ slightly from the sour cream version.
Alternate it with the dry ingredients in the same way. Begin and end with the dry mixture.
Do not add it all at once. The gradual mixing method remains important.
Gluten-Free Variation
A 1:1 gluten-free flour blend can replace the all-purpose flour. Use the same overall amount.
Follow the same dry-mixing and batter method. Do not change the baking temperature simply because the flour changes.
Check the cake for doneness with the same toothpick test. A few moist crumbs are acceptable, while wet batter means more time is needed.
The finished texture may vary with the flour blend used. Keep the remaining ingredients unchanged.
Cinnamon or Nutmeg Variation
Add ½ teaspoon cinnamon or nutmeg to the dry ingredients for a spiced version. Either one brings a warmer character to the peach cake.
Whisk the spice into the flour, baking powder, baking soda, and salt. This distributes it evenly before it reaches the wet ingredients.
Use one of the listed options according to the flavor you want. The peach remains the main fruit element.
This variation gives the cake a cozier personality. The standard peach glaze can still finish the top.
Almond-Topped Variation
Sliced almonds can be sprinkled over the batter before baking. They create an additional crunchy element on the surface.
Add them after the batter has been transferred to the pan. Spread them across the top rather than mixing them into the cake.
Bake using the same 350°F temperature. The almonds will cook along with the cake.
This variation creates more texture without altering the peach-filled crumb. The glaze can still be added after the cake cools.
Peach and Berry Variation
Replace half of the peaches with raspberries or blueberries. This gives the cake a second fruit flavor while keeping peaches as part of the recipe.
Fold the fruit in gently. Berries can be more delicate, so avoid unnecessary stirring.
The finished crumb will have both peach pieces and berries throughout. The appearance becomes especially colorful once sliced.
Keep the remainder of the batter unchanged. Bake and cool using the same method.
Coconut Peach Variation
Fold ¼ cup shredded coconut into the batter with the peaches. This adds another layer of texture and flavor.
Add the coconut during the final folding stage. There is no need to change the earlier mixing process.
Keep the batter gentle once the flour has been incorporated. The peach pieces and coconut should simply be distributed rather than beaten.
The glaze can still be added after cooling. The cake remains centered around peach while gaining a tropical accent.
Serving the Cake Slightly Warm
A slice served slightly warm is especially comforting. The peach pieces feel soft and the crumb stays tender.
Add a dollop of whipped cream for a simple accompaniment. The cool cream contrasts with the warmer cake.
Do not confuse serving slightly warm with glazing a hot cake. Allow the cake to cool properly for glazing, then gently warm an individual serving if desired.
This approach lets you keep the glaze visible while still enjoying a warmer slice. It also works well when serving leftovers.
Serving With Vanilla Ice Cream
Vanilla ice cream is another easy pairing. Place a scoop beside a slightly warm slice and let it begin melting naturally.
The creamy vanilla flavor stays mild enough to let the peaches lead. The temperature contrast makes the dessert feel more indulgent.
Serve immediately once the ice cream is added. Waiting too long will allow the melted ice cream to soak heavily into the cake.
A modest scoop is enough. The cake already has its own peach glaze and sweetness.
Serving at Picnics
This cake works especially well for summer gatherings because it can be sliced and served without elaborate assembly. The peach flavor also feels naturally suited to warm-weather tables.
Transport the cake in a container that protects the glazed surface. Slice when ready to serve if you want the neatest presentation.
Because it is already flavorful on its own, no additional topping is necessary. Whipped cream or ice cream can simply be optional extras.
It is the kind of dessert that works well after a casual meal. The soft fruit cake feels satisfying without needing elaborate decoration.
Storage
Place leftover cake in an airtight container at room temperature. It will stay fresh and moist for about 3 days.
The glaze may gradually soak into the cake by the second day. That changes the appearance but also distributes more peach flavor into the crumb.
Keep the container closed so the cake does not dry out. Slice only what you plan to eat when possible.
The texture is best while the cake remains soft. Enjoy it within the suggested 3-day window.
Freezing Summer Peach Cake
The cake can be frozen for up to 2 months. Freeze it before adding the glaze.
Wrap the unglazed cake tightly in plastic. This protects it while frozen.
Individual slices can also be frozen. That makes it easy to thaw only the amount you want.
Thaw the cake at room temperature before glazing. Once thawed, add the peach glaze before serving.
Frequently Asked Questions
Can I Use Fresh Peaches?
Yes. Use about 2 medium peaches.
Peel and chop them before folding them into the batter. Handle the fruit gently so the pieces remain distinct.
Can I Use Frozen Peaches?
Yes. Thaw the peaches completely and pat them dry with paper towels.
Frozen fruit releases more moisture. An extra tablespoon of flour can be added to compensate.
Can I Use Canned Peaches?
Yes. The standard version uses 1 cup canned peaches, drained and chopped.
Reserve the juice before draining completely. You will need 2–3 tablespoons for the glaze.
How Do I Keep Peaches From Sinking?
Toss the chopped peaches with 1 tablespoon flour. This light coating helps them remain better distributed through the batter.
Fold them in gently afterward. Avoid overmixing once the fruit is added.
Can I Replace Sour Cream?
Plain Greek yogurt works as a substitute. Use it in the same place in the mixing process.
Alternate it with the dry ingredients. Begin and end with the dry mixture.
Can I Make This Cake Gluten-Free?
A 1:1 gluten-free flour blend can replace the all-purpose flour. Keep the remaining ingredients and process the same.
Use the toothpick test to judge baking time. The cake is ready when there is no wet batter on the tester.
Can I Replace the Butter?
The butter is kept as an essential ingredient in this cake. Use ½ cup unsalted butter softened to room temperature.
Do not melt it. Cream it with the sugar for about 2 minutes before adding the eggs.
Can I Freeze the Cake?
Yes. Freeze the cake unglazed for up to 2 months.
Wrap it tightly in plastic and thaw at room temperature. Add the glaze only after thawing.
Why Did My Cake Turn Out Dense?
Overmixing can work against the light texture. Stir only until the dry and wet ingredients are combined.
Also measure the flour by spooning and leveling rather than packing it into the cup. Too much flour can make the crumb heavier.
Why Did My Glaze Disappear Into the Cake?
The cake may have been too warm when the glaze was added. A hot cake absorbs the glaze more readily.
Cool completely before glazing when you want a visible finish. The absorbed glaze will still taste good, but the presentation will look different.
Summer Peach Cake Nutrition Information
One serving contains approximately 280 calories. It also provides about 20g sugar, 12g fat, and 4g protein.
These values can vary according to the ingredients used. Different substitutions or portion sizes will change the nutritional profile.
Fresh, canned, frozen, berry, coconut, and gluten-free variations can all affect the final values. The standard figures are best treated as estimates for the original cake.
The cake is designed as a sweet summer dessert. Serve it in portions that fit the occasion and the rest of the meal.
The Cake That Still Smells Like Summer to Me
Some recipes become favorites because they are new and exciting, while others stay with you because they are tied to memories you never really want to lose. Summer Peach Cake belongs to that second group for me.
Whenever peaches are at their best, I think about my grandmother’s kitchen and the smell of fruit and cake moving through the house. I remember waiting for the cake to cool and wondering why ten minutes could possibly feel so long.
That memory is probably why I still prefer this cake to stay simple. I do not want thick layers of frosting or complicated decorations covering the peaches that give it its character.
The golden crumb is enough. Those small pieces of fruit tucked into each slice are enough, and the thin peach glaze across the top provides just the right finish.
I also appreciate the recipe more now because I understand how flexible it can be. Canned peaches make it reliable, fresh peaches celebrate the height of summer, and frozen peaches keep the idea available when fresh fruit is harder to find.
Some batches stay completely classic. Others get a little cinnamon, a handful of sliced almonds, berries, or coconut depending on what sounds good that day.
But the heart of the cake never really changes. Butter and sugar create the rich base, sour cream keeps the crumb tender, and peaches bring the flavor that makes every slice feel like a summer dessert.
I love it warm enough for vanilla ice cream to soften at the edges. I also love it the next day when some of the glaze has worked its way into the crumb and the peach flavor feels even more settled.
At a picnic, the cake rarely needs much introduction. People see the golden slices, notice the fruit, take one piece, and often return before the plate is empty.
That is exactly how I remember my grandmother’s version disappearing too. Summer Peach Cake has always been that kind of dessert—easy, warm, familiar, and sweet enough to make one slice feel like a little piece of the season itself.
Summer Peach Cake Recipe

Soft, fluffy, and filled with sweet peach flavor, this Summer Peach Cake is an easy dessert with a tender sour cream crumb and juicy pieces of fruit throughout. A simple peach glaze adds a delicate finish, making every slice feel bright, sweet, and perfect for warm-weather baking.
Recipe Details
- Prep Time: 15 minutes
- Cook Time: 35 minutes
- Total Time: 50 minutes
- Course: Dessert
- Cuisine: American
- Servings: 8 servings
- Calories: 280 kcal
Ingredients
For the Cake
- 1 cup canned peaches drained and chopped
- ½ cup sour cream
- 1 teaspoon vanilla extract
- 2 large eggs
- ½ cup granulated sugar
- ½ cup unsalted butter softened
- ½ teaspoon salt
- ½ teaspoon baking soda
- 1 ½ teaspoons baking powder
- 1 ½ cups all-purpose flour
For the Peach Glaze
- ½ cup powdered sugar
- 2–3 tablespoons peach juice from canned peaches
Instructions
Step 1: Prepare the Oven and Pan
Preheat the oven to 350°F (175°C).
Grease a 9-inch round baking pan and set it aside while you prepare the batter.
Step 2: Combine the Dry Ingredients
In a bowl, whisk together the all-purpose flour, baking powder, baking soda, and salt.
Mix until the ingredients are evenly distributed.
Step 3: Cream the Butter and Sugar
In a separate bowl, beat the softened unsalted butter with the granulated sugar until fluffy.
Add the eggs one at a time, mixing after each addition.
Step 4: Add the Vanilla
Stir the vanilla extract into the butter mixture.
Mix until evenly incorporated.
Step 5: Finish the Batter
Alternately add the dry ingredients and sour cream to the butter mixture.
Continue mixing until the batter is smooth.
Step 6: Fold in the Peaches
Gently fold the drained and chopped peaches into the batter.
Distribute the fruit evenly without overmixing.
Step 7: Bake
Pour the batter into the prepared 9-inch round pan.
Bake for 30–35 minutes, or until a toothpick inserted into the cake comes out clean.
Step 8: Cool the Cake
Let the cake cool in the pan for 10 minutes.
Transfer it to a wire rack and allow it to continue cooling.
Step 9: Make the Peach Glaze
Combine the powdered sugar with 2–3 tablespoons peach juice.
Mix until smooth and ready to drizzle.
Step 10: Glaze and Serve
Drizzle the peach glaze over the cooled cake.
Slice into 8 servings and enjoy.
Notes
- Use fresh peaches if available.
- Store leftovers in an airtight container.
Serving Suggestions
Serve Summer Peach Cake after it has cooled and been finished with the peach glaze. The soft sour cream cake, sweet peach pieces, and simple glaze create a light dessert with plenty of fruit flavor.
This recipe makes 8 servings and works well as a simple summer dessert. Fresh peaches can also be used when available.
For neat slices and a smooth glaze, let the cake cool before adding the powdered sugar and peach juice mixture.
Storage
Store leftovers in an airtight container.
Peach Tip
Use 1 cup canned peaches, drained and chopped.
Fresh peaches can be used if available.
Butter Tip
Use ½ cup softened unsalted butter and cream it with the granulated sugar until fluffy.
Sour Cream Tip
Use ½ cup sour cream and alternate it with the dry ingredients when mixing the batter.
Egg Tip
Add the 2 large eggs one at a time.
Mix after each addition before stirring in the vanilla.
Baking Tip
Bake at 350°F (175°C) for 30–35 minutes.
The cake is ready when a toothpick inserted into it comes out clean.
Cooling Tip
Cool the cake in the pan for 10 minutes before transferring it to a wire rack.
Glaze Tip
Mix ½ cup powdered sugar with 2–3 tablespoons peach juice until smooth.
Drizzle the glaze over the cooled cake.

Fernando is the creator and writer behind the food blog Eating with your Hands. Living and working in cities like Paris, Barcelona, and Berlin, and being married to a Canadian foodie, has given Fernando a passion and interest in food and inspired him to run EWYH.