
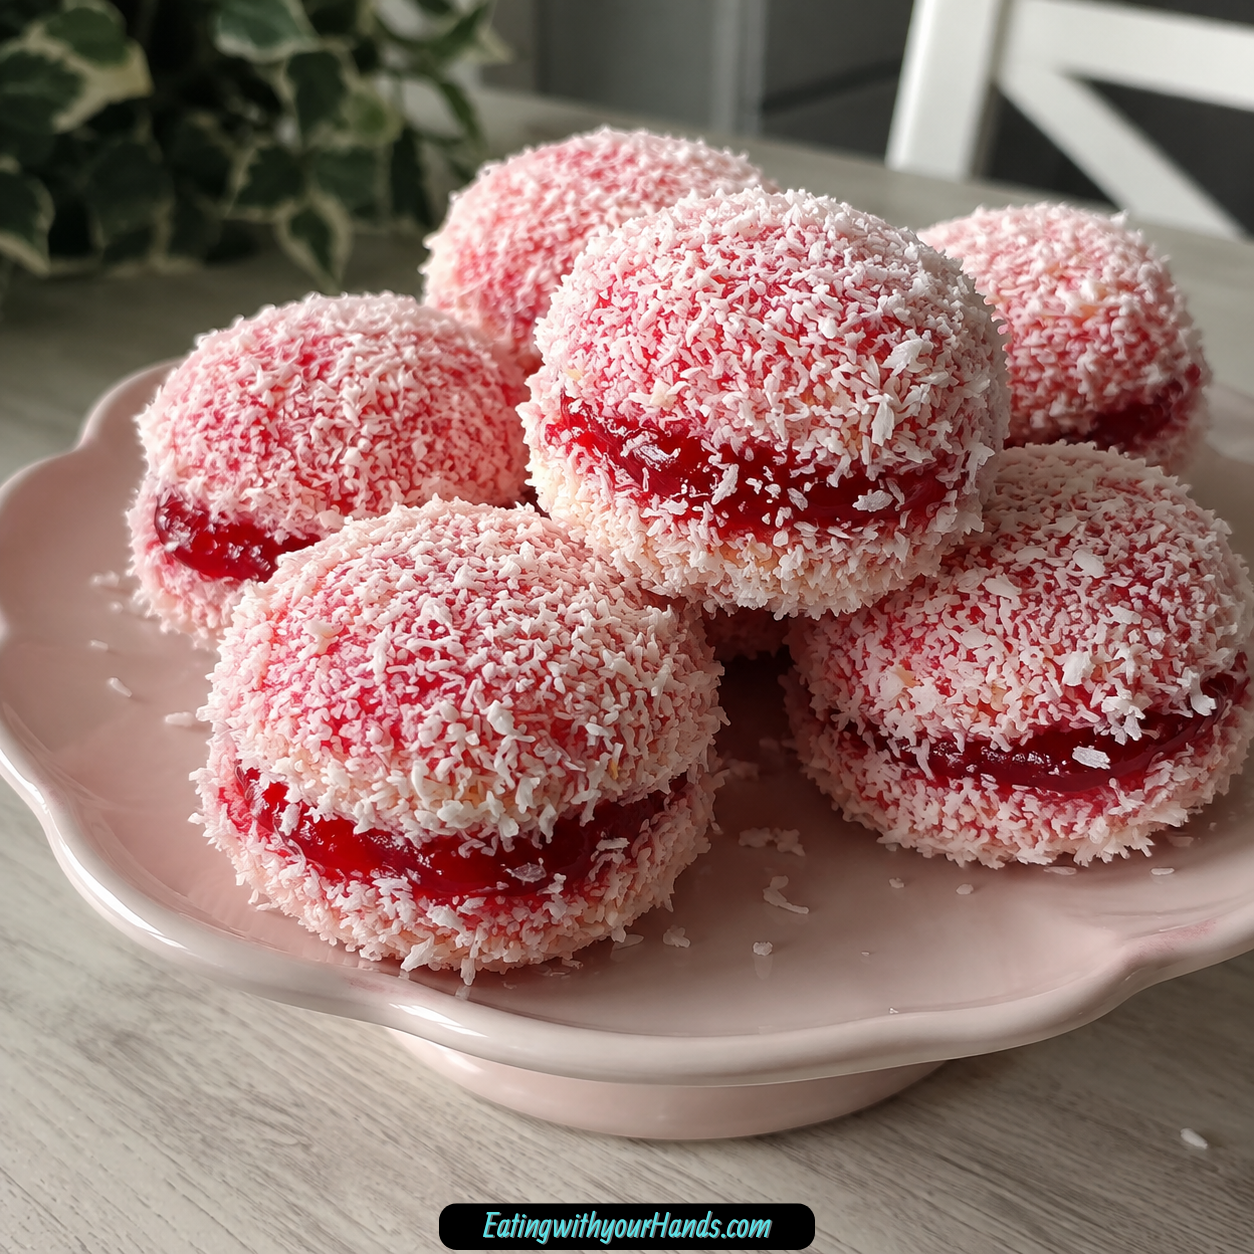
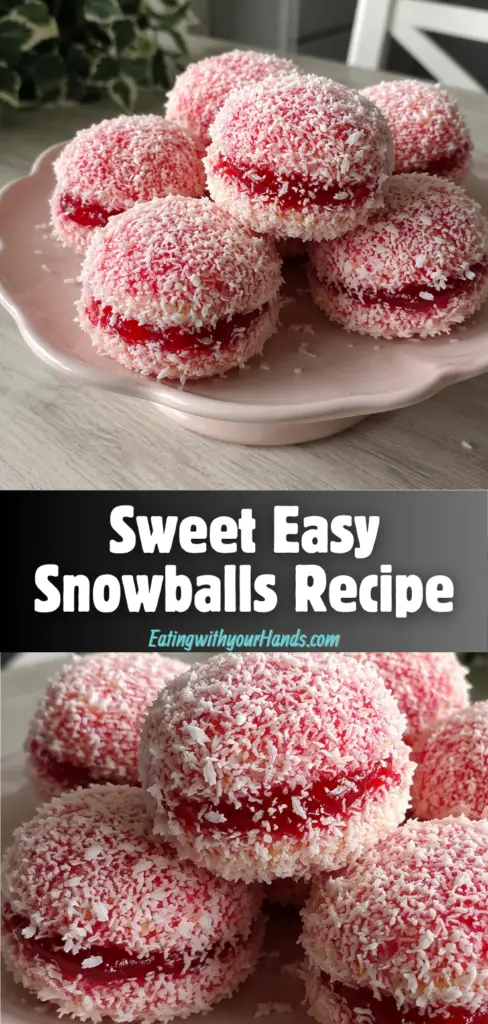
Sweet Easy Snowballs are the kind of cheerful homemade dessert that can turn a simple cake into something festive, soft, sweet, and surprisingly memorable. They have fluffy cake centers, a sweet syrup dip, a coconut coating that makes them look like tiny snow-covered treats, and just enough playful mess to make the process feel joyful.
I love recipes that begin with ordinary ingredients and end with something that looks like it belongs on a holiday tray. These snowballs start with a simple homemade cake, then each piece is dipped, coated, and joined into little coconut-covered bites that feel nostalgic and fun.
There is something especially charming about a dessert that invites people into the kitchen. Kids can help roll the syrupy cake pieces in coconut, adults can enjoy the old-fashioned sweetness, and everyone gets to sneak a little taste along the way.
These Easy Snowballs are wonderful for potlucks, birthday parties, cozy nights with tea, holiday platters, and family gatherings. They feel festive without being fussy, and they are just as welcome at a casual table as they are on a dessert spread.
The best part is how forgiving they are. If the cake pieces are neat squares, they look polished; if they are rustic chunks, they still taste soft, sweet, and coconutty.
Table of Contents
- Why You’ll Love This Recipe
- Recipe Details
- Ingredients
- Optional Swaps, Variations, Add-Ins, and Serving Ideas
- Why These Sweet Easy Snowballs Work
- Directions
- Step 1: Preheat the Oven
- Step 2: Grease and Flour the Pan
- Step 3: Beat the Eggs, Sugar, Vanilla, and Oil
- Step 4: Combine the Dry Ingredients
- Step 5: Alternate the Dry Ingredients and Milk
- Step 6: Pour the Batter Into the Pan
- Step 7: Bake the Cake for About 30 Minutes
- Step 8: Make the Syrup
- Step 9: Let the Cake Cool
- Step 10: Cut or Tear the Cake
- Step 11: Prepare the Coconut Coating
- Step 12: Dip the Cake Pieces in Syrup
- Step 13: Roll in Desiccated Coconut
- Step 14: Make the Icing Paste
- Step 15: Stick Two Pieces Together
- Step 16: Let the Snowballs Set
- Step 17: Serve and Enjoy
- Serving Ideas
- Storage
- Reheating
- Freezing
- Make-Ahead
- Helpful Notes for Best Results
- Variations
- Troubleshooting
- Frequently Asked Questions
- Why This Recipe Works So Well
- Final Thoughts
- Easy Snowballs
Why You’ll Love This Recipe
These Easy Snowballs truly live up to their name. The ingredients are simple, the method is approachable, and the final result looks much more special than the effort required.
They use basic pantry staples. Eggs, sugar, vanilla, oil, cake flour, baking powder, salt, milk, coconut, icing sugar, water, and food coloring come together into a fun dessert.
The prep has a big payoff. The cake bakes in about 30 minutes, and the assembly feels like edible arts and crafts.
They are crowd-pleasers. Kids love the coconut coating and sweet color, while adults often love the nostalgic homemade feeling.
They are also leftover-friendly. Day-old cake, pound cake, or sponge cake can be turned into snowballs with the syrup and coconut coating.
They are easy to adapt for different seasons. Use red syrup, green syrup, pastel colors, or no color at all for classic white snowballs.
Recipe Details
These snowballs begin with a cake baked at 180°C (350°F). A standard 9×13-inch baking pan should be greased and floured, or sprayed with baking spray.
The cake batter uses 4 large eggs, 1.5 cups sugar, 1 tablespoon vanilla essence, 1 cup oil, 2.5 cups cake flour, 3 teaspoons baking powder, ½ teaspoon salt, and 1 cup milk.
The syrup is made with 1.5 cups sugar, 1.5 cups water, and 2 teaspoons red food colour. The mixture is heated gently until the sugar dissolves completely.
The coating and assembly use 2–3 cups desiccated coconut, 1 cup sifted icing sugar, and 1–2 tablespoons hot water. The icing sugar and hot water make a thick, glue-like paste that helps stick two cake pieces together.
The cake bakes for about 30 minutes. It is done when the top is golden and a toothpick inserted into the center comes out clean.
After cooling, the cake is cut into small squares or torn into rustic chunks. Each piece gets a quick dip in syrup, a roll in coconut, and then two pieces can be joined together with the icing paste to form snowballs.
The finished snowballs should set for 10–15 minutes before serving. This gives the icing glue time to firm so the pieces hold together better.
Ingredients
Cake
4 large eggs
1.5 cups sugar
1 tablespoon vanilla essence
1 cup oil
2.5 cups cake flour
3 teaspoons baking powder
½ teaspoon salt
1 cup milk
Syrup
1.5 cups sugar
1.5 cups water
2 teaspoons red food colour
Icing and Assembly
2–3 cups desiccated coconut
1 cup icing sugar, sifted
1–2 tablespoons hot water
Ingredient Notes
Large eggs help give the cake structure and lift. Room temperature eggs work best for a fluffy texture, but cold eggs can still work in a pinch.
Granulated sugar sweetens the cake and also sweetens the syrup. This is a dessert built around soft, simple sweetness.
Vanilla essence gives the cake warm flavor. It makes the cake taste more complete before it is dipped and coated.
Oil keeps the cake moist without weighing it down. Vegetable or canola oil both work well.
Cake flour gives the cake a lighter texture than all-purpose flour. If needed, all-purpose flour can be substituted, but it should be sifted well.
Baking powder helps the cake rise. Fresh baking powder gives the best lift.
Salt balances the sweetness. Even a small amount helps the cake taste better.
Milk adds moisture to the batter. Whole milk gives the richest texture, but any milk you have can work.
Desiccated coconut creates the snowy coating. The more generously the cake pieces are coated, the more festive they look.
Icing sugar and hot water create a thick paste for joining the pieces. Sifting the icing sugar helps keep the paste smooth.
Optional Swaps, Variations, Add-Ins, and Serving Ideas
Color Variations
Red food colour gives these snowballs their festive look. You can swap it for green at Christmas, pastel colors for Easter, or any color that fits the occasion.
You can also skip the food coloring entirely. Plain white snowballs look classic and beautiful under their coconut coating.
For a natural tint, pomegranate juice can be used. The syrup will still taste sweet while giving a different color effect.
Flavor Boosts
Add a teaspoon of almond extract to the syrup for extra depth. This gives the snowballs a slightly richer flavor.
Citrus zest can also be added to the syrup for a brighter note. It makes the sweetness feel a little fresher.
A dash of cinnamon can be mixed into the coconut coating. This gives the outside a warm spice flavor.
Coconut-Free Coatings
If coconut is not your favorite, roll the pieces in crushed nuts. This gives the snowballs a crunchy coating.
Sprinkles can also be used for a party-style version. Finely chopped chocolate is another option for a richer finish.
Each coating changes the look and texture. The basic cake and syrup idea stays the same.
Grown-Up Version
Stir a tablespoon of rum or amaretto into the syrup. This gives the snowballs a more grown-up flavor.
Use just enough to make the flavor interesting. The goal is a gentle twist, not overpowering sweetness.
This variation is best for adult gatherings. Keep the classic version for kids and family trays.
Chocolate Version
Mix cocoa powder into the cake batter for a chocolate direction. This changes the snowballs into a richer dessert.
You can also drizzle melted chocolate over the finished snowballs. Chocolate sauce can be served on the side when plating.
This version works well for people who love chocolate and coconut together. It makes the dessert feel extra indulgent.
Shortcut Cake Option
Store-bought cake can be used if you want a faster version. Day-old pound cake or sponge cake works great.
If using store-bought cake, skip straight to the syrup-dipping step. This makes the recipe even more convenient.
Leftover cake also works beautifully. These snowballs are a great way to revive day-old baked goods.
Why These Sweet Easy Snowballs Work
These snowballs work because they take simple cake and transform it through syrup, coconut, and icing. The cake gives softness, the syrup adds sweetness and color, and the coconut creates the snowy texture.
The cake itself is light but sturdy enough to cut and dip. Oil keeps it moist, while cake flour helps the crumb stay tender.
The syrup should be sweet and smooth, but it does not need to boil aggressively. Heating gently until the sugar dissolves is enough.
A quick dip is important. The cake should absorb sweetness without becoming mushy or falling apart.
The coconut coating adds texture and makes the snowball look complete. It covers the syrupy outside and gives every bite a little chew.
The icing paste works like edible glue. It holds two pieces together so the dessert looks like a small snowball instead of a single cake cube.
Directions
Step 1: Preheat the Oven
Preheat your oven to 180°C (350°F). This gives the cake a steady baking temperature so it can rise and bake evenly.
Let the oven heat fully before adding the pan. A properly preheated oven helps the cake bake in about 30 minutes.
While the oven warms, prepare the baking pan. This makes the batter-to-oven step smooth and simple.
Step 2: Grease and Flour the Pan
Grease and flour a standard 9×13-inch baking pan. This helps prevent the cake from sticking after baking.
If you prefer a quicker option, use baking spray. Either method helps the cake release more easily.
Make sure the corners and sides are coated. A stuck cake can be harder to cut into neat pieces.
Step 3: Beat the Eggs, Sugar, Vanilla, and Oil
In a large bowl, beat together 4 large eggs, 1.5 cups sugar, 1 tablespoon vanilla essence, and 1 cup oil. Mix until creamy and well combined.
The mixture should look pale and slightly fluffy. This creates a soft beginning for the cake batter.
You can use a whisk and some effort if you do not want to use a mixer. No fancy equipment is required.
Step 4: Combine the Dry Ingredients
In another bowl, mix 2.5 cups cake flour with 3 teaspoons baking powder and ½ teaspoon salt. Stir until evenly combined.
This helps spread the baking powder and salt throughout the flour. Even mixing supports a better rise and balanced flavor.
If substituting all-purpose flour, sift it well. Sifting helps keep the texture lighter.
Step 5: Alternate the Dry Ingredients and Milk
Add the flour mixture and 1 cup milk to the egg mixture in alternating additions. Start and end with the dry ingredients.
Mix just until smooth after each addition. The goal is a batter with no visible flour streaks.
Do not overmix. Overmixing can make the cake less tender.
Step 6: Pour the Batter Into the Pan
Pour the batter into the prepared 9×13-inch pan. Spread it evenly into the corners.
An even layer helps the cake bake at the same pace throughout. It also makes cutting easier later.
Smooth the top gently if needed. The cake will rise and bake into a soft sheet.
Step 7: Bake the Cake for About 30 Minutes
Bake the cake for about 30 minutes. The top should look golden when it is done.
Check the center with a toothpick. If the toothpick comes out clean with no wet batter clinging to it, the cake is ready.
Do not overbake if you can avoid it. A moist cake makes better snowballs.
Step 8: Make the Syrup
While the cake bakes, add 1.5 cups sugar, 1.5 cups water, and 2 teaspoons red food colour to a saucepan. Stir gently.
Heat the mixture until the sugar dissolves completely. There is no need to boil it heavily.
The syrup should be smooth and sweet. Let it cool slightly before dipping the cake pieces.
Step 9: Let the Cake Cool
Once the cake is baked, let it cool before cutting or tearing it. Warm cake is more delicate and can fall apart too easily.
Patience helps here. Cooled cake is easier to handle during dipping and rolling.
The cake does not have to be cold, but it should not be hot. Tender cake pieces need gentle handling.
Step 10: Cut or Tear the Cake
Cut the cooled cake into small squares. You can also tear it into rustic chunks.
Neat squares give a more polished look. Rustic chunks still taste wonderful once coated in coconut.
Try to keep the pieces similar in size if you plan to join them into snowballs. Similar sizes stick together more neatly.
Step 11: Prepare the Coconut Coating
Pour 2–3 cups desiccated coconut into a shallow bowl or dish. Keep it close to the syrup.
Having the coconut ready makes dipping and rolling easier. The cake pieces should go into the coconut soon after touching the syrup.
Use plenty of coconut so the pieces can be fully coated. The coating is what gives them their snowy look.
Step 12: Dip the Cake Pieces in Syrup
Dip each cake piece quickly into the syrup. The goal is to soak up sweetness without turning the cake mushy.
Handle each piece gently. The cake is tender, especially after touching syrup.
Let any excess syrup drip off briefly. Then move the piece straight to the coconut.
Step 13: Roll in Desiccated Coconut
Roll each syrup-dipped piece in desiccated coconut until fully coated. Press lightly if needed so the coconut sticks.
The coconut coating adds texture and prevents the pieces from feeling too sticky. It also makes them look like little snowballs.
Continue dipping and rolling until all cake pieces are coated. Keep the process gentle and steady.
Step 14: Make the Icing Paste
Sift 1 cup icing sugar into a bowl. Add 1–2 tablespoons hot water and mix until thick like glue.
Start with less water and add more only if needed. The paste should be thick enough to hold two cake pieces together.
If the icing becomes too runny, add more sifted icing sugar a tablespoon at a time. If it is too thick, loosen it with a few drops of hot water.
Step 15: Stick Two Pieces Together
Use the thick icing paste to stick two coconut-coated cake pieces together. Press gently so they hold.
This creates the snowball shape. The icing acts as the edible glue.
Do not use too much icing, or the pieces may slide. A small thick layer is enough.
Step 16: Let the Snowballs Set
Place the finished snowballs on a tray and let them set for 10–15 minutes. This gives the icing time to firm.
The setting time helps the snowballs stay together when served. It also gives the coating time to settle.
Do not rush to move them too much while they are setting. They are sturdier after a short rest.
Step 17: Serve and Enjoy
Serve the Easy Snowballs once they have firmed up. They can be enjoyed fresh, chilled, or at room temperature.
For a pretty finish, dust the tray with extra icing sugar. This gives them an extra snowy look.
They are sweet, soft, coconutty, and fun to eat. Make extra if serving a group, because they tend to disappear quickly.
Serving Ideas
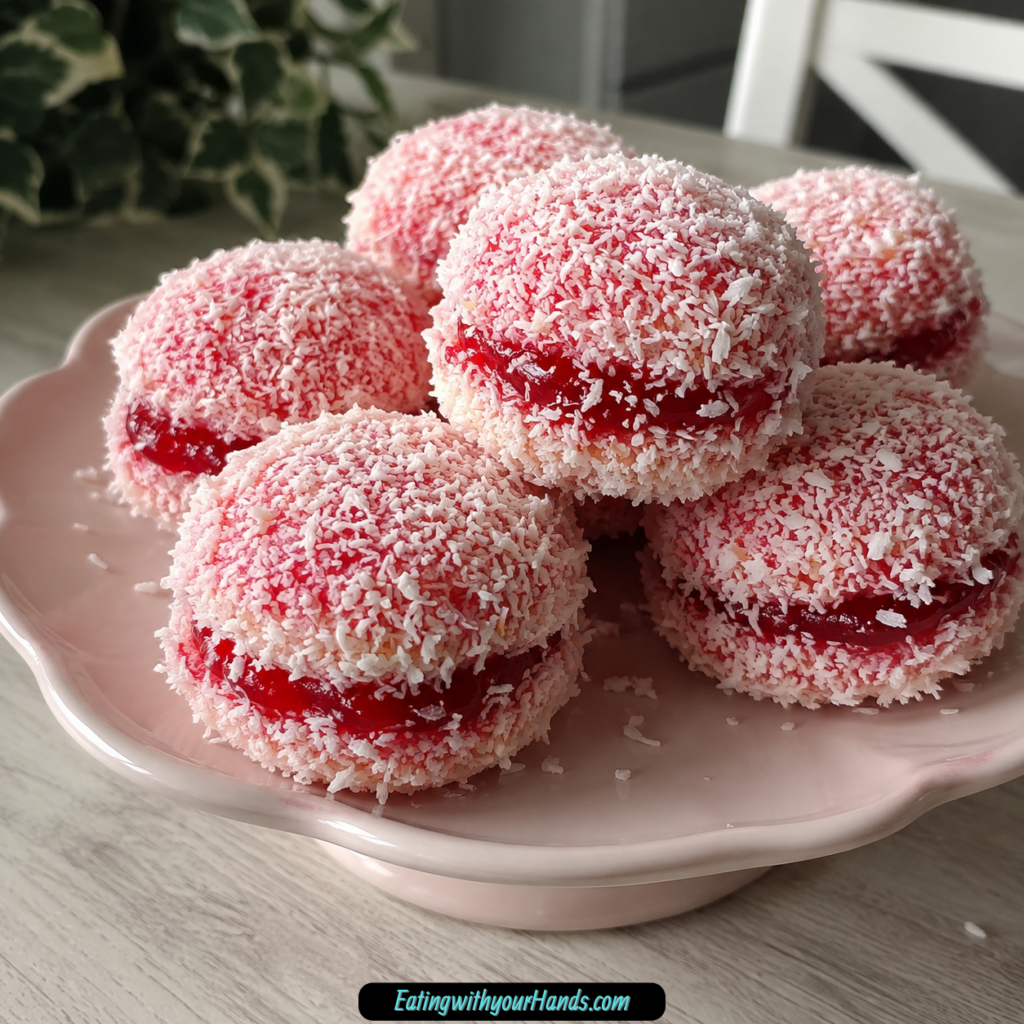
Serve Sweet Easy Snowballs on a pretty tray with a dusting of extra icing sugar. The snowy look makes them perfect for holidays and parties.
They are delicious as a standalone dessert. They also pair nicely with a scoop of vanilla ice cream or a drizzle of chocolate sauce.
Serve them with coffee or tea for a cozy treat. Their soft cake and coconut coating make them especially nice with a warm drink.
Kids love them at birthday parties. Adults enjoy the nostalgic sweetness and the fun coconut texture.
They can be served fresh, chilled, or at room temperature. Choose the texture you like best.
Storage
Store Easy Snowballs in an airtight container at room temperature for up to 2 days. Keep them covered so they stay fresh.
For longer storage, refrigerate them for up to 1 week. Let them come to room temperature before serving so the coconut stays fluffy.
Layer them with parchment paper in the container to prevent sticking. This is especially helpful if the snowballs are stacked.
The coconut may soften slightly over time, but the flavor stays delicious. Keep the container closed between servings.
Reheating
These snowballs do not need reheating. They are meant to be served fresh, chilled, or at room temperature.
If refrigerated, let them sit at room temperature before serving. This helps the texture soften slightly.
Do not microwave them. Heat can affect the syrup, icing, and coconut coating.
Room-temperature serving gives the best balance of soft cake and coconut texture. Chilled snowballs are also refreshing.
Freezing
Easy Snowballs can be frozen for up to 1 month. Freeze them in a single layer first, then transfer them to a container.
Freezing in a single layer helps keep them from sticking together. Once firm, they can be stored more easily.
Thaw them in the refrigerator overnight before serving. Let them come closer to room temperature if you want a softer bite.
Layer with parchment paper if storing in a container. This helps protect the coconut coating.
Make-Ahead
These snowballs are a great make-ahead dessert. You can prepare them before a party and store them at room temperature for 2 days or in the refrigerator for up to 1 week.
If making them far ahead, freeze them for up to 1 month. Thaw in the refrigerator overnight before serving.
The cake can also be baked ahead and turned into snowballs later. Day-old cake works very well for this recipe.
This make-ahead flexibility makes them useful for holidays, potlucks, birthdays, and dessert trays. They are simple to store and easy to serve.
Helpful Notes for Best Results
The cake pieces should be moist but not swimming in syrup. A quick dip is enough.
Handle the cake pieces gently when dipping. They are tender and can break if treated roughly.
If the cake crumbles while cutting, do not worry. Rustic chunks still taste amazing once rolled in coconut.
If the syrup tastes too sweet for your preference, reduce the sugar by a quarter cup. The dessert will still be sweet.
For allergy-friendly swaps, try gluten-free cake flour or almond milk if needed. The texture may change slightly.
If watching sugar, use a light dusting of powdered sugar instead of the icing glue. The snowballs may be a little less sturdy.
Sift the icing sugar before mixing with hot water. This keeps the icing glue smooth.
Variations
Classic White Snowballs
Skip the food coloring for a classic white snowball look. The coconut coating gives them a clean snowy finish.
This version is simple and elegant. It works beautifully for winter gatherings.
Christmas Snowballs
Use green food coloring in the syrup. The color makes the dessert feel festive.
Serve them on a holiday tray with extra icing sugar dusted around them. They look cheerful and seasonal.
Easter Snowballs
Use pastel food coloring for spring. Soft pink, yellow, green, or blue tones make them fun for Easter.
The coconut coating keeps the look sweet and delicate. Pastel colors make them especially pretty for dessert tables.
Almond Snowballs
Add a teaspoon of almond extract to the syrup. This gives the dessert extra depth.
Almond flavor pairs well with cake and coconut. It makes the snowballs taste a little richer.
Citrus Snowballs
Add citrus zest to the syrup. This gives the sweetness a brighter flavor.
Citrus works well when you want the snowballs to feel less heavy. It adds a fresh note.
Cinnamon Coconut Snowballs
Add a dash of cinnamon to the coconut coating. This gives the outside a warm spice flavor.
This variation is especially nice for cozy gatherings. It pairs well with tea or coffee.
Nut-Coated Snowballs
Roll the syrup-dipped cake pieces in crushed nuts instead of coconut. This gives a crunchy coating.
This is a good option for people who do not love coconut. It changes the texture but keeps the same dessert idea.
Sprinkle Snowballs
Roll the pieces in sprinkles for a party look. This variation is fun for birthdays.
Use colors that match the occasion. The snowballs become bright and playful.
Chocolate Snowballs
Mix cocoa powder into the cake batter for a chocolate version. You can also drizzle melted chocolate over the finished snowballs.
Chocolate sauce can be served on the side, too. This version is rich and fun for chocolate lovers.
Rum or Amaretto Snowballs
Stir a tablespoon of rum or amaretto into the syrup. This creates a grown-up version.
Use this variation for adult gatherings. Keep the classic version separate for kids.
Troubleshooting
Why Are My Snowballs Falling Apart?
The icing paste may be too thin, or the snowballs may not have set long enough. The icing should be thick like glue.
Let the snowballs rest for 10–15 minutes before serving. This gives the icing time to firm up.
Why Did My Cake Turn Mushy?
The cake pieces may have soaked too long in syrup. Use a quick dip instead of letting them sit in the syrup.
The cake should be moist, not saturated. Let excess syrup drip off before rolling in coconut.
Why Is My Icing Too Runny?
Add more sifted icing sugar, one tablespoon at a time. Mix until the icing becomes thick like glue.
If the icing becomes too thick, add a few drops of hot water. Adjust slowly.
Why Is the Coconut Not Sticking?
The cake may not have enough syrup on the outside. Dip quickly, then roll in coconut right away.
Press lightly if needed. The coconut should cling to the syrupy surface.
Why Is My Cake Crumbling?
The cake may be too warm, or it may be very tender. Let it cool before cutting.
Even if it crumbles, rustic chunks can still be used. Once coated, they still taste delicious.
Frequently Asked Questions
Can I Use Store-Bought Cake Instead of Baking My Own?
Yes, store-bought cake can be used. Day-old pound cake or sponge cake works great.
If using store-bought cake, skip straight to the syrup-dipping step. This makes the recipe even easier.
How Long Do Easy Snowballs Stay Fresh?
They are best within 2 days at room temperature when covered. They can last up to 1 week in the refrigerator.
The coconut may lose a little crunch over time, but the flavor stays delicious. Let chilled snowballs come to room temperature before serving.
What If I Do Not Have Food Coloring?
You can skip the food coloring for classic white snowballs. You can also use a fruit juice like pomegranate for a natural tint.
The syrup will still taste sweet without color. The coconut coating will still create the snowy look.
Can I Freeze Easy Snowballs?
Yes, freeze them in a single layer first, then transfer them to a container. They can be frozen for up to 1 month.
Thaw them in the refrigerator overnight. They will be ready to serve once thawed.
Why Is My Icing Too Runny?
Add more sifted icing sugar, a tablespoon at a time, until it is thick like glue. This helps the snowballs hold together.
If the icing is too thick, add a few drops of hot water. Adjust slowly so it does not become runny again.
Can I Make These With Leftover Cake?
Yes, leftover cake works very well. Stale or day-old cake can be revived with syrup and coconut.
Cut or tear the cake into pieces, dip quickly, roll in coconut, and join with icing. It is a practical way to turn leftovers into dessert.
Can I Make These Allergy-Friendly?
You can try gluten-free cake flour or almond milk if needed. The texture may change, but the idea remains the same.
If watching sugar, use a light dusting of powdered sugar instead of icing glue. The snowballs may be less sturdy.
Why This Recipe Works So Well
Sweet Easy Snowballs work because they turn simple cake into a festive handheld dessert. The process adds moisture, color, texture, and shape without requiring complicated decorating.
The cake is soft and lightly flavored with vanilla. Oil and milk help keep it tender enough to soak up syrup.
The syrup gives sweetness and color. A quick dip coats the cake without making it fall apart.
The desiccated coconut adds the snowy look and a gentle chewy texture. It also keeps the outside from feeling sticky.
The icing glue helps two pieces become one snowball. Once set, the dessert becomes easy to pick up and serve.
The recipe also works because it is flexible. You can change the color, flavor the syrup, use leftover cake, swap the coating, or make a grown-up version with rum or amaretto.
Final Thoughts
Sweet Easy Snowballs are simple, cheerful, and full of that homemade dessert magic that makes people smile before they even take a bite. They are soft inside, sweet from the syrup, coated in coconut, and shaped into little treats that feel festive without requiring difficult decorating.
I love how they welcome a little mess. Coconut-covered fingers, bright syrup, soft cake pieces, and thick icing glue are all part of the fun.
Make them for potlucks, birthdays, holidays, cozy nights, or whenever leftover cake needs a second life. Whether you keep them classic, make them colorful, add almond extract, drizzle chocolate, or serve them with tea, these snowballs prove that easy desserts can still feel special.
Easy Snowballs
These Easy Snowballs are soft, sweet cake treats dipped in red syrup, rolled in desiccated coconut, and shaped into pretty snowball-style desserts. With a tender vanilla cake base, a bright syrup coating, and a simple icing paste to hold everything together, they make a fun dessert for parties, holidays, afternoon tea, or family gatherings.
Recipe Details
- Prep Time: 20 minutes
- Cook Time: 30 minutes
- Total Time: 50 minutes
- Course: Dessert
- Servings: 12 snowballs
Ingredients
For the Cake
- 1 cup milk
- 1 cup oil
- 1 tablespoon vanilla essence
- 4 large eggs
- 1.5 cups sugar
- 2.5 cups cake flour
- 3 teaspoons baking powder
- 0.5 teaspoon salt
For the Syrup
- 2-3 cups desiccated coconut
- 2 teaspoons red food colour
- 1.5 cups water
- 1.5 cups sugar
For the Icing
- 1-2 tablespoons hot water
- 1 cup icing sugar sifted
Instructions
Step 1: Prepare the Oven and Pan
Preheat the oven to 180°C (350°F). Grease and flour a baking pan.
Step 2: Mix the Wet Cake Ingredients
In a bowl, beat the eggs, sugar, vanilla essence, and oil until well combined.
Step 3: Finish the Cake Batter
Add the cake flour, baking powder, and salt to the mixture, alternating with the milk. Mix until the batter is smooth.
Step 4: Bake the Cake
Pour the batter into the prepared pan and bake for 30 minutes, or until a toothpick inserted comes out clean.
Step 5: Prepare the Red Syrup
While the cake is baking, prepare the syrup. In a saucepan, combine the sugar, water, and red food colour. Heat until the sugar dissolves, then set the syrup aside to cool.
Step 6: Cut the Cake
Once the cake is baked and cooled, cut it into small pieces.
Step 7: Coat with Syrup and Coconut
Dip each cake piece into the cooled syrup, then roll it in desiccated coconut until coated.
Step 8: Make the Icing Paste
Mix the sifted icing sugar with hot water to form a thick paste.
Step 9: Shape the Snowballs
Use the icing paste to join the cake pieces into snowball shapes.
Step 10: Let Set and Serve
Allow the snowballs to set before serving.
Notes
Store the snowballs in an airtight container to keep them fresh.
Serving Suggestions
- Serve on a dessert tray for parties, holidays, or family gatherings.
- Pair with hot tea, coffee, or cold milk.
- Add to a sweet table with cookies, cakes, or other small desserts.
- Serve as a colorful treat for afternoon tea.
- Arrange in paper cups for neat individual servings.
Storage
How to Store
Store the snowballs in an airtight container to keep them fresh.
Best Texture Tip
Allow the snowballs to set before serving so the icing paste can help hold the cake pieces together.
Serving Tip
Keep the snowballs covered until serving so the coconut coating stays soft and the cake does not dry out.

Fernando is the creator and writer behind the food blog Eating with your Hands. Living and working in cities like Paris, Barcelona, and Berlin, and being married to a Canadian foodie, has given Fernando a passion and interest in food and inspired him to run EWYH.