
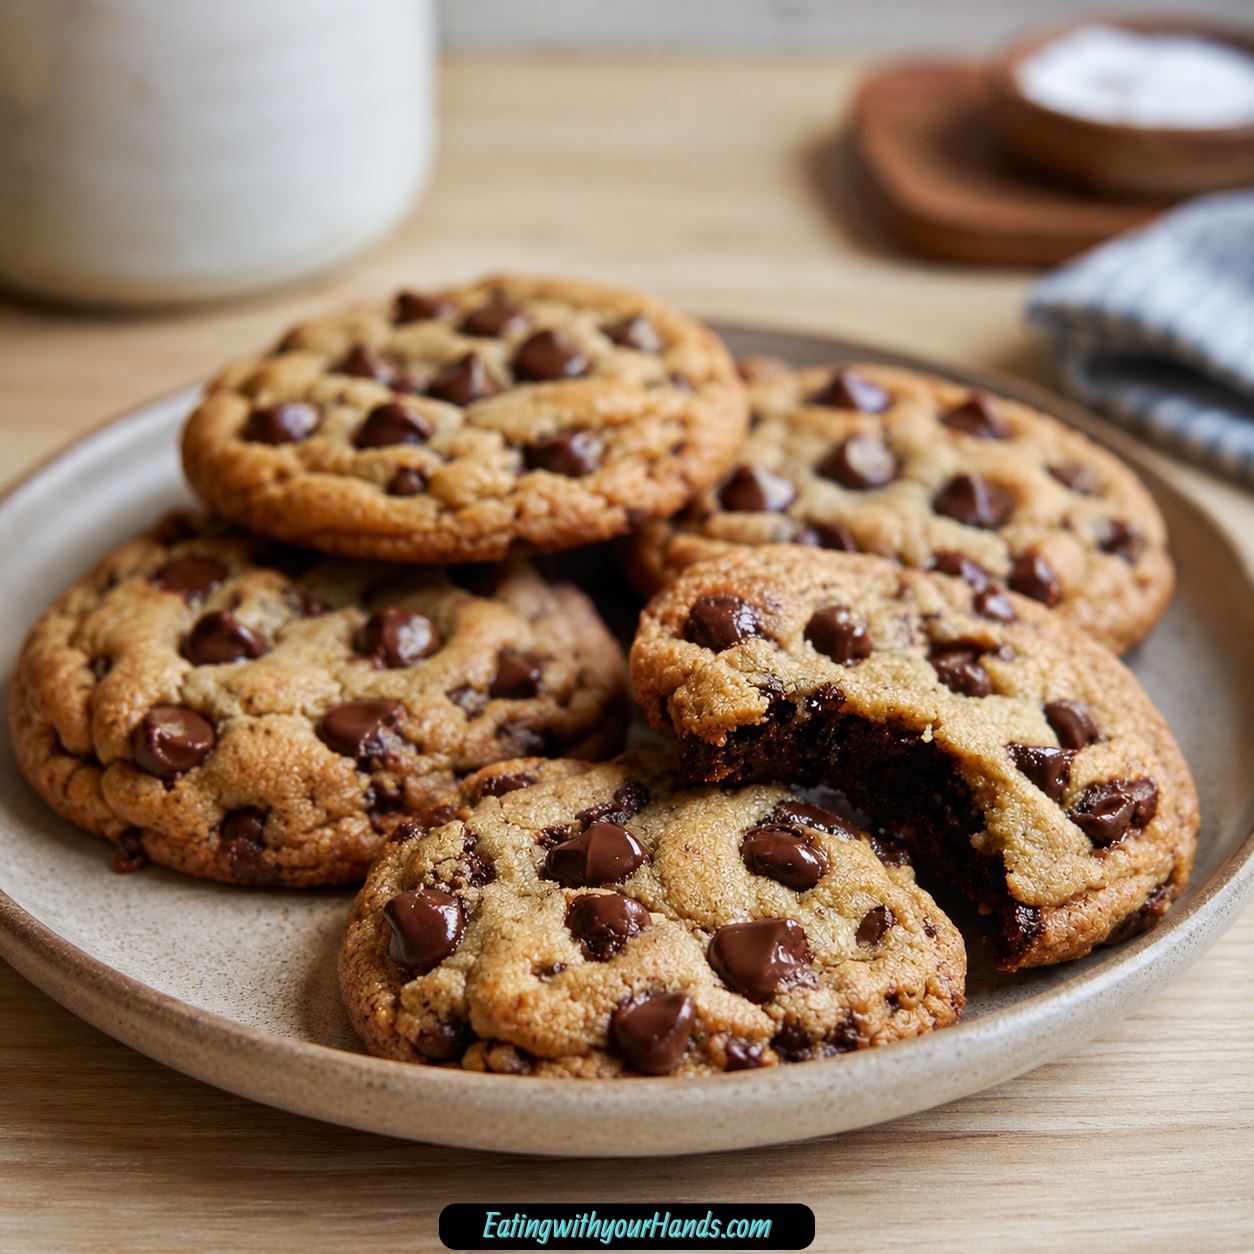
There are some recipes that feel less like instructions and more like memories you can bake. Chocolate chip cookies belong in that category, because almost everyone has a version of them tucked somewhere in childhood, family kitchens, late-night cravings, school bake sales, or the smell of butter and vanilla drifting through the house.
These chocolate chip cookies are soft and chewy in the center, lightly crisp at the edges, and filled with enough chocolate to make every bite feel generous. They are the kind of cookie that bends slightly when you break one open, with warm chocolate pockets hiding inside a buttery, golden dough.
What makes this recipe so dependable is the balance of simple ingredients and careful details. Cold cubed butter helps the cookies bake thick and chewy, cornstarch gives them a softer bakery-style texture, and the cookies are pulled from the oven while the centers still look slightly underbaked.
This is not a fussy cookie recipe. It uses pantry staples, comes together with basic mixing, and still tastes like the cookie people hope to find on a dessert table.
Whether you are baking for a party, a school event, a weekend treat, a late-night craving, or just because the kitchen feels too quiet without cookies in it, this is the kind of chocolate chip cookie recipe that brings comfort quickly. It is classic, rich, reliable, and full of that nostalgic homemade sweetness that never really gets old.
Table of Contents
- Why You’ll Love The Best Chocolate Chip Cookies
- Recipe Details
- Ingredients
- Optional Variations and Swaps
- The Nostalgic Charm of a Great Chocolate Chip Cookie
- Why Cold Butter Works
- Why Cornstarch Matters
- Directions
- Step 1: Preheat the Oven
- Step 2: Prepare the Baking Sheets
- Step 3: Cube the Cold Butter
- Step 4: Add the Sugars
- Step 5: Cream the Butter and Sugars
- Step 6: Add the Eggs One at a Time
- Step 7: Add the Vanilla Extract
- Step 8: Whisk the Dry Ingredients
- Step 9: Add the Dry Ingredients Gradually
- Step 10: Fold in the Chocolate Chips
- Step 11: Check the Dough
- Step 12: Scoop the Dough
- Step 13: Space the Cookies
- Step 14: Bake the Cookies
- Step 15: Do Not Overbake
- Step 16: Cool on the Baking Sheet
- Step 17: Transfer to a Wire Rack
- Step 18: Repeat With Remaining Dough
- Step 19: Optional Sea Salt Finish
- Step 20: Serve or Store
- Serving Suggestions
- Storage
- Freezing Baked Cookies
- Freezing Raw Dough
- Refrigerating the Dough
- Helpful Notes for Best Results
- Variations
- Troubleshooting
- Frequently Asked Questions
- Why These Cookies Work for Any Occasion
- Why This Recipe Works So Well
- Final Thoughts
- The Best Chocolate Chip Cookies
Why You’ll Love The Best Chocolate Chip Cookies
These cookies have the texture people dream about in a classic chocolate chip cookie. The centers are chewy and soft, while the edges bake with just enough crispness to give every bite contrast.
They are simple to make. There are no unusual ingredients, no complicated shaping, and no difficult decorating steps.
The chocolate level is generous. With 2 to 2 ½ cups semi-sweet or mixed chocolate chips, every cookie gets plenty of melty chocolate.
Cold butter helps create a thicker cookie. It keeps the dough sturdy and supports that soft, chewy center.
Cornstarch is the quiet secret. It helps give the cookies a tender bakery-style chew without making them heavy.
The recipe is flexible, too. You can add nuts, make a double chocolate version, sprinkle with flaky sea salt, use pretzel pieces, add toffee bits, or even mix in crushed potato chips for salty-sweet crunch.
Recipe Details
- Recipe name: The Best Chocolate Chip Cookies
- Oven temperature: 375°F (190°C)
- Baking time: 8 to 10 minutes
- Cooling time on baking sheet: 5 minutes
- Butter temperature: Cold and cubed
- Chocolate amount: 2 to 2 ½ cups semi-sweet or mixed chocolate chips
- Optional dough chill: 30 minutes before baking
- Refrigerator dough storage: Up to 3 days
- Room temperature cookie storage: Up to 5 days
- Freezer storage for baked cookies: Up to 3 months
- Reheating frozen baked cookies: 300°F for 5 minutes
- Frozen dough baking: Bake from frozen and add 1 to 2 extra minutes
Ingredients
Butter
- 1 cup cold butter, cubed
Sugars
- 1 cup packed brown sugar
- ¾ cup granulated sugar
Eggs and Vanilla
- 2 large eggs
- 2 teaspoons pure vanilla extract
Dry Ingredients
- 2 ¾ cups all-purpose flour
- 1 teaspoon cornstarch
- ¾ teaspoon baking soda
- ¾ teaspoon salt
Chocolate Chips
- 2 to 2 ½ cups semi-sweet or mixed chocolate chips
Optional Variations and Swaps
- Microwave cold butter cubes for 7 to 8 seconds for thinner, crispier cookies
- Replace 1 cup all-purpose flour with 1 cup cake flour and use 1 ¾ cups all-purpose flour for extra tenderness
- 1 cup chopped walnuts
- 1 cup chopped pecans
- ½ cup cocoa powder in place of ½ cup flour for double chocolate cookies
- Dark chocolate chips
- Flaky sea salt
- Pretzel pieces
- Toffee bits
- Crushed potato chips
- Kosher salt, 1 ¼ teaspoons if replacing regular salt
- Extra 2 tablespoons flour if replacing 1 tablespoon cornstarch
- Vanilla ice cream
- Caramel for sundaes
- Powdered sugar for serving
The Nostalgic Charm of a Great Chocolate Chip Cookie
A good chocolate chip cookie does not need to be complicated to feel special. It only needs to have the right balance of butter, sugar, vanilla, salt, flour, and chocolate.
This recipe leans into that classic comfort while using a few smart details to improve the texture. Cold butter keeps the dough from spreading too quickly, and cornstarch helps create that soft chew people often associate with bakery cookies.
The brown sugar gives the dough warmth and moisture. Granulated sugar adds sweetness and helps the edges bake with a slight crisp.
Vanilla matters here because the ingredient list is simple. A good pure vanilla extract gives the dough a fuller, warmer flavor.
The chocolate chips make the cookie feel generous. Using semi-sweet or a mix of semi-sweet and milk chocolate gives every bite a little surprise.
The final cookie should feel familiar but better than ordinary. It should have a soft middle, a golden edge, and enough chocolate to make you pause after the first bite.
Why Cold Butter Works
Cold butter is one of the most important details in this recipe. It helps create thick, chewy cookies instead of thin, flat ones.
The butter should be cubed before mixing. Smaller cubes are easier to beat into the sugars, even when the butter starts cold.
As the cold butter mixes with the brown sugar and granulated sugar, it slowly softens into a creamy base. This takes a little patience, but it is worth it.
If you prefer thinner and crispier cookies, the notes say you can microwave the butter cubes for 7 to 8 seconds first. The butter should not melt.
Melted butter creates a different cookie. It makes the dough spread more and can lead to thinner, crispier cookies than this recipe is meant to produce.
For the thick and chewy result, keep the butter cold. Let the mixer do the work.
Why Cornstarch Matters
Cornstarch may sound like a small ingredient, but it has a real job in this recipe. It helps create a softer, chewier cookie.
Only 1 teaspoon is used. That small amount supports the bakery-style texture without changing the flavor.
Cornstarch makes the cookie crumb more tender. It gives the center a soft bite while still allowing the edges to set.
The recipe notes that cornstarch should not be skipped if you want the intended texture. It is described as the secret weapon for chewiness.
If you do not have cornstarch, the substitution note says to use 2 tablespoons of flour for 1 tablespoon of cornstarch in the recipe. Since this recipe uses 1 teaspoon cornstarch, the texture may change if adjusted, but the note explains the general swap.
The best result comes from using the cornstarch as written. It is one of the details that helps these cookies feel special.
Directions
Step 1: Preheat the Oven
Preheat your oven to 375°F (190°C). Let it fully heat before baking the cookies.
This higher cookie temperature helps the edges set while the centers stay soft. Starting with a properly heated oven gives the cookies their best texture.
While the oven warms, set out your baking sheets, mixing bowl, mixer, spatula, measuring cups, and cooling rack. A little preparation makes the cookie process smoother.
Step 2: Prepare the Baking Sheets
Use baking sheets that are clean and ready for dough. The source notes that greasing is not necessary.
If you are worried about sticking, line the baking sheets with parchment paper or a silicone baking mat. This makes cleanup easier.
Set the prepared sheets aside. The dough will be scooped onto them once mixed.
Step 3: Cube the Cold Butter
Take 1 cup cold butter and cut it into cubes. Keep the butter cold for thick and chewy cookies.
Cold butter takes a little more mixing, but it helps the cookies hold their shape. It is part of what gives them that bakery-style texture.
If you prefer thinner, crispier cookies, microwave the cubes for 7 to 8 seconds first. Be careful not to melt them.
Step 4: Add the Sugars
Place the cold cubed butter into a large mixing bowl. Add 1 cup packed brown sugar and ¾ cup granulated sugar.
Pack the brown sugar firmly into the measuring cup. This gives the cookies their caramel-like depth and moisture.
Granulated sugar adds classic sweetness and helps the edges crisp slightly. The two sugars work together for balance.
Step 5: Cream the Butter and Sugars
Beat the cold butter and sugars together on medium speed for about 2 to 3 minutes. Use a hand mixer or stand mixer.
At first, the cold butter may resist mixing. Keep going until the mixture becomes lighter and fluffier.
Do not rush this step. Proper creaming helps build the cookie texture and blends the sugars evenly into the butter.
Step 6: Add the Eggs One at a Time
Add 2 large eggs, one at a time. Mix well after each addition.
Room-temperature eggs are ideal, but the notes say cold eggs can work in a pinch. The important part is mixing them in fully.
Adding the eggs one at a time helps the dough base stay smoother. It also makes the mixture easier to combine evenly.
Step 7: Add the Vanilla Extract
Pour in 2 teaspoons pure vanilla extract. Mix for about 30 seconds.
Vanilla gives the dough warmth and depth. The source notes that pure vanilla is worth using here.
After mixing, the dough base should look smooth and creamy. Scrape the bowl if needed before adding the dry ingredients.
Step 8: Whisk the Dry Ingredients
In a separate bowl, whisk together 2 ¾ cups all-purpose flour, 1 teaspoon cornstarch, ¾ teaspoon baking soda, and ¾ teaspoon salt.
Whisking is important because it spreads the cornstarch, baking soda, and salt evenly through the flour. This helps prevent clumps or uneven flavor.
Make sure there are no visible pockets of baking soda. Even mixing helps the cookies bake consistently.
Step 9: Add the Dry Ingredients Gradually
Gradually add the dry ingredients to the butter mixture. Mix on low speed.
Stop mixing as soon as the flour disappears. Overmixing can make the cookies tough.
The dough should look thick and soft. It should be sturdy enough to scoop and hold chocolate chips.
Step 10: Fold in the Chocolate Chips
Add 2 to 2 ½ cups semi-sweet or mixed chocolate chips. Fold them in gently with a spatula.
Using a spatula helps distribute the chocolate without overworking the dough. Every scoop should have chocolate throughout.
You can use semi-sweet, milk chocolate, mixed chips, or chunks if you want a fancier texture. The recipe allows you to choose.
Step 11: Check the Dough
The dough should be thick, chocolate-studded, and scoopable. It should not be runny.
If your kitchen is hot or the dough feels soft, you can chill it for 30 minutes. This helps prevent overspreading and increases chewiness.
If baking right away, move on to scooping. The recipe works without required chilling.
Step 12: Scoop the Dough
Use a tablespoon or cookie scoop to drop mounds of dough onto the prepared baking sheets. Keep the portions similar in size.
A tablespoon scoop gives standard cookies. Larger scoops can be used for bakery-style cookies, but they need 1 to 2 extra minutes of baking time.
Leave the dough mounds slightly rounded. This helps the cookies bake with soft centers.
Step 13: Space the Cookies
Place the dough mounds about 2 inches apart. The cookies will spread as they bake.
Do not crowd the baking sheet. Crowding can cause cookies to merge and bake unevenly.
If needed, bake in batches. A little space helps the edges brown properly.
Step 14: Bake the Cookies
Bake at 375°F (190°C) for 8 to 10 minutes. Choose the timing based on your texture preference.
For softer cookies, bake closer to 8 minutes. For crispier edges and a firmer bite, bake closer to 10 minutes.
Watch the edges carefully. The cookies are ready when the edges are golden brown and the centers still look slightly underbaked.
Step 15: Do Not Overbake
Do not wait for the centers to look fully done. They will continue cooking slightly on the hot tray.
This is the key to soft, chewy chocolate chip cookies. Pulling them early keeps the centers tender.
If you want the classic soft center, the cookies should look a little underdone in the middle when they come out. That is exactly right.
Step 16: Cool on the Baking Sheet
Let the cookies cool on the baking sheet for 5 minutes. This allows them to set without falling apart.
The cookies are delicate right out of the oven. The resting time helps them firm while staying soft inside.
Do not rush the transfer. Five minutes makes the cookies easier to move.
Step 17: Transfer to a Wire Rack
After the 5-minute rest, move the cookies to a wire rack. Let them cool completely, or enjoy one warm.
A warm cookie will have softer chocolate and a more tender center. A cooled cookie will be easier to store and stack.
Use a spatula to transfer them gently. The centers should still be soft.
Step 18: Repeat With Remaining Dough
If baking more than one tray, repeat the scooping and baking process. Make sure the cookie dough is placed on a cool baking sheet.
A hot baking sheet can make the dough start melting too early. This may cause extra spreading.
Let sheets cool between batches if needed. This helps keep the cookie texture consistent.
Step 19: Optional Sea Salt Finish
For a sea salt version, sprinkle a tiny pinch of flaky sea salt on the cookies right when they come out of the oven. Use only a small amount.
The salt makes the chocolate taste more intense. It also balances the sweetness.
This step is optional, but it adds a simple bakery-style finish. It works especially well with dark or mixed chocolate chips.
Step 20: Serve or Store
Serve the cookies warm, room temperature, or with your favorite dessert pairing. They are excellent on their own.
Let cookies cool completely before storing. Warm cookies can create moisture inside a container.
Once cool, place them in an airtight container. They will stay soft and delicious for up to 5 days.
Serving Suggestions
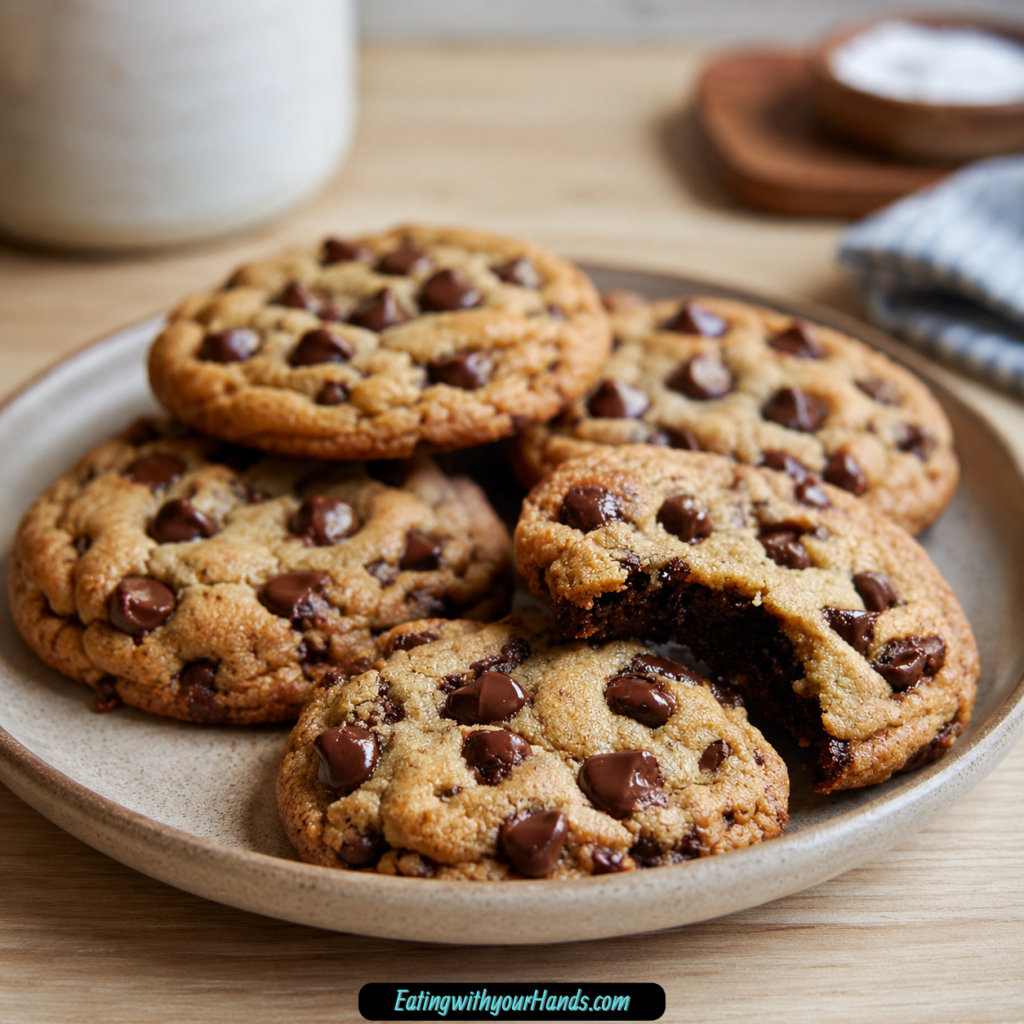
These cookies are perfect warm from the oven with a cold glass of milk. The chocolate stays soft, and the centers feel rich and chewy.
For a more indulgent dessert, sandwich a scoop of vanilla ice cream between two cookies. This turns them into a homemade ice cream sandwich.
They also make a wonderful cookie sundae base. Crumble one over ice cream and drizzle with caramel.
If you want a simple dessert plate, serve them slightly warm with a dusting of powdered sugar. It looks pretty without adding much effort.
They are also perfect straight from the cooling rack. No extra topping is required when the cookie itself is soft, buttery, and full of chocolate.
Storage
Store cooled cookies in an airtight container at room temperature. They will stay soft and delicious for up to 5 days.
Make sure the cookies are fully cooled before sealing. This helps avoid trapped steam.
If stacking, place parchment between layers if desired. This helps protect the cookie tops and chocolate.
Keep the container closed tightly. Air exposure can dry out soft cookies.
Freezing Baked Cookies
Freeze baked cookies in a single layer on a tray first. Once frozen, transfer them to a freezer bag.
They will keep for up to 3 months. This is useful for making a batch ahead of time.
Reheat frozen baked cookies at 300°F for 5 minutes. This brings back a warm, fresh texture.
You can also thaw them at room temperature. The oven method gives the best warm-cookie feel.
Freezing Raw Dough
You can freeze raw cookie dough portions. Scoop the dough onto a tray and freeze until solid.
Once the dough balls are frozen, place them in a freezer bag. This makes it easy to bake cookies on demand.
Bake from frozen and add 1 to 2 extra minutes. Watch for golden edges and soft centers.
This is a great option for late-night cravings, last-minute guests, or small-batch baking. You can bake only what you need.
Refrigerating the Dough
If you have time, refrigerate the dough for 30 minutes before baking. This helps prevent overspreading and makes the cookies chewier.
The dough can also be kept in the fridge for up to 3 days. This lets you bake fresh cookies when you want them.
Chilled dough may need a minute or two at room temperature if it becomes very firm. Scoop when manageable.
The flavor can deepen slightly as the dough rests. The texture also becomes sturdier.
Helpful Notes for Best Results
Bake for 8 minutes if you love soft, slightly doughy centers. Bake for 10 minutes if you prefer crispier edges.
Remember that the cookies keep cooking slightly on the hot tray. Do not wait until they look fully done in the oven.
For bigger bakery-style cookies, use larger scoops and add 1 to 2 extra minutes to the baking time. For smaller two-bite cookies, check earlier.
If using kosher salt instead of regular salt, use 1 ¼ teaspoons. This is the salt swap from the original notes.
If the dough spreads too much, chill it for 30 minutes before baking. This helps the butter firm back up.
If your butter accidentally melts, refrigerate it for 10 minutes to firm slightly before creaming. This can help rescue the dough.
Variations
Nutty Chocolate Chip Cookies
Add 1 cup chopped walnuts or pecans when folding in the chocolate chips. The nuts add crunch and a toasty flavor.
Walnuts give a classic chocolate chip cookie feel. Pecans add a slightly sweeter, buttery crunch.
Fold the nuts in gently. Do not overmix after adding them.
Double Chocolate Cookies
Swap ½ cup of the flour for cocoa powder. Use dark chocolate chips for a richer cookie.
This turns the dough into something more intense and brownie-like. Underbake by about 1 minute for extra gooey centers.
Keep an eye on the edges because chocolate dough can be harder to judge by color. Look for set edges and soft centers.
Sea Salt Chocolate Chip Cookies
Sprinkle flaky sea salt on the cookies right when they come out of the oven. Use a small pinch.
The salt makes the chocolate flavor stronger and balances the sweetness. It gives the cookies a bakery-style finish.
This variation is simple but very effective. It works with semi-sweet, milk chocolate, or dark chocolate chips.
Pretzel Chocolate Chip Cookies
Add pretzel pieces to the dough for salty-sweet crunch. The pretzels bring texture and a playful flavor.
Fold them in with the chocolate chips. Avoid crushing them too finely.
This variation is great if you like sweet and salty desserts. It keeps the cookie familiar while adding crunch.
Toffee Chocolate Chip Cookies
Add toffee bits for caramel flavor. The toffee melts slightly and gives little buttery-sweet pockets.
This works beautifully with brown sugar and vanilla. It makes the cookies taste richer.
Fold the toffee in gently with the chocolate chips. Watch the edges while baking because toffee can caramelize.
Potato Chip Chocolate Chip Cookies
Add a handful of crushed potato chips for a surprising salty crunch. It may sound unusual, but the source notes that it tastes amazing.
Use crushed pieces, not powder. You want texture in the cookie.
This variation is fun for late-night baking. It makes the cookie sweet, salty, buttery, and crunchy.
Extra Tender Version
Replace 1 cup of the all-purpose flour with cake flour and use 1 ¾ cups all-purpose flour. This creates extra tenderness.
This variation is included in the ingredient notes. It keeps the cookie soft while still using the same general method.
Use the same baking cues. Pull the cookies when the edges are golden and the centers look slightly underbaked.
Troubleshooting
Why Are My Cookies Flat?
The butter may have been too soft or melted. Cold butter is important for thick, chewy cookies.
Warm dough can also cause spreading. Chill the dough for 30 minutes before baking if your kitchen is hot.
Overcreaming can add too much air. The cookies may rise and then collapse.
Can I Use Melted Butter?
Technically, melted butter can be used, but it is not recommended for this texture. Melted butter makes cookies spread thinner and bake crispier.
If you accidentally melt the butter, place it in the refrigerator for 10 minutes to firm slightly. Then continue creaming.
For the intended thick and chewy cookie, use cold cubed butter. That is the best choice.
Why Are My Cookies Tough?
The dough may have been overmixed after the flour was added. Mix only until the flour disappears.
Too much flour can also cause a tough or dry cookie. Measure carefully.
Bake only until the edges are golden and the centers still look slightly underbaked. Overbaking can make cookies firmer.
Why Are My Cookies Not Chewy?
Cornstarch may have been skipped, or the cookies may have baked too long. The cornstarch supports the soft, chewy texture.
Brown sugar also helps with chew. Make sure it is packed properly.
Pull the cookies at the right time. The centers should look slightly underbaked when removed from the oven.
Why Did My Cookies Spread Too Much?
The butter may have softened too much, the dough may be warm, or the sheet pan may be hot. Keep butter cold and use cool pans.
Chilling the dough for 30 minutes can help. This is especially useful in warm kitchens.
Do not place dough on a hot baking sheet. It can begin melting before it reaches the oven.
Frequently Asked Questions
Can I Use Melted Butter?
You can, but it is not recommended for this recipe. Melted butter will make the cookies spread thinner and turn crispier.
Cold butter keeps the cookies thick and chewy. If butter melts by accident, chill it for 10 minutes before creaming.
Why Are My Cookies Flat?
Flat cookies usually come from butter that is too soft, dough that is too warm, or overcreaming. Keep the butter cold and avoid mixing longer than needed.
If your kitchen is warm, chill the dough for 30 minutes before baking. This helps the cookies stay plump.
Can I Make These Without a Mixer?
Yes, you can use a wooden spoon and mix by hand. Cream the butter and sugars very well for about 5 minutes.
It takes more effort, but it works. The dough should still become well combined and creamy before adding the eggs.
Can I Halve the Recipe?
Yes, divide every ingredient exactly in half. The method stays the same.
The only warning is that the cookies may disappear quickly. A full batch is often worth making.
Why Add Cornstarch?
Cornstarch helps create soft, bakery-style chew. It acts like a small texture insurance policy.
The recipe uses 1 teaspoon. Skipping it will change the final texture slightly.
Can I Chill the Dough?
Yes, chilling for 30 minutes helps prevent overspreading and increases chewiness. It is optional but helpful.
The dough can also stay in the refrigerator for up to 3 days. This lets you bake fresh cookies later.
Can I Freeze the Dough?
Yes, scoop the dough, freeze the portions on a tray, then transfer them to a bag. Bake from frozen.
Add 1 to 2 extra minutes to the baking time. Look for golden edges and soft centers.
Can I Make Bigger Cookies?
Yes, use a larger scoop for bakery-style cookies. Add 1 to 2 extra minutes to the baking time.
Watch the centers closely. They should still look slightly underbaked when removed.
Why These Cookies Work for Any Occasion
Chocolate chip cookies fit almost every kind of moment. They can be casual, nostalgic, celebratory, comforting, or practical.
These cookies work for bake sales because they are easy to portion and pack. They also work for parties because nearly everyone loves chocolate chip cookies.
They are useful for late-night cravings because the dough can be frozen in scoops. You can bake only a few whenever you want.
They are also perfect for family baking. The ingredient list is simple, and the method is easy to follow.
Most of all, they taste like the kind of cookie people want when they ask for chocolate chip cookies. Soft center, crisp edge, plenty of chocolate, and no unnecessary fuss.
Why This Recipe Works So Well
This recipe works because it pays attention to texture without making the process complicated. Cold butter, brown sugar, cornstarch, and careful baking all help build the final cookie.
Brown sugar keeps the centers chewy. Granulated sugar helps the edges crisp.
Cornstarch softens the crumb. Baking soda gives the cookies the right spread and lift.
Salt balances the sweetness and makes the chocolate taste better. Vanilla rounds out the flavor.
The baking time is short and intentional. Pulling the cookies when the centers still look underbaked creates the final soft, chewy texture after cooling.
Final Thoughts
The Best Chocolate Chip Cookies are simple, nostalgic, buttery, chocolate-loaded cookies with chewy centers and lightly crisp edges. With cold cubed butter, packed brown sugar, granulated sugar, eggs, pure vanilla extract, flour, cornstarch, baking soda, salt, and plenty of chocolate chips, they deliver classic cookie comfort without complicated steps.
The most important details are worth following closely. Use cold butter, cream it well with the sugars, add the eggs one at a time, mix the dry ingredients separately, avoid overmixing after the flour goes in, and fold in the chocolate gently.
Bake the cookies at 375°F (190°C) for 8 to 10 minutes, pulling them when the edges are golden and the centers still look slightly underbaked. Let them rest on the baking sheet for 5 minutes so they set while staying soft.
Serve them warm with milk, turn them into ice cream sandwiches, crumble them over ice cream, freeze baked cookies for later, or freeze raw dough for fresh cookies on demand. However you enjoy them, these cookies bring everything a classic chocolate chip cookie should have: soft centers, crisp edges, rich chocolate, and the kind of homemade flavor that always feels like home.
The Best Chocolate Chip Cookies
These classic chocolate chip cookies are soft, chewy, and packed with plenty of chocolate in every bite. Cold butter helps create a rich cookie dough with a tender center, while brown sugar adds depth and keeps the texture wonderfully soft. They are perfect for everyday baking, dessert trays, lunchbox treats, bake sales, or whenever you want a warm homemade cookie with golden edges and a chewy middle.
Recipe Details
- Prep Time: 15 minutes
- Cook Time: 10 minutes
- Total Time: 25 minutes
- Course: Dessert
- Cuisine: American
- Servings: 24 cookies
Equipment
- Mixing bowl
- Baking sheet
Ingredients
Cookie Dough
- 2 to 2 ½ cups Chocolate Chips semi-sweet or mix of milk chocolate and semi-sweet
- 1 cup Cold Butter cut into cubes, if you want a slightly thinner cookie, microwave for 7-8 seconds
- 1 cup Brown Sugar
- ¾ cup Sugar
- 2 large Eggs
- 2 teaspoons Vanilla
- 2 ¾ cups Flour may use all-purpose or 1 cup cake flour and 1 ¾ cups of all-purpose flour
- 1 teaspoon Cornstarch
- ¾ teaspoon Baking Soda
- ¾ teaspoon Salt
Instructions
Step 1: Prepare the Oven
Preheat your oven to 375°F (190°C).
Step 2: Cream the Butter and Sugars
In a mixing bowl, cream together the cold butter, brown sugar, and sugar until the mixture is light and fluffy.
Step 3: Add the Eggs and Vanilla
Add the eggs and vanilla, then mix until well combined.
Step 4: Combine the Dry Ingredients
In a separate bowl, whisk together the flour, cornstarch, baking soda, and salt until evenly mixed.
Step 5: Make the Cookie Dough
Gradually add the dry ingredients to the wet ingredients, mixing just until combined.
Step 6: Fold in the Chocolate Chips
Fold in the chocolate chips until they are evenly distributed throughout the dough.
Step 7: Scoop the Dough
Scoop tablespoon-sized portions of dough onto a baking sheet, spacing them about 2 inches apart.
Step 8: Bake the Cookies
Bake for 8-10 minutes, or until the edges are golden brown.
Step 9: Cool Before Serving
Let the cookies cool on the baking sheet for 5 minutes, then transfer them to a wire rack to cool further.
Notes
For softer cookies, bake for the shorter time.
For crispier cookies, bake for the full 10 minutes.
Serving Suggestions
- Serve warm with a glass of cold milk.
- Pair with hot coffee or cocoa.
- Add to cookie trays for parties or bake sales.
- Use in ice cream sandwiches.
- Pack into lunchboxes or homemade treat bags.
Storage
How to Store
Keep the completely cooled cookies in an airtight container at room temperature.
How to Reheat
Warm individual cookies briefly before serving if you want a softer, fresh-baked texture.
How to Freeze
Place cooled cookies in a freezer-safe airtight container and freeze for longer storage. Thaw before serving.
Best Texture Tip
For softer cookies, use the shorter baking time and remove them when the edges are golden but the centers still look slightly soft.

Fernando is the creator and writer behind the food blog Eating with your Hands. Living and working in cities like Paris, Barcelona, and Berlin, and being married to a Canadian foodie, has given Fernando a passion and interest in food and inspired him to run EWYH.