
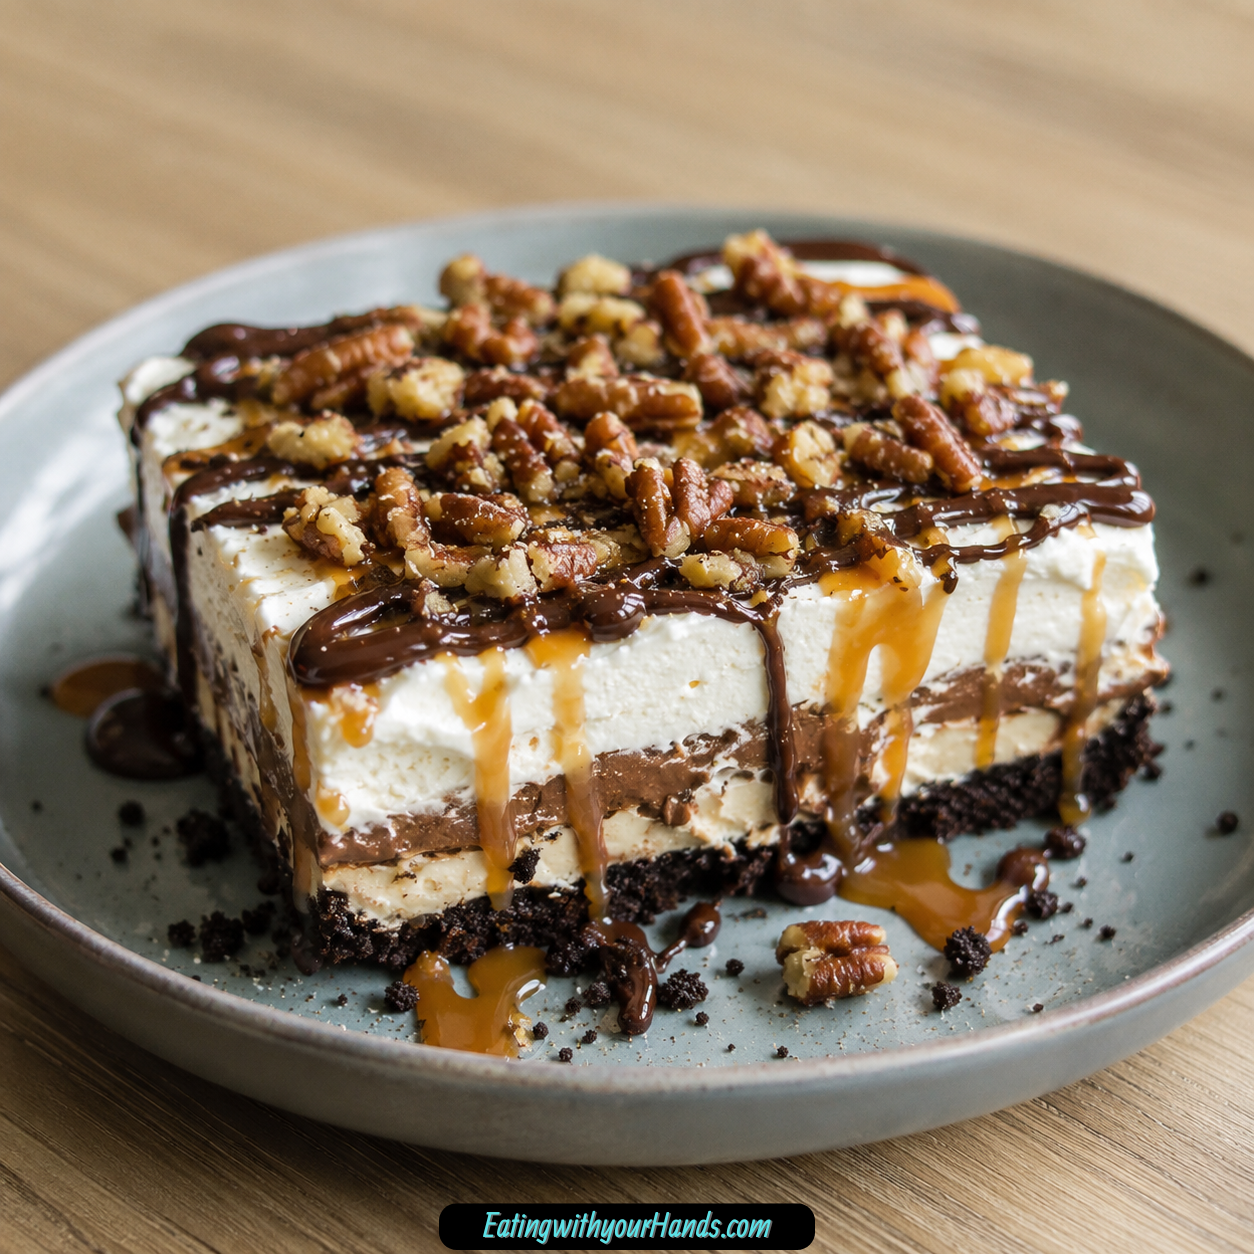
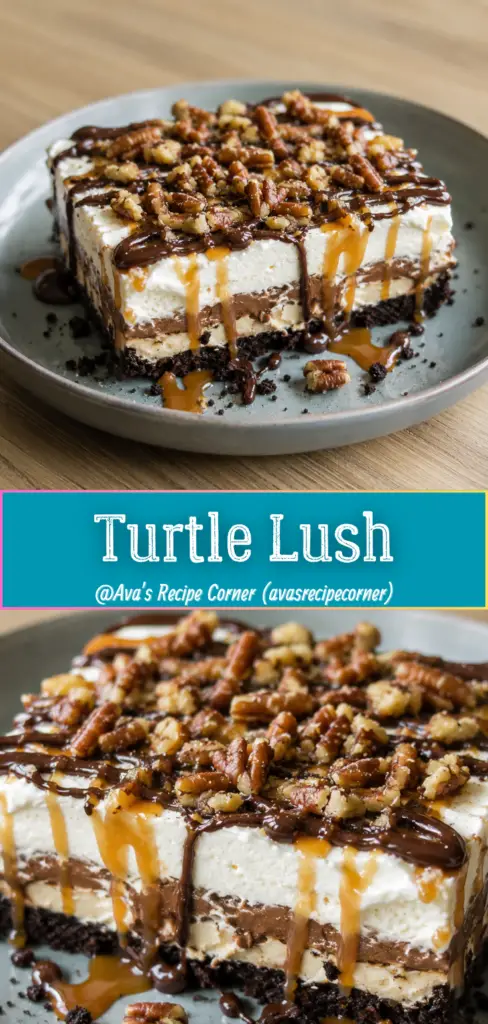
Turtle Lush is the kind of dessert that immediately feels like it belongs in the center of the table. It is creamy, chocolatey, caramel-drizzled, nutty, chilled, and layered with enough texture to make every forkful feel special.
This dessert takes inspiration from classic turtle candies and turns those familiar flavors into a soft, sliceable, no-fuss layered treat. Instead of one small candy bite, you get a whole pan of buttery Oreo crust, sweet cream cheese filling, chocolate pudding, whipped topping, caramel sauce, chocolate syrup, and chopped pecans.
I love desserts like this because they look like they took much more effort than they actually did. The layers are simple to build, but once everything chills together, the finished dessert feels rich, elegant, and completely party-worthy.
Turtle Lush is perfect for potlucks, holidays, family gatherings, special dinners, or any day when you want something decadent without making a complicated cake. It serves 12, which makes it a reliable dessert for sharing.
The magic is in the contrast. You get the buttery crunch of Oreo crumbs, the smooth tang of cream cheese, the silky chocolate pudding, the lightness of whipped topping, the sweetness of caramel, the extra chocolate finish, and the nutty crunch of pecans.
It is also a wonderful make-ahead dessert. In fact, it tastes even better after chilling overnight because the layers firm up, the flavors settle, and each square cuts more neatly.
Table of Contents
- Why You’ll Love Turtle Lush
- A Layered Dessert Inspired by Turtle Candy
- Recipe Details
- Ingredients for Turtle Lush
- Oreo Crumbs
- Unsalted Butter
- Cream Cheese
- Powdered Sugar
- Whipped Topping
- Instant Chocolate Pudding Mix
- Cold Milk
- Chopped Pecans
- Caramel Sauce
- Chocolate Syrup
- Before You Start
- Directions for Turtle Lush
- Step 1: Preheat the Oven
- Step 2: Prepare the Oreo Crumbs
- Step 3: Melt the Butter
- Step 4: Combine the Crumbs and Butter
- Step 5: Press the Crust Into the Pan
- Step 6: Bake the Crust
- Step 7: Cool the Crust Completely
- Step 8: Beat the Cream Cheese
- Step 9: Add the Powdered Sugar
- Step 10: Fold in Half of the Whipped Topping
- Step 11: Fold in Half of the Pecans
- Step 12: Spread the Cream Cheese Layer
- Step 13: Prepare the Pudding Bowl
- Step 14: Add the Cold Milk
- Step 15: Whisk the Pudding
- Step 16: Spread the Pudding Layer
- Step 17: Add the Remaining Whipped Topping
- Step 18: Drizzle the Caramel Sauce
- Step 19: Drizzle the Chocolate Syrup
- Step 20: Sprinkle the Remaining Pecans
- Step 21: Cover the Dessert
- Step 22: Chill for at Least 4 Hours
- Step 23: Chill Overnight for Best Flavor
- Step 24: Slice With a Sharp Knife
- Step 25: Serve Chilled
- Serving Suggestions
- Storage Tips
- Freezing Tips
- Make-Ahead Tips
- Helpful Notes for Perfect Turtle Lush
- Nut Alternatives and Texture Ideas
- Troubleshooting Turtle Lush
- Frequently Asked Questions
- Can I Use Homemade Whipped Cream Instead of Whipped Topping?
- Can I Make Turtle Lush Ahead of Time?
- Do I Have to Bake the Crust?
- Can I Use Regular Pudding Instead of Instant?
- What Can I Use Instead of Pecans?
- How Long Does Turtle Lush Need to Chill?
- How Long Does Turtle Lush Last in the Fridge?
- Can Turtle Lush Be Frozen?
- Final Thoughts
- Turtle Lush
Why You’ll Love Turtle Lush
You will love Turtle Lush because it gives you a show-stopping dessert without requiring advanced baking skills. The steps are straightforward, and the finished pan looks beautiful with its creamy layers and glossy caramel-chocolate drizzle.
The flavor is built around the classic chocolate-caramel-pecan combination. It has the richness of turtle candy, but in a cool, creamy dessert form.
The texture is just as important as the flavor. The crust is firm and buttery, the cream cheese layer is fluffy and sweet, the pudding is smooth, and the pecans bring crunch.
It is a great make-ahead dessert. After at least 4 hours in the refrigerator, or preferably overnight, the layers set beautifully.
It is also ideal for gatherings. Since it serves 12, it works well for holidays, potlucks, family dinners, and dessert tables.
The recipe is flexible enough for simple changes. Pecans can be swapped for walnuts or almonds, extra chocolate can be added, or nuts can be skipped for a nut-free version.
A Layered Dessert Inspired by Turtle Candy
Turtle candy is loved for its combination of chocolate, caramel, and pecans. Turtle Lush takes those same flavors and stretches them into a cool, creamy dessert with a buttery cookie base.
The Oreo crust gives the dessert a deep chocolate foundation. The crumbs are mixed with melted butter, pressed into a baking dish, baked briefly, and cooled completely.
The cream cheese layer adds a cheesecake-like feeling without making a full cheesecake. Powdered sugar sweetens it smoothly, and whipped topping keeps the texture light.
Chocolate pudding forms the silky middle layer. Instant pudding mix and cold milk thicken quickly and create a smooth, sliceable layer.
The top is finished with more whipped topping, caramel sauce, chocolate syrup, and chopped pecans. This final layer makes the dessert look finished and gives it that signature turtle flavor.
When chilled, everything settles into clean, distinct layers. Each square gives you a little bit of every texture and flavor.
Recipe Details
- Recipe Name: Turtle Lush
- Recipe Style: Layered chocolate caramel pecan dessert
- Inspiration: Classic turtle candies
- Servings: 12
- Pan Size: 9×13-inch baking dish
- Oven Temperature: 350°F (175°C)
- Crust Bake Time: 8 to 10 minutes
- Chill Time: At least 4 hours, preferably overnight
- Crust Base: Oreo crumbs and melted unsalted butter
- Cream Layer: Cream cheese, powdered sugar, whipped topping, and chopped pecans
- Pudding Layer: Instant chocolate pudding mix and cold milk
- Topping: Remaining whipped topping, caramel sauce, chocolate syrup, and chopped pecans
- Best Served: Chilled, directly from the refrigerator
- Refrigerator Storage: Covered for up to 4 days
- Freezer Storage: Up to 2 weeks
- Freezer Thawing: Thaw in the refrigerator overnight before serving
Ingredients for Turtle Lush
This dessert is built from simple ingredients that create distinct layers. The crust gives structure, the cream cheese layer adds richness, the pudding adds chocolate flavor, and the toppings bring the turtle-inspired finish.
Oreo Crumbs
You need 3 cups Oreo crumbs. Crush whole cookies, including the cream, in a food processor.
Using the whole cookie helps the crust taste rich and sweet. The cream inside the cookies becomes part of the crumb mixture.
The crumbs should be fine enough to press firmly into the pan. A finer crumb helps the crust hold together after baking and chilling.
If using pre-made crumbs, the source note says you will need about 2 1/2 cups plus 2 tablespoons melted butter. This is an alternate note for that specific shortcut.
Unsalted Butter
You need 8 tablespoons unsalted butter, melted. The melted butter binds the Oreo crumbs together.
Once mixed with the crumbs, the butter helps create a firm crust. Baking the crust helps it hold its shape better.
Use the full amount listed for the crust. Too little butter can make the crust crumble, while too much can make it greasy.
Cream Cheese
You need 1 (8-ounce) package cream cheese, softened. Softened cream cheese creates a smooth, rich cream layer.
The cream cheese needs to be soft enough to beat easily with powdered sugar. If it is too cold, the mixture may turn lumpy.
This layer gives the dessert a cheesecake-like flavor. It adds tang and richness that balance the sweet pudding and sauces.
Powdered Sugar
You need 1/2 cup powdered sugar. Powdered sugar sweetens the cream cheese layer without grittiness.
Because it dissolves smoothly, it helps keep the filling soft and fluffy. Granulated sugar would not give the same smooth texture.
The powdered sugar also helps the cream cheese taste more dessert-like. It softens the tang without making the layer too heavy.
Whipped Topping
You need 16 ounces thawed whipped topping, divided. Part of it goes into the cream cheese layer, and the rest goes on top.
Whipped topping lightens the cream cheese layer. It also creates the fluffy white top layer that makes the dessert look finished.
Make sure it is thawed before using. Frozen whipped topping will not fold or spread smoothly.
Instant Chocolate Pudding Mix
You need 1 (5.9-ounce) box instant chocolate pudding mix. This creates the chocolate pudding layer.
Instant pudding is best for this recipe because it sets properly in layered desserts. Cook-and-serve pudding is not recommended because it will not set properly in layers.
The pudding layer gives Turtle Lush its rich chocolate center. It also pairs beautifully with caramel and pecans.
Cold Milk
You need 3 cups cold milk. Cold milk is essential for setting the pudding properly.
The pudding mix needs cold milk to thicken quickly and correctly. Warm or room temperature milk would not give the same fast set.
Whisk the pudding with the cold milk for about 2 minutes. It should thicken before being spread over the cream cheese layer.
Chopped Pecans
You need 1 cup chopped pecans, divided. Half goes into the cream cheese layer, and the rest goes on top.
Pecans bring crunch and nutty, buttery contrast. They are part of what makes the dessert taste like a turtle-inspired treat.
If you need an alternative, walnuts or almonds can be used. You can also skip the nuts entirely for a nut-free version.
Caramel Sauce
You need 1/2 cup caramel sauce. This is drizzled over the top of the dessert.
Caramel sauce gives Turtle Lush its signature turtle flair. It adds sweetness, shine, and rich caramel flavor.
You can top the dessert with extra warmed caramel just before serving for more indulgence. This is optional but delicious.
Chocolate Syrup
You need 1/4 cup chocolate syrup. This enhances the chocolate flavor and adds visual appeal.
Chocolate syrup is drizzled over the whipped topping along with the caramel sauce. The two sauces make the top look beautiful.
It also reinforces the chocolate pudding layer. Each bite gets chocolate from both the crust and the pudding, with the syrup adding one more touch.
Before You Start
Before making the dessert, thaw the whipped topping completely. It needs to be soft enough to fold and spread.
Soften the cream cheese before beating. Soft cream cheese is the key to a smooth cream layer.
Prepare a 9×13-inch baking dish. This size gives the layers enough room to spread evenly and makes 12 servings.
Use cold milk for the pudding. This detail matters because the pudding needs to thicken properly before it is spread into the dish.
Plan for chill time. Turtle Lush needs at least 4 hours in the refrigerator, and overnight is even better.
Directions for Turtle Lush
Step 1: Preheat the Oven
Preheat your oven to 350°F, or 175°C. Let the oven fully heat before baking the crust.
This short baking step helps the Oreo crust hold together. It gives the base a firmer texture before the creamy layers are added.
Step 2: Prepare the Oreo Crumbs
Crush whole Oreo cookies, including the cream, until you have 3 cups Oreo crumbs. A food processor works well for this.
The crumbs should be fine and even. Large cookie chunks can make the crust harder to press smoothly into the pan.
Step 3: Melt the Butter
Melt 8 tablespoons unsalted butter. Let it melt fully so it can coat the crumbs evenly.
The butter is what binds the Oreo crumbs together. It should be liquid, not just softened.
Step 4: Combine the Crumbs and Butter
In a medium bowl, combine the Oreo crumbs and melted butter. Stir until all the crumbs are coated.
The mixture should look evenly moistened. Dry crumbs can cause the crust to fall apart later.
Step 5: Press the Crust Into the Pan
Transfer the crumb mixture to a 9×13-inch baking dish. Press it firmly into the bottom of the dish.
Use your hands, the bottom of a measuring cup, or a spatula to compact the crust. A firm crust gives cleaner slices.
Step 6: Bake the Crust
Bake the crust for 8 to 10 minutes. This helps it set and hold together.
Do not add the next layer while the crust is warm. The crust needs to cool completely before the cream cheese layer goes on.
Step 7: Cool the Crust Completely
Remove the baking dish from the oven and let the crust cool completely. Be patient with this step.
If the crust is still warm, it can soften the cream cheese layer. A cooled crust helps keep the layers neat.
Step 8: Beat the Cream Cheese
Place the softened cream cheese in a large bowl. Beat it until smooth.
Soft cream cheese should become creamy without lumps. If it still looks chunky, keep beating before adding the powdered sugar.
Step 9: Add the Powdered Sugar
Add 1/2 cup powdered sugar to the cream cheese. Beat until the mixture is smooth and fluffy.
The powdered sugar sweetens the cream cheese layer. It should blend fully into the cream cheese without graininess.
Step 10: Fold in Half of the Whipped Topping
Fold in half of the 16 ounces thawed whipped topping. Fold gently so the layer stays light.
This makes the cream cheese layer softer and fluffier. Do not beat aggressively after adding the whipped topping.
Step 11: Fold in Half of the Pecans
Add half of the 1 cup chopped pecans to the cream cheese mixture. Fold until evenly distributed.
The pecans give the cream layer a little crunch. They also bring the nutty flavor into the middle of the dessert.
Step 12: Spread the Cream Cheese Layer
Spread the cream cheese mixture evenly over the cooled Oreo crust. Use a spatula to smooth it to the edges.
Work gently so you do not pull up the crust. A smooth layer gives the pudding a level surface.
Step 13: Prepare the Pudding Bowl
In a separate bowl, add the instant chocolate pudding mix. Make sure the bowl is large enough for whisking.
Using a separate bowl keeps the pudding smooth before it touches the cream cheese layer. This helps avoid mixing the layers together.
Step 14: Add the Cold Milk
Pour in 3 cups cold milk. Cold milk is crucial for proper pudding set.
Do not use warm milk for this step. The pudding needs cold milk to thicken quickly.
Step 15: Whisk the Pudding
Whisk the pudding mix and cold milk for about 2 minutes. The mixture should thicken as you whisk.
The pudding should look smooth and slightly thick before spreading. If it is still very thin, keep whisking until it begins to set.
Step 16: Spread the Pudding Layer
Spread the thickened chocolate pudding evenly over the cream cheese layer. Use a spatula and move carefully.
Try not to press too hard. Gentle spreading keeps the cream cheese layer from mixing into the pudding.
Step 17: Add the Remaining Whipped Topping
Spread the remaining whipped topping over the chocolate pudding layer. Smooth it evenly with a spatula.
This final whipped layer gives the dessert a soft, fluffy top. It also creates a clean surface for the sauces and pecans.
Step 18: Drizzle the Caramel Sauce
Drizzle 1/2 cup caramel sauce evenly over the whipped topping. Move slowly so the drizzle reaches across the dessert.
The caramel gives the dessert its signature turtle flavor. It also makes the top glossy and inviting.
Step 19: Drizzle the Chocolate Syrup
Drizzle 1/4 cup chocolate syrup over the top. Let it cross the caramel drizzle for a pretty finish.
The chocolate syrup adds extra chocolate flavor and visual contrast. It makes the dessert look more decadent.
Step 20: Sprinkle the Remaining Pecans
Sprinkle the remaining chopped pecans across the top of the dessert. Spread them evenly.
The pecans add crunch to the final layer. They also make the turtle candy inspiration clear.
Step 21: Cover the Dessert
Cover the baking dish before refrigerating. Use a lid or wrap that protects the top without smearing the topping if possible.
Covering keeps the dessert fresh. It also protects the whipped topping from absorbing refrigerator odors.
Step 22: Chill for at Least 4 Hours
Refrigerate the assembled Turtle Lush for at least 4 hours. This time allows the layers to firm up.
Do not rush the chill time. Clean slices depend on the pudding, cream layer, and crust having time to set.
Step 23: Chill Overnight for Best Flavor
If you have the time, chill the dessert overnight. The flavor becomes even better after resting.
Overnight chilling lets the layers settle beautifully. This makes the dessert easier to cut and serve.
Step 24: Slice With a Sharp Knife
Use a sharp knife to cut the dessert into squares. Clean the knife between cuts for neater slices.
Because the layers are creamy, wiping the blade helps keep the edges clean. This is especially helpful for serving at gatherings.
Step 25: Serve Chilled
Serve Turtle Lush directly from the refrigerator. It is best cold and firm.
If desired, add an extra drizzle of warmed caramel just before serving. This makes the dessert feel even more indulgent.
Serving Suggestions
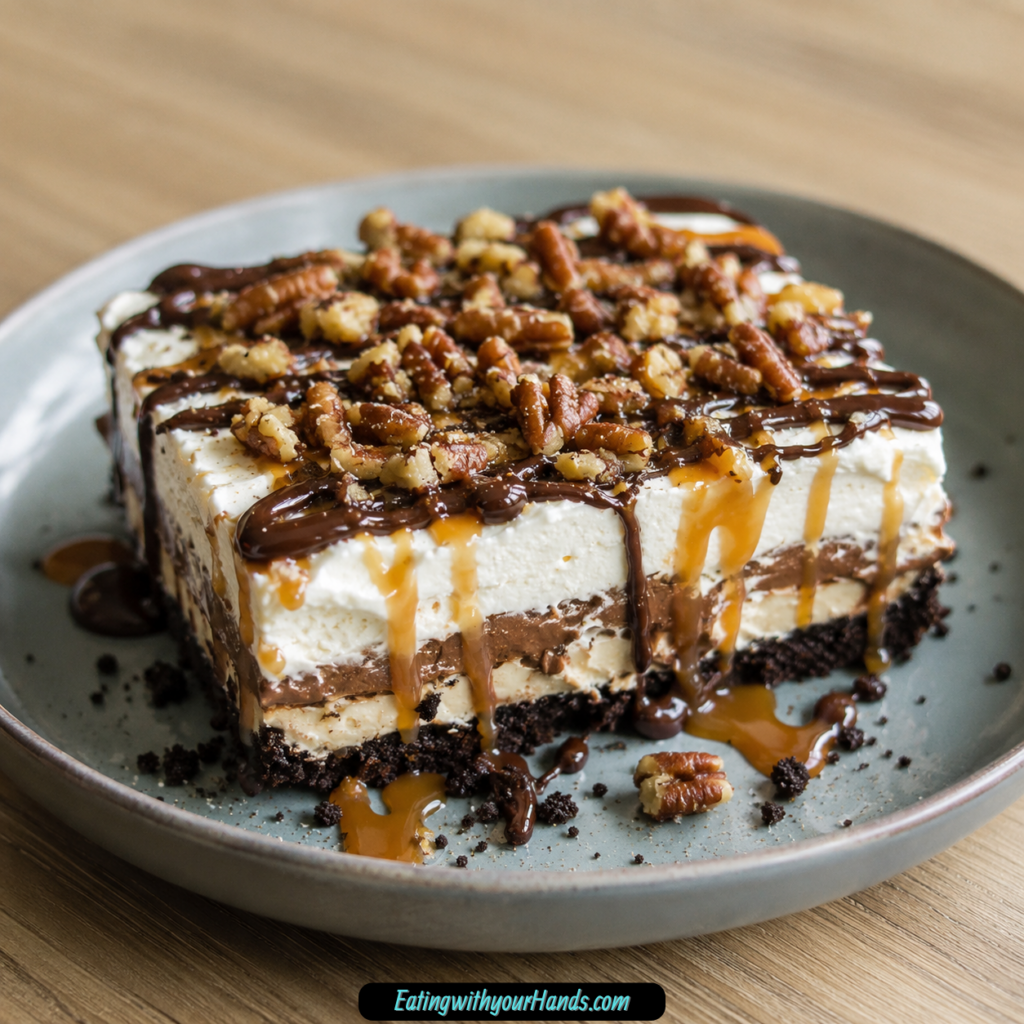
Turtle Lush should be served chilled. The layers hold their shape best when the dessert comes straight from the refrigerator.
Cut it into neat squares with a sharp knife. Wipe the knife between cuts for the cleanest presentation.
This dessert is rich enough that small squares are satisfying. Since it serves 12, it is perfect for sharing.
Add extra warmed caramel sauce just before serving if you want a more decadent finish. The warm caramel contrasts beautifully with the chilled dessert.
It works well for potlucks, holidays, family gatherings, and special dessert tables. It looks impressive without requiring complicated decorating.
Serve it after a meal when you want something creamy and sweet. The chocolate, caramel, pecan, and Oreo layers make it feel like a celebration dessert.
Storage Tips
Store Turtle Lush covered in the refrigerator for up to 4 days. Keep it chilled when not serving.
The whipped topping and pudding layers stay best when cold. A tight cover helps protect the texture and flavor.
If serving over multiple days, cut only what you need. Keeping the remaining dessert in the pan helps the layers stay cleaner.
The dessert may become softer as it sits, but it will still taste delicious. Chilling overnight is actually recommended for the best flavor.
Freezing Tips
Turtle Lush can be frozen for up to 2 weeks. Cover it well before freezing.
Thaw the dessert in the refrigerator overnight before serving. This helps the layers soften evenly.
Do not thaw it at room temperature if you want the best texture. Slow thawing in the refrigerator protects the creamy layers.
After thawing, serve chilled. The texture may be slightly different from fresh, but it remains a useful make-ahead option.
Make-Ahead Tips
Turtle Lush is an excellent make-ahead dessert. It tastes better after chilling, especially overnight.
You can assemble the full dessert the day before serving. This gives the layers time to firm and the flavors time to meld.
If making for a gathering, wait to add extra warmed caramel until just before serving. The original caramel and chocolate syrup drizzle can still be added during assembly.
Keep the dessert covered while it chills. This keeps the top layer fresh and clean.
Because this dessert needs at least 4 hours to set, it is not ideal as a last-minute dessert. Plan ahead and let the refrigerator do the work.
Helpful Notes for Perfect Turtle Lush
Use Cold Milk for the Pudding
Cold milk is crucial for the pudding layer. It helps the instant pudding set quickly and properly.
Do not use warm milk. The pudding may not thicken the way it needs to for clean layers.
Let the Crust Cool Completely
The Oreo crust must cool before the cream cheese layer is added. Warm crust can soften the filling.
A cool crust makes the layers more stable. It also keeps the cream layer from melting.
Soften the Cream Cheese
Softened cream cheese beats into a smoother layer. Cold cream cheese can leave lumps.
Take time to beat it with the powdered sugar until smooth and fluffy. The texture of this layer matters.
Fold Gently
When adding whipped topping to the cream cheese, fold gently. This keeps the layer light.
Beating too hard can deflate the whipped topping. A gentle hand gives a better texture.
Chill Time Matters
Give the dessert at least 4 hours to chill. This is what helps the layers firm.
Overnight is even better. The dessert slices more cleanly and tastes more balanced the next day.
Use the Right Pudding
Instant pudding is best for this recipe. Cook-and-serve pudding will not set properly in layers.
The instant pudding gives the dessert structure. It also makes the process simple and quick.
Nut Alternatives and Texture Ideas
Pecans are classic for turtle flavor, but they are not the only option. Walnuts or almonds can be used instead.
Walnuts bring a slightly different nutty flavor. Almonds add a firmer crunch.
If you need a nut-free version, skip the nuts entirely. The dessert will still have creamy layers, chocolate, caramel, and Oreo crust.
Crushed pretzels are mentioned as another texture option in the FAQ section. They add crunch and a salty contrast.
Extra chocolate drizzle can also be used if you want a stronger chocolate finish. This keeps the dessert customizable while staying true to the turtle-inspired idea.
Troubleshooting Turtle Lush
Why Is My Crust Crumbling?
The crumbs may not have been coated evenly with butter, or the crust may not have been pressed firmly enough. Mix until all crumbs are moistened and press firmly into the pan.
Baking the crust also helps it hold together. If you skip baking, press firmly and chill longer.
Why Is My Cream Cheese Layer Lumpy?
The cream cheese may not have been softened enough. Beat the cream cheese and powdered sugar until completely smooth before folding in the whipped topping.
Do not rush this step. A smooth cream cheese base makes the entire dessert feel more polished.
Why Did My Pudding Not Set?
The milk may not have been cold, or the pudding may not have been whisked long enough. Use 3 cups cold milk and whisk for about 2 minutes.
Instant pudding is required for the best layered texture. Cook-and-serve pudding is not recommended for this recipe.
Why Are My Layers Mixing Together?
The crust may have been warm, or the layers may have been spread too aggressively. Cool the crust completely and spread each layer gently.
Use a spatula and work slowly. A light touch keeps the layers distinct.
Why Are My Slices Messy?
The dessert may not have chilled long enough. Chill for at least 4 hours, preferably overnight.
Use a sharp knife and clean it between cuts. This gives neater squares.
Why Is the Dessert Too Soft?
It may need more chill time. The pudding and cream layers firm up as they sit.
Keep the dessert refrigerated until serving. Serve directly from the fridge for the best texture.
Frequently Asked Questions
Can I Use Homemade Whipped Cream Instead of Whipped Topping?
Yes, but it should be stabilized so it holds its shape. The source mentions gelatin or powdered sugar as stabilizing options.
The dessert depends on the whipped layer staying firm. Unstabilized whipped cream may soften too quickly.
Can I Make Turtle Lush Ahead of Time?
Absolutely. It is even better after sitting overnight in the refrigerator.
The make-ahead nature is one of the best parts of this dessert. The layers set more cleanly and the flavors meld.
Do I Have to Bake the Crust?
Baking helps the crust hold together. It gives the base better structure.
You can skip baking if you press the crust firmly and chill it longer. The texture may be a little different.
Can I Use Regular Pudding Instead of Instant?
Instant pudding is best for this recipe. Cook-and-serve pudding will not set properly in layers.
The instant pudding thickens quickly with cold milk. That is what makes it work in this chilled dessert.
What Can I Use Instead of Pecans?
Walnuts, almonds, or crushed pretzels can be used instead. These options add texture and flavor contrast.
You can also skip the nuts completely for a nut-free version. The dessert will still be rich and creamy.
How Long Does Turtle Lush Need to Chill?
It needs at least 4 hours in the refrigerator. Overnight is preferred.
The chill time helps the layers firm up. It also makes slicing easier.
How Long Does Turtle Lush Last in the Fridge?
Store it covered in the refrigerator for up to 4 days. Keep it chilled until serving.
The dessert is best served cold. Covering it well helps preserve the topping and texture.
Can Turtle Lush Be Frozen?
Yes, it can be frozen for up to 2 weeks. Thaw in the refrigerator overnight before serving.
Serve it chilled after thawing. The texture may be slightly softer, but it remains a helpful make-ahead option.
Final Thoughts
Turtle Lush is a dessert that delivers big flavor with simple steps. It has a buttery Oreo crust, a smooth cream cheese layer, silky chocolate pudding, fluffy whipped topping, chopped pecans, caramel sauce, and chocolate syrup.
The flavor combination is rich but not difficult to love. Chocolate and caramel bring sweetness, pecans bring crunch, and the cream cheese layer adds a smooth tang that keeps everything balanced.
It is elegant enough for holidays and gatherings, but easy enough for any home baker. The layers look impressive, even though the process is mostly mixing, spreading, drizzling, and chilling.
This is also the kind of dessert that rewards patience. After at least 4 hours in the refrigerator, and especially after an overnight chill, the layers become firmer and the flavor becomes even better.
Make it for a potluck, family gathering, holiday table, or quiet weekend treat. Once people taste the combination of Oreo crust, creamy filling, chocolate pudding, caramel drizzle, and pecan crunch, it is easy to understand why Turtle Lush becomes a requested favorite.
Turtle Lush
Turtle Lush is a rich layered dessert inspired by the classic combination of chocolate, caramel, and pecans. A buttery Oreo crust holds a creamy sweetened cream cheese layer, smooth chocolate pudding, fluffy whipped topping, and a final drizzle of caramel sauce and chocolate syrup. This dessert is perfect for potlucks, holidays, celebrations, or any time you need a make-ahead treat that serves a crowd. After chilling, the layers become cool, creamy, and easy to slice.
Recipe Details
- Prep Time: 20 minutes
- Cook Time: 10 minutes
- Chilling Time: 4 hours
- Total Time: 4 hours 30 minutes
- Servings: 12
- Calories: 410 kcal
Ingredients
- ¼ cup chocolate syrup
- ½ cup caramel sauce
- 1 cup chopped pecans divided
- 3 cups cold milk
- 1 5.9-ounce box instant chocolate pudding mix
- 16 ounces thawed whipped topping divided
- ½ cup powdered sugar
- 1 8-ounce package cream cheese, softened
- 8 tablespoons unsalted butter melted
- 3 cups Oreo crumbs
Instructions
Step 1: Prepare the Oreo Crust
Preheat the oven to 350°F (175°C). Mix the Oreo crumbs with the melted unsalted butter, then press the mixture firmly into a 9×13-inch dish.
Step 2: Bake and Cool the Crust
Bake the crust for 8-10 minutes. Let it cool completely before adding the creamy layers.
Step 3: Make the Cream Cheese Layer
Beat the softened cream cheese and powdered sugar until smooth. Fold in half the thawed whipped topping and half the chopped pecans.
Step 4: Spread Over the Crust
Spread the cream cheese mixture evenly over the cooled Oreo crust.
Step 5: Prepare the Chocolate Pudding
Whisk the instant chocolate pudding mix with the cold milk until thickened, about 2 minutes.
Step 6: Add the Pudding Layer
Spread the thickened chocolate pudding evenly over the cream cheese layer.
Step 7: Add the Whipped Topping
Top the pudding layer with the remaining thawed whipped topping, spreading it gently across the surface.
Step 8: Finish with Sauces and Pecans
Drizzle the caramel sauce and chocolate syrup over the top. Sprinkle with the remaining chopped pecans.
Step 9: Chill Before Serving
Chill the dessert for at least 4 hours or overnight before slicing and serving.
Notes
Use cold milk for the pudding to ensure it sets properly.
Chill the dessert overnight for clean slices and the best flavor.
Substitute walnuts or almonds if preferred.
Add extra caramel drizzle before serving for a bakery-style touch.
Serving Suggestions
- Hot coffee
- Cold milk
- Vanilla ice cream
- Fresh strawberries
- Holiday dessert tables
- Potluck dessert trays
- Extra caramel drizzle
Storage
How to Store
Store Turtle Lush covered in the refrigerator. Keep it chilled until ready to serve so the pudding and cream cheese layers stay firm.
How to Freeze
Freezing is not ideal for the smoothest layered texture, but the dessert can be frozen if needed. Thaw in the refrigerator before serving.
Best Texture Tip
Chill the dessert overnight for the cleanest slices and the best set texture, as noted in the original recipe.

Fernando is the creator and writer behind the food blog Eating with your Hands. Living and working in cities like Paris, Barcelona, and Berlin, and being married to a Canadian foodie, has given Fernando a passion and interest in food and inspired him to run EWYH.