
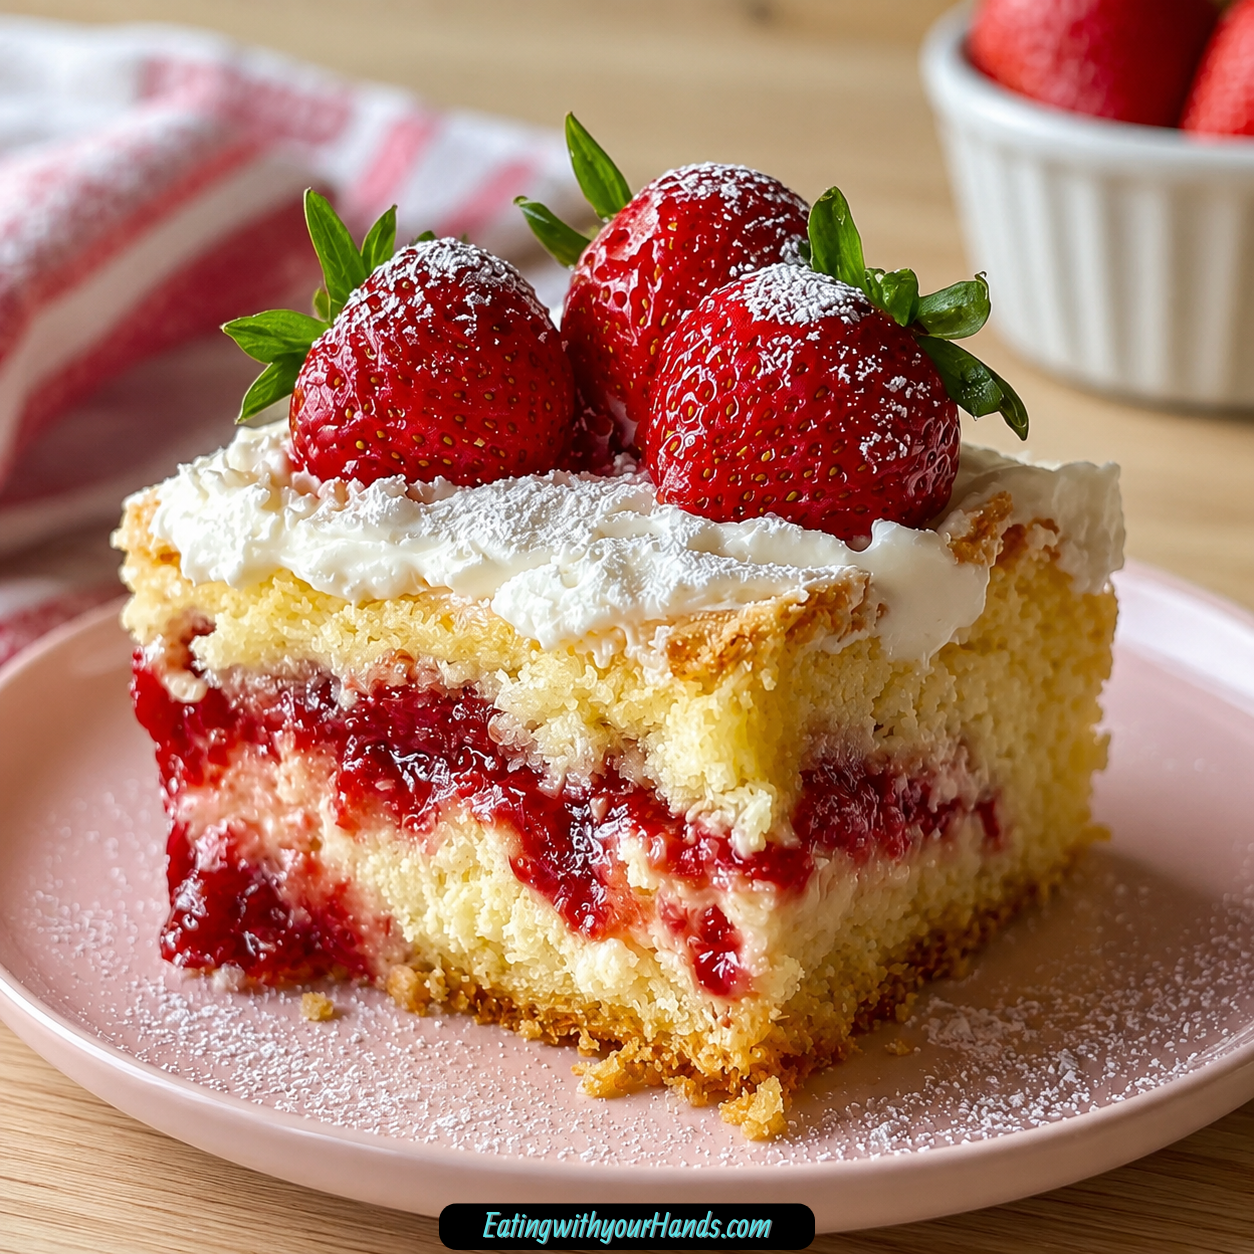
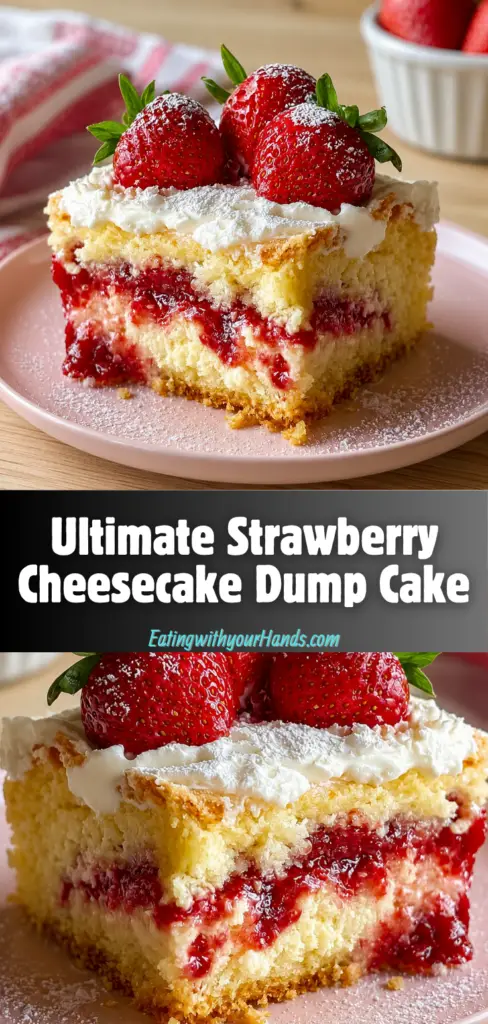
There are desserts you plan carefully, and then there are desserts that save you when time, patience, and clean counter space are all running dangerously low. This Ultimate Strawberry Cheesecake Dump Cake belongs to that second group, and that is exactly why it feels so wonderful.
It is the kind of recipe you reach for when company is coming soon, the kitchen already feels busy, and you still want something warm, sweet, creamy, and memorable. With strawberry pie filling, yellow cake mix, melted butter, cream cheese, whipped topping, vanilla, and a few pretty garnishes, you can create a dessert that tastes far more impressive than the effort required.
The base is sweet, fruity, and buttery. The strawberry pie filling bubbles under a golden cake mix topping, creating a warm layer that feels almost cobbler-like.
Then comes the cheesecake layer. Softened cream cheese, sugar, vanilla, and whipped topping turn into a fluffy, tangy-sweet spread that makes the whole dessert feel richer and more indulgent.
This is not a fussy cake, and that is part of its charm. You do not need to make cake batter from scratch, roll dough, stack layers, or decorate with precision.
You simply build the dessert in a 9×13-inch dish, bake the strawberry cake base, let it cool slightly, and finish it with a creamy cheesecake-style topping. Add fresh strawberries and powdered sugar if you want it to look extra pretty, then serve and watch it disappear.
Table of Contents
- What Is Strawberry Cheesecake Dump Cake?
- Why You’ll Love This Ultimate Strawberry Cheesecake Dump Cake
- Recipe Details
- Ingredients You’ll Need
- A Closer Look at the Ingredients
- The Flavor Behind This Dump Cake
- Directions
- Step 1: Gather the Ingredients and Tools
- Step 2: Preheat the Oven
- Step 3: Grease the Baking Dish
- Step 4: Add the Strawberry Pie Filling
- Step 5: Check the Fruit Distribution
- Step 6: Sprinkle the Cake Mix
- Step 7: Smooth the Dry Cake Mix Gently
- Step 8: Drizzle the Melted Butter
- Step 9: Check Before Baking
- Step 10: Bake the Cake Base
- Step 11: Cool the Baked Base
- Step 12: Start the Cheesecake Layer
- Step 13: Add the Sugar
- Step 14: Add the Vanilla
- Step 15: Fold in the Whipped Topping
- Step 16: Check the Cheesecake Topping Texture
- Step 17: Spread the Cheesecake Layer
- Step 18: Let the Topping Set Briefly
- Step 19: Add Fresh Strawberries
- Step 20: Dust with Powdered Sugar
- Step 21: Slice or Scoop
- Step 22: Serve and Enjoy
- Helpful Tips for the Best Strawberry Cheesecake Dump Cake
- Common Mistakes
- Variations
- Serving Suggestions
- Storage Tips
- Freezing Instructions
- Make-Ahead Notes
- Frequently Asked Questions
- Can I Use Fresh Strawberries Instead of Pie Filling?
- How Long Does This Last in the Fridge?
- Can I Freeze Leftovers?
- My Cake Mix Did Not Fully Incorporate. Is That Normal?
- Can I Make This Ahead for a Party?
- Can I Use a Different Cake Mix?
- Can I Make It Gluten-Free?
- Can I Make the Cheesecake Layer Less Sweet?
- Final Thoughts
- Ultimate Strawberry Cheesecake Dump Cake
What Is Strawberry Cheesecake Dump Cake?
Strawberry Cheesecake Dump Cake is an easy baked dessert made with strawberry pie filling, dry yellow cake mix, melted butter, and a creamy cheesecake topping. The fruit filling goes into the baking dish first, the cake mix is sprinkled over it, and melted butter is drizzled on top before baking.
After the base bakes until golden and bubbly, it cools briefly before the cheesecake layer is spread over the top. That topping is made with softened cream cheese, granulated sugar, vanilla extract, and thawed whipped topping.
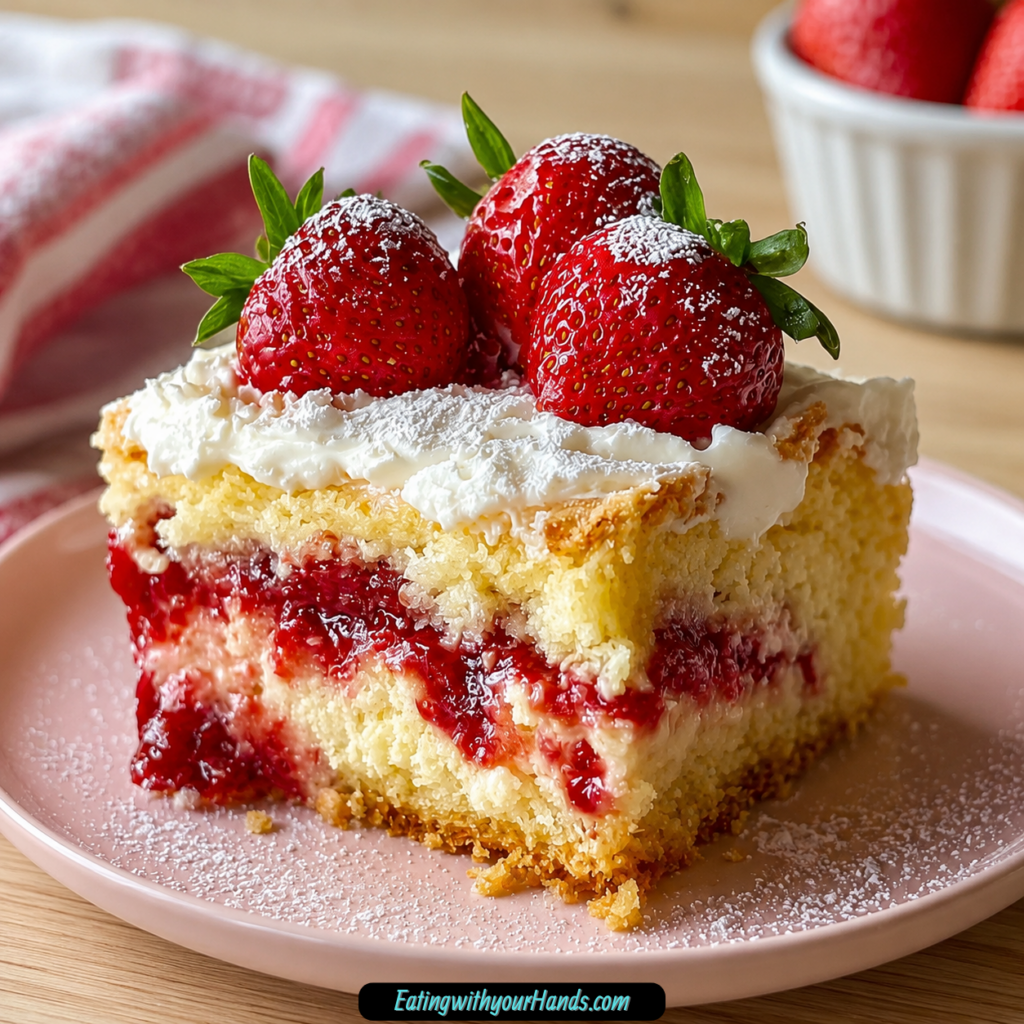
The result is a dessert with several textures in one dish. The bottom is jammy and strawberry-rich, the cake layer is buttery and golden, and the topping is cool, creamy, and fluffy.
It is called a dump cake because the base is assembled in a very simple way. You mostly add ingredients to the pan without complicated mixing, which makes it perfect for last-minute dessert needs.
Why You’ll Love This Ultimate Strawberry Cheesecake Dump Cake
This dessert is effortless but still looks special. The process is simple, but the cheesecake topping and fresh garnish make it feel like a party dessert.
It uses easy ingredients. Cake mix, pie filling, cream cheese, sugar, vanilla, whipped topping, butter, and optional strawberries are all simple to find.
It feeds a crowd. A 9×13-inch dish makes this recipe useful for potlucks, barbecues, family dinners, and parties.
It has a rich cheesecake-style topping. The cream cheese mixture adds tang, fluffiness, and a creamy finish to the sweet strawberry base.
It works year-round. It feels bright enough for summer but comforting enough for colder months.
It is flexible. You can change the fruit filling, use a different cake mix, add crunch, brighten the topping with lemon zest, or create a seasonal variation.
Recipe Details
- Recipe name: Ultimate Strawberry Cheesecake Dump Cake
- Dessert style: Strawberry dump cake with cheesecake topping
- Baking dish: 9×13-inch baking dish
- Oven temperature: 350°F (175°C)
- Base bake time: About 45 minutes
- Cooling time before topping: About 10-15 minutes
- Suggested rest after topping: About 15-20 minutes before serving
- Main fruit layer: Strawberry pie filling
- Cake mix: Yellow cake mix
- Cheesecake layer: Cream cheese, sugar, vanilla extract, and whipped topping
- Optional garnish: Fresh strawberries and powdered sugar
- Best served: Warm base with creamy topping after a short set time, or chilled from the fridge
- Refrigerator storage: About 3 days
- Make-ahead option: Bake the base up to 8 hours ahead, then add topping before serving
- Freezing note: Best to freeze only the baked cake base and add fresh topping later
- Gluten-free option: Use gluten-free cake mix
- Lower-sugar option: Reduce cheesecake layer sugar to ¼ cup
Ingredients You’ll Need
For the Cake Base
- 1 box yellow cake mix
- ½ cup unsalted butter, melted
- 2 cans strawberry pie filling (21 oz each)
For the Cheesecake Layer
- 2 packages cream cheese (8 oz each), softened
- ½ cup granulated sugar
- 1 teaspoon vanilla extract
- 1 container whipped topping (8 oz), thawed
For Garnish
- 1 cup fresh strawberries, halved or whole
- Powdered sugar, for dusting
A Closer Look at the Ingredients
Yellow cake mix creates the buttery cake layer. A basic box works well because the flavor stays simple and lets the strawberries and cheesecake topping shine.
Melted unsalted butter moistens the dry cake mix as it bakes. Salted butter can be used in a pinch, but avoid adding extra salt if you do.
Strawberry pie filling gives the dessert its sweet, jammy fruit base. The best option is one with plenty of whole berries for better texture.
Cream cheese is the heart of the cheesecake layer. It must be softened so the topping becomes smooth instead of lumpy.
Granulated sugar sweetens the cream cheese. You can adjust it if the pie filling you use is already very sweet.
Vanilla extract gives the cheesecake topping a warm, rounded flavor. Real vanilla makes the topping taste especially nice.
Whipped topping keeps the cheesecake layer light and fluffy. It should be thawed before mixing so it folds in smoothly.
Fresh strawberries are optional but beautiful. They add freshness, color, and a more polished finish.
Powdered sugar is also optional. A light dusting makes the finished cake look soft, pretty, and dessert-table ready.
The Flavor Behind This Dump Cake
This dessert works because it combines three familiar dessert ideas in one pan. You get the syrupy fruit comfort of strawberry cobbler, the buttery sweetness of cake, and the creamy tang of cheesecake.
The strawberry pie filling becomes hot and bubbly as it bakes. It creates a rich fruit layer that tastes sweet and jammy.
The dry cake mix turns golden when it meets the melted butter and oven heat. Some parts become soft and cake-like, while other areas turn into buttery crumbles.
The cheesecake layer adds contrast after baking. It is cool, creamy, tangy, sweet, and fluffy enough to balance the warm strawberry base.
When garnished with fresh strawberries, the dessert feels brighter. A dusting of powdered sugar adds a simple finishing touch without extra work.
Directions
Step 1: Gather the Ingredients and Tools
Start by gathering the yellow cake mix, melted butter, strawberry pie filling, softened cream cheese, granulated sugar, vanilla extract, thawed whipped topping, fresh strawberries, and powdered sugar. You will also need a 9×13-inch baking dish, mixing bowl, hand mixer or stand mixer, spatula, spoon, and measuring cups.
This recipe is easy, but the best texture depends on having the cream cheese softened and the whipped topping thawed. Cold cream cheese can leave lumps, and frozen whipped topping will not fold smoothly.
Set the cream cheese out ahead of time if possible. If you forgot, soften it carefully in short microwave bursts, but do not melt it.
Step 2: Preheat the Oven
Preheat your oven to 350°F (175°C). This temperature gives the dump cake base time to bake until the fruit is bubbling and the topping is golden.
Let the oven fully preheat before adding the baking dish. A properly heated oven helps the cake mix bake evenly.
While the oven warms, prepare the baking dish. This keeps the process moving smoothly.
Step 3: Grease the Baking Dish
Lightly grease a 9×13-inch baking dish with butter or cooking spray. You only need enough to help prevent sticking.
The strawberry filling will be saucy, but greasing still helps with serving. It also makes cleanup easier.
Coat the bottom and sides lightly. Set the dish on a stable surface before adding the filling.
Step 4: Add the Strawberry Pie Filling
Open the 2 cans of strawberry pie filling, 21 oz each. Pour both cans into the greased baking dish.
Spread the filling evenly across the bottom with a spatula or the back of a spoon. The goal is to cover the whole base of the dish.
Do not worry about making it perfect. Just make sure the fruit layer is mostly even from edge to edge.
Step 5: Check the Fruit Distribution
Look over the strawberry layer and gently move any large clumps of filling. This helps every serving get a good amount of fruit.
If your pie filling has whole berries, spread them around evenly. Whole berries make the dessert feel more generous.
The fruit layer should look bright and glossy. It will bubble as the cake bakes.
Step 6: Sprinkle the Cake Mix
Open the box of yellow cake mix. Sprinkle the dry mix evenly over the strawberry pie filling.
Do not stir the cake mix into the fruit. It should sit on top like a loose blanket.
Try to cover as much of the strawberry layer as possible. A few small gaps are fine.
Step 7: Smooth the Dry Cake Mix Gently
Use a spoon or spatula to lightly level the cake mix if needed. Do not press it down hard.
The topping should stay loose so the butter can soak in and create a crumbly, golden surface. Pressing too much can make the texture uneven.
Make sure the cake mix reaches the corners. This helps the whole dessert bake more evenly.
Step 8: Drizzle the Melted Butter
Drizzle ½ cup melted unsalted butter over the dry cake mix. Move slowly so the butter covers as much of the surface as possible.
Try to reach the edges and corners. Butter helps the dry mix bake into a golden topping.
A few dry spots are normal. They often turn into crumbly bits, which are part of the dump cake texture.
Step 9: Check Before Baking
Before placing the dish in the oven, look for very large areas of dry cake mix. If you see any, use the spoon to gently spread buttered areas a little.
Do not fully mix the layers. The strawberry filling should stay underneath, and the cake mix should stay on top.
The dish is ready when the fruit is spread, the cake mix is even, and the butter is drizzled across the surface.
Step 10: Bake the Cake Base
Place the baking dish in the preheated oven. Bake for about 45 minutes.
The cake is ready when the top turns golden brown and the edges bubble slightly. The bubbling means the strawberry filling is hot and syrupy.
The kitchen should smell sweet, buttery, and strawberry-filled. Watch near the end so the top does not overbake.
Step 11: Cool the Baked Base
Remove the cake base from the oven and let it cool for about 10-15 minutes. This step matters because the cheesecake layer should not be added to a piping hot cake.
If the base is too hot, the cream cheese topping can melt and slide. It will still taste good, but the dessert will look messier.
Letting it cool slightly gives you a warmer-than-room-temperature base that can hold the topping better. This makes the final dessert more attractive.
Step 12: Start the Cheesecake Layer
While the cake cools, place the 2 softened 8 oz packages of cream cheese in a mixing bowl. Beat until smooth and creamy.
Make sure there are no lumps before adding the sugar. Smooth cream cheese is the key to a silky topping.
Scrape down the sides and bottom of the bowl. Hidden pockets of cream cheese can stay unmixed.
Step 13: Add the Sugar
Add ½ cup granulated sugar to the cream cheese. Beat until the mixture is smooth.
The sugar sweetens the tangy cream cheese and makes it taste like cheesecake. If your pie filling is very sweet, you can reduce the sugar in this layer to ¼ cup.
Mix until the sugar is fully incorporated. The mixture should look creamy and spreadable.
Step 14: Add the Vanilla
Add 1 teaspoon vanilla extract to the cream cheese mixture. Beat briefly until blended.
Vanilla gives the cheesecake layer a warm, dessert-like flavor. It helps balance the cream cheese and sugar.
Do not overbeat once the mixture is smooth. You only need to combine the vanilla evenly.
Step 15: Fold in the Whipped Topping
Add the thawed 8 oz container whipped topping to the cream cheese mixture. Fold it in gently with a spatula.
Use slow folding motions rather than heavy stirring. This keeps the topping light and fluffy.
Continue folding until no streaks remain. The cheesecake layer should look smooth, soft, and cloud-like.
Step 16: Check the Cheesecake Topping Texture
The topping should be thick enough to spread but light enough to feel fluffy. If it looks dense, it may have been overmixed.
A smooth, creamy topping will spread more easily over the cake base. It should not have visible cream cheese lumps.
Taste a small amount if desired. It should be tangy, sweet, and vanilla-scented.
Step 17: Spread the Cheesecake Layer
Once the cake base has cooled for 10-15 minutes, spread the cheesecake mixture over the top. Use an offset spatula or the back of a spoon.
Work gently so you do not pull up too much of the cake layer underneath. Spread from the center outward.
Try to cover the whole surface evenly. The cheesecake layer is part of what makes the dessert feel special.
Step 18: Let the Topping Set Briefly
After spreading the cheesecake layer, let the dessert sit for about 15-20 minutes before serving. This gives the topping a little time to settle.
The dessert can be served warm with the creamy topping slightly softened. It can also be chilled if you prefer a firmer topping.
Do not rush if you want cleaner servings. A short rest helps the layers hold better.
Step 19: Add Fresh Strawberries
If using garnish, arrange 1 cup fresh strawberries over the top. Use halved or whole strawberries.
Add them right before serving if you are storing the cake. Fresh strawberries stay prettier that way.
The berries add color and freshness. They also make the dessert look more homemade and inviting.
Step 20: Dust with Powdered Sugar
Lightly dust powdered sugar over the top if desired. Use only a gentle sprinkle.
Powdered sugar gives the cake a pretty finish. It also makes the dessert look more polished.
Add the powdered sugar close to serving time. It can disappear into the topping if added too early.
Step 21: Slice or Scoop
Use a serving spoon or spatula to portion the cake. Because this is a dump cake, it may scoop more naturally than it slices.
Make sure each serving gets strawberry filling, buttery cake, and cheesecake topping. That is the best combination.
If you want neater pieces, let the dessert chill first. Chilled topping holds shape better.
Step 22: Serve and Enjoy
Serve the cake warm after resting, or enjoy it chilled from the refrigerator. Both versions are delicious.
Warm servings feel soft, fruity, and comforting. Cold servings taste more like a strawberry cheesecake dessert.
This cake is perfect for potlucks, summer barbecues, last-minute guests, or simple comfort desserts. It is easy enough for a busy day and sweet enough for a celebration.
Helpful Tips for the Best Strawberry Cheesecake Dump Cake
Use softened cream cheese for the topping. Cold cream cheese can create lumps.
Use thawed whipped topping. Frozen whipped topping will not fold properly.
Drizzle the butter as evenly as possible over the dry cake mix. This helps the topping bake more evenly.
Do not stir the cake mix into the fruit. The dump cake texture depends on layering.
Cool the baked base for 10-15 minutes before adding the cheesecake topping. This prevents the topping from melting too much.
Add fresh strawberries right before serving if storing the dessert. They will look fresher and prettier.
Common Mistakes
Adding the Cheesecake Layer Too Soon
If the cake is too hot, the cheesecake topping can melt into a puddle. It will still taste good but may not look as nice.
Let the base cool for 10-15 minutes before topping. That short wait helps preserve the creamy layer.
Using Cold Cream Cheese
Cold cream cheese does not beat smoothly. It can leave lumps in the cheesecake topping.
Let it soften on the counter for about an hour, or use careful 10-second microwave bursts. Do not melt it.
Overmixing the Whipped Topping
Whipped topping keeps the cheesecake layer fluffy. Overmixing can make it dense.
Fold gently until combined. Stop when no streaks remain.
Leaving Too Many Dry Cake Mix Patches
A few dry spots are normal, but very large dry patches can stay powdery. Drizzle the butter as evenly as you can.
If needed, gently spread the buttered areas before baking. Do not stir the layers together.
Storing with Fresh Berries Too Early
Fresh strawberries can soften as they sit. If storing the cake, add fresh strawberries closer to serving time.
This keeps the garnish looking bright. It also helps avoid extra moisture on top.
Variations
Swap the strawberry pie filling for cherry, blueberry, or peach pie filling. Each fruit gives the dessert a different personality.
Try a strawberry-rhubarb combination if you enjoy a tart-sweet flavor. It gives the cake a brighter fruit layer.
Use white or vanilla cake mix instead of yellow cake mix. Both work well with the strawberry filling.
For a more decadent twist, use chocolate cake mix with cherry pie filling. This creates a Black Forest-style dessert.
Sprinkle chopped nuts over the cake mix before baking for extra crunch. Graham cracker crumbs can also add texture.
Add 1 teaspoon lemon zest to the cheesecake layer. This gives the topping a bright, tangy note.
For a fall version, use apple pie filling and sprinkle the top with cinnamon sugar before baking. This makes the dessert feel cozy and seasonal.
Use gluten-free cake mix if needed. The method stays the same.
Cut the sugar in the cheesecake layer to ¼ cup if you want it less sweet. This works especially well if the pie filling is very sweet.
Use margarine instead of butter if needed. Coconut oil can also be used for a tropical twist, but it should be melted first.
Serving Suggestions
Serve this cake after the topping has rested for 15-20 minutes. This helps the creamy layer settle slightly.
It can be served warm, which makes the strawberry base soft and comforting. The cheesecake topping will be creamier and looser.
It can also be served chilled. This gives it a firmer, more cheesecake-like feel.
Fresh strawberries make the cake look beautiful for parties. Add them right before serving for the best appearance.
A light powdered sugar dusting adds a pretty finish. It is simple but effective.
This dessert is a great choice for potlucks, summer barbecues, casual gatherings, or last-minute company. It looks generous and tastes indulgent without difficult prep.
Storage Tips
Cover leftovers tightly with plastic wrap or transfer slices to an airtight container. Store in the refrigerator for about 3 days.
The whipped topping may weep slightly by day 2. The dessert is best within 24 hours, but it can still be enjoyed after that.
Reheat individual servings in the microwave for 10-15 seconds if you want a warmer dessert. It is also delicious cold straight from the refrigerator.
If you plan to store the dessert, add fresh strawberry garnish only when serving. This helps the berries stay fresh-looking.
Keep the cake refrigerated because of the cheesecake topping. Do not leave it sitting out for too long.
Freezing Instructions
You can technically freeze leftovers, but the cheesecake layer can become icy. For best results, freeze only the baked cake base.
Let the baked base cool completely, then wrap it well or store it in a freezer-safe container. Add the cheesecake topping fresh after thawing.
If freezing leftovers anyway, slice first for easier single servings. Thaw in the refrigerator before eating.
The texture of the topping may not be as smooth after freezing. It will still be sweet, but fresh topping is better.
For a party or planned dessert, bake the base ahead and add fresh topping later. This gives the best final texture.
Make-Ahead Notes
You can bake the base up to 8 hours ahead. Let it cool, cover it, and keep it ready until closer to serving time.
Add the cheesecake topping right before serving or shortly before guests arrive. This keeps the strawberries fresh and the cake from becoming soggy.
If you want the topping firmer, refrigerate after adding it. Chilled topping slices more cleanly.
Do not add fresh strawberries too early if the dessert will sit for a while. Add them just before serving for the best look.
This make-ahead method is perfect for parties. It lets you finish the hardest part early and decorate at the end.
Frequently Asked Questions
Can I Use Fresh Strawberries Instead of Pie Filling?
Yes, but you will need to macerate them first. Toss the fresh strawberries with sugar and let them sit for 30 minutes.
Even then, the texture will not be quite as luscious as canned pie filling. The syrupy berries in pie filling work especially well here.
How Long Does This Last in the Fridge?
It lasts about 3 days in the refrigerator. The whipped topping may weep a little by day 2.
For best texture and appearance, enjoy it within 24 hours. Store it covered and chilled.
Can I Freeze Leftovers?
Technically yes, but the cheesecake layer can become icy. The better option is to freeze only the baked cake base.
Add the cheesecake topping fresh later. If freezing leftovers, slice before freezing for easy servings.
My Cake Mix Did Not Fully Incorporate. Is That Normal?
Yes, some buttery crumbles and small dry-looking spots can happen. That is part of dump cake texture.
As long as most of the mix is moistened, the dessert should bake up well. The top should become golden.
Can I Make This Ahead for a Party?
Yes, bake the base up to 8 hours ahead. Add the cheesecake topping right before serving.
This keeps the cake from getting soggy and helps the fresh strawberries look their best. It is a smart make-ahead dessert.
Can I Use a Different Cake Mix?
Yes, white or vanilla cake mix works well. Yellow cake mix is classic for this version.
Chocolate cake mix can be used with cherry pie filling for a richer variation. That creates a Black Forest-style twist.
Can I Make It Gluten-Free?
Yes, use a gluten-free cake mix. The rest of the method stays the same.
Check any other packaged ingredients if you need the whole dessert gluten-free. The cake mix swap is the main adjustment.
Can I Make the Cheesecake Layer Less Sweet?
Yes, reduce the sugar in the cheesecake layer to ¼ cup. This is helpful if your pie filling is very sweet.
Taste the topping before spreading if you want to adjust. The cream cheese should stay tangy and lightly sweet.
Final Thoughts
Ultimate Strawberry Cheesecake Dump Cake is the kind of dessert that proves easy can still feel exciting. With strawberry pie filling, yellow cake mix, melted butter, cream cheese, sugar, vanilla, whipped topping, fresh strawberries, and powdered sugar, you get a dessert that is fruity, buttery, creamy, and beautiful.
The base bakes into a warm strawberry cake layer, while the cheesecake topping adds a cool, fluffy finish. It is simple enough for a last-minute dessert but pretty enough for a potluck or barbecue table.
This recipe is also easy to adapt. You can change the fruit filling, switch the cake mix, add nuts or graham cracker crumbs, brighten the topping with lemon zest, make it gluten-free, reduce the sugar, or create a seasonal apple version.
Serve it warm after a short rest or cold from the fridge. Either way, this dump cake brings big strawberry cheesecake comfort with very little effort.
Ultimate Strawberry Cheesecake Dump Cake
This Ultimate Strawberry Cheesecake Dump Cake is an easy, creamy, and fruity dessert made with strawberry pie filling, yellow cake mix, melted butter, cream cheese, whipped topping, and a sweet optional strawberry garnish. The cake bakes into a golden, buttery topping over a warm strawberry base, then gets finished with a smooth cheesecake-style layer. It is simple to prepare, perfect for feeding a crowd, and great for potlucks, family desserts, holidays, summer parties, or anytime you want a sweet strawberry treat without complicated steps.
Recipe Details
- Prep Time: 15 minutes
- Cook Time: 45 minutes
- Total Time: 1 hour
- Course: Dessert
- Cuisine: American
- Servings: 12 servings
Equipment
- 9×13-inch baking dish
- Mixing bowl
Ingredients
For the Cheesecake Layer
- 1 container whipped topping 8 oz, thawed (like Cool Whip)
- 1 teaspoon vanilla extract
- ½ cup granulated sugar
- 2 packages cream cheese 8 oz each, softened
For Garnish Optional
- powdered sugar for dusting
- 1 cup fresh strawberries halved or whole
For the Cake Base
- ½ cup unsalted butter melted
- 2 cans strawberry pie filling 21 oz each
- 1 box yellow cake mix
Instructions
Step 1: Prepare the Oven and Dish
Preheat the oven to 350°F (175°C).
Grease a 9×13-inch baking dish and set it aside.
Step 2: Add the Strawberry Filling
Spread the strawberry pie filling evenly across the bottom of the prepared baking dish.
Make sure the filling reaches the corners so every serving has a sweet strawberry base.
Step 3: Add the Cake Mix
Sprinkle the dry yellow cake mix evenly over the strawberry pie filling.
Do not stir it in; keep it layered on top of the fruit filling.
Step 4: Drizzle with Butter
Drizzle the melted unsalted butter over the cake mix, covering as much of the surface as possible.
This helps the topping bake up golden and rich.
Step 5: Bake the Dump Cake
Bake for 45 minutes, or until the top is golden brown and the strawberry filling is bubbling around the edges.
Step 6: Make the Cheesecake Layer
While the cake bakes, beat the softened cream cheese, granulated sugar, and vanilla extract until smooth.
Fold in the whipped topping until fully combined and creamy.
Step 7: Add the Cheesecake Topping
Once the cake has cooled slightly, spread the cream cheese mixture evenly over the top.
Smooth it gently so it forms a soft cheesecake-style layer.
Step 8: Garnish and Serve
Garnish with fresh strawberries and dust with powdered sugar if desired.
Serve chilled or slightly cooled, depending on your preferred texture.
Notes
Store leftovers covered in the refrigerator for up to 3 days.
Serving Suggestions
This strawberry cheesecake dump cake pairs well with:
- Fresh strawberries
- Vanilla ice cream
- Whipped cream
- Hot coffee
- Iced coffee
- Strawberry sauce
- Powdered sugar
- Brunch dessert trays
Storage
How to Store
Store leftovers covered in the refrigerator.
Best Texture Tip
Let the cake cool before adding the cheesecake layer so the topping stays smooth and creamy instead of melting into the warm cake.

Fernando is the creator and writer behind the food blog Eating with your Hands. Living and working in cities like Paris, Barcelona, and Berlin, and being married to a Canadian foodie, has given Fernando a passion and interest in food and inspired him to run EWYH.