
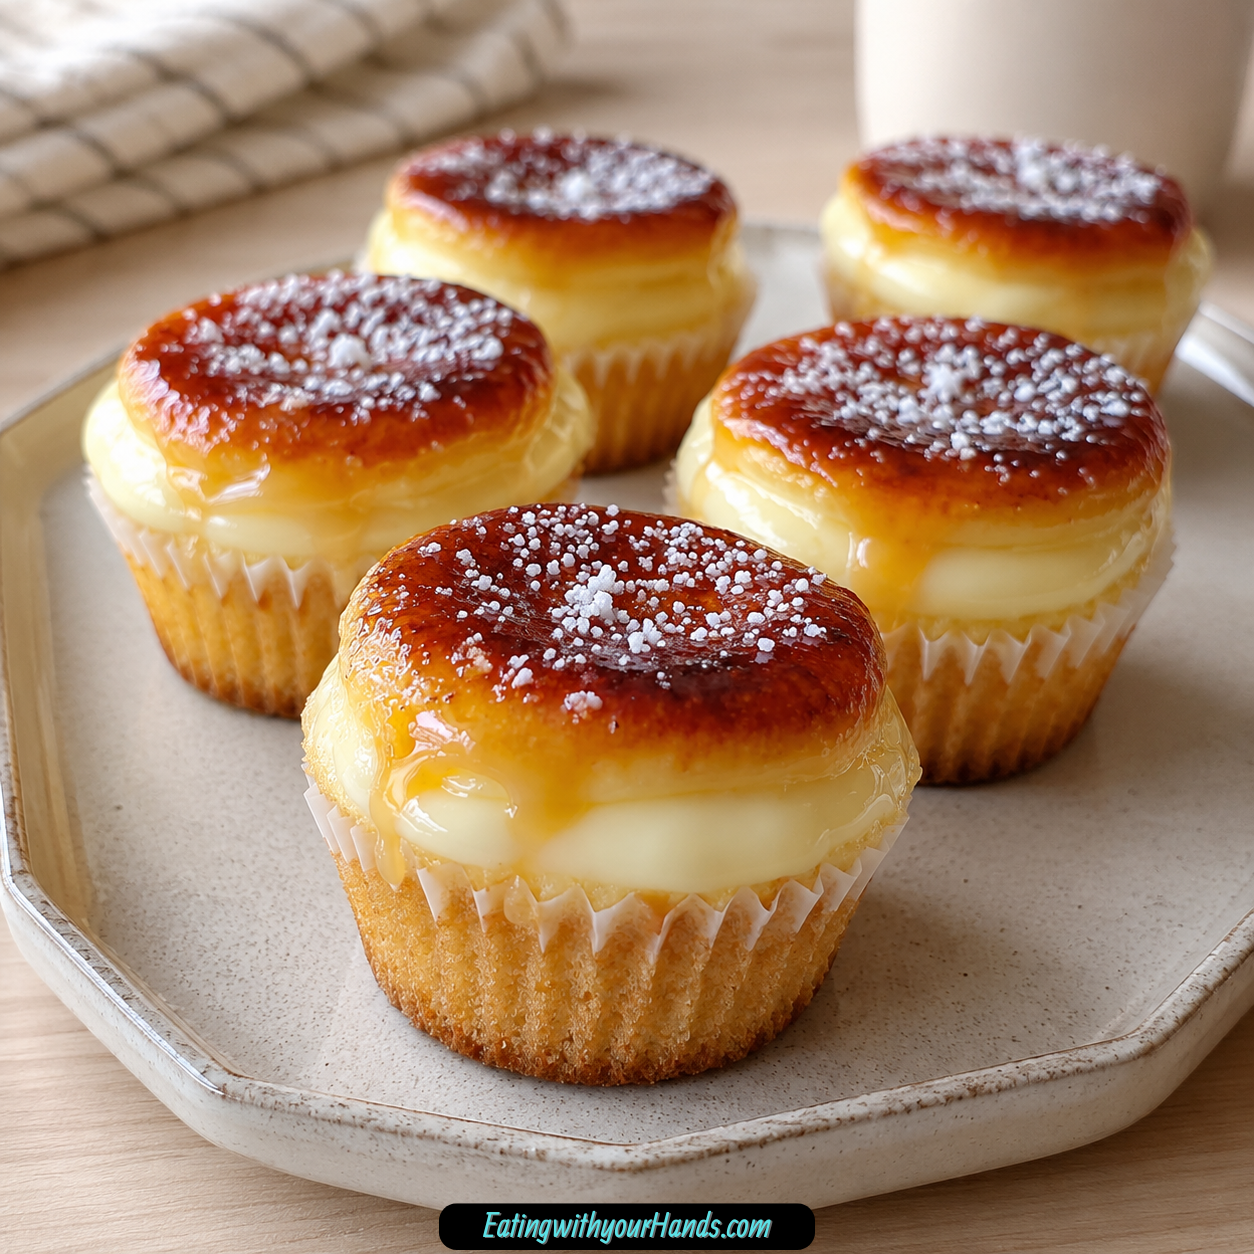
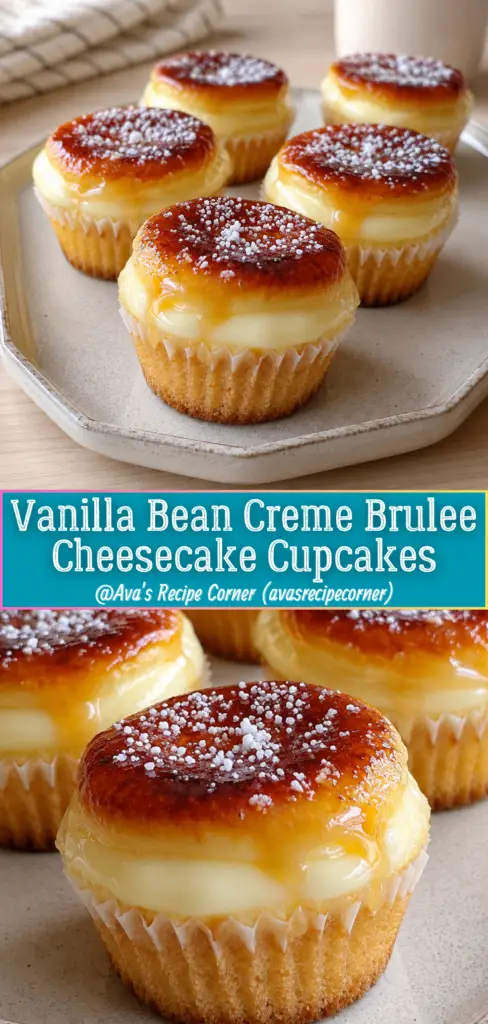
Vanilla Bean Creme Brulee Cheesecake Cupcakes are soft, elegant cupcakes filled with creamy vanilla bean cheesecake and finished with a thin caramelized sugar topping. They bring together the comfort of a tender vanilla cupcake, the richness of cheesecake, and the crisp golden finish of crème brûlée in one beautiful handheld dessert.
I love desserts that feel like they belong at a celebration but still have the warmth of something homemade. These cupcakes have that special balance, with a soft cake base, a smooth cheesecake center, and a crackly sugar top that makes every bite feel a little magical.
The flavor is rich but familiar. Butter, sugar, eggs, buttermilk, vanilla, cream cheese, and vanilla bean paste create a cupcake that feels creamy, sweet, and full of soft vanilla aroma.
The caramelized topping is what makes them unforgettable. A thin layer of granulated sugar is sprinkled over each cooled cupcake, then caramelized with a kitchen torch until golden brown and bubbly.
These cupcakes are fancy enough for dinner parties, birthdays, and celebrations, but simple enough for a weekday dessert. They are the kind of treat that makes people lean closer to the dessert tray before they even ask what they are.
Table of Contents
- Why You’ll Love These Vanilla Bean Creme Brulee Cheesecake Cupcakes
- Recipe Details
- Ingredients
- Optional Swaps, Variations, Add-Ins, and Serving Ideas
- Why These Vanilla Bean Creme Brulee Cheesecake Cupcakes Work
- Directions
- Step 1: Preheat the Oven
- Step 2: Line the Cupcake Pan
- Step 3: Soften the Butter and Cream Cheese
- Step 4: Start the Cupcake Batter
- Step 5: Add the Eggs
- Step 6: Add the Buttermilk
- Step 7: Add the Vanilla Extract
- Step 8: Whisk the Dry Ingredients
- Step 9: Combine the Wet and Dry Mixtures
- Step 10: Make the Cheesecake Filling
- Step 11: Check the Cheesecake Texture
- Step 12: Fill the Cupcake Liners
- Step 13: Add the Cheesecake Filling
- Step 14: Bake the Cupcakes
- Step 15: Cool in the Pan
- Step 16: Transfer to a Wire Rack
- Step 17: Sprinkle the Sugar Topping
- Step 18: Caramelize With a Kitchen Torch
- Step 19: Add Optional Vanilla Bean Seeds
- Step 20: Serve and Store
- Serving Ideas
- Storage
- Reheating
- Freezing
- Make-Ahead
- Helpful Notes for Best Results
- Variations
- Raspberry Creme Brulee Cheesecake Cupcakes
- Strawberry Creme Brulee Cheesecake Cupcakes
- Almond Flour Cheesecake Cupcakes
- Reduced-Fat Cheesecake Cupcakes
- Mocha Cheesecake Cupcakes
- Fresh Berry Cheesecake Cupcakes
- Dairy-Free Cheesecake Cupcakes
- Chocolate Chip Cheesecake Cupcakes
- Chopped Nut Cheesecake Cupcakes
- Pumpkin Spice Cheesecake Cupcakes
- Mascarpone Cheesecake Cupcakes
- Greek Yogurt Cheesecake Cupcakes
- Troubleshooting
- Frequently Asked Questions
- Can I Freeze Vanilla Bean Creme Brulee Cheesecake Cupcakes?
- How Can I Substitute the Cream Cheese?
- What Can I Use Instead of Buttermilk?
- Can I Make These Cupcakes Dairy-Free?
- Can I Use Vanilla Extract Instead of Vanilla Bean Paste?
- Can I Add Fruit to the Cheesecake Filling?
- Should I Caramelize the Sugar Before Storing?
- Why This Recipe Works So Well
- Final Thoughts
- Vanilla Bean Creme Brulee Cheesecake Cupcakes
- Recipe Details
- Equipment
- Ingredients
- Instructions
- Step 1: Prepare the Oven and Cupcake Pan
- Step 2: Cream the Butter and Sugar
- Step 3: Add the Wet Cupcake Ingredients
- Step 4: Whisk the Dry Ingredients
- Step 5: Finish the Cupcake Batter
- Step 6: Fill the Cupcake Liners
- Step 7: Make the Cheesecake Filling
- Step 8: Add the Filling
- Step 9: Bake the Cupcakes
- Step 10: Cool the Cupcakes
- Step 11: Add the Sugar Topping
- Step 12: Caramelize the Sugar
- Step 13: Garnish and Serve
- Notes
- Serving Suggestions
- Storage
Why You’ll Love These Vanilla Bean Creme Brulee Cheesecake Cupcakes
These cupcakes have a quick and easy prep time of just 20 minutes. They feel impressive without requiring an overly complicated process.
They combine rich vanilla bean flavor with creamy cheesecake. Every bite gives you soft cupcake, smooth filling, and sweet caramelized topping.
They are family-friendly. Kids and adults can both enjoy the soft vanilla flavor and creamy center.
They are perfect for many occasions. Birthdays, dinner parties, casual weeknight desserts, and special celebrations all feel right for these cupcakes.
They are freezer-friendly. You can save some for later without losing flavor.
They use minimal ingredients. Simple baking staples become a dessert that looks elegant and tastes special.
Recipe Details
These cupcakes bake at 350°F (175°C). The cupcake pan should be lined with cupcake liners before the batter is added.
The cupcake batter uses 1 ½ cups all-purpose flour, 1 cup granulated sugar, ½ teaspoon salt, 1 teaspoon baking powder, ½ cup softened unsalted butter, 2 large eggs, ½ cup buttermilk, and 1 teaspoon vanilla extract.
If you do not have buttermilk, a mix of milk and vinegar can work in a pinch. The recipe also gives a homemade buttermilk method using 1 tablespoon white vinegar or lemon juice with enough milk to make 1 cup, then letting it sit for about 5 minutes.
The cheesecake filling uses 8 ounces softened cream cheese, ¼ cup granulated sugar, 1 large egg, 2 tablespoons all-purpose flour, and 1 teaspoon vanilla bean paste.
If vanilla bean paste is not available, regular vanilla extract works. The cheesecake filling should be mixed until smooth and velvety.
Each cupcake liner is filled about ⅔ full with cupcake batter. Cheesecake filling is spooned into each cupcake and distributed evenly.
The cupcakes bake for 20–25 minutes. They are done when a toothpick inserted into the center comes out clean.
After baking, they cool in the pan for about 5 minutes, then move to a wire rack to cool completely. The caramelized sugar topping is added before serving.
Ingredients
Vanilla Cupcake Batter
1 ½ cups all-purpose flour
1 cup granulated sugar
½ teaspoon salt
1 teaspoon baking powder
½ cup unsalted butter, softened
2 large eggs
½ cup buttermilk
1 teaspoon vanilla extract
Vanilla Bean Cheesecake Filling
8 oz cream cheese, softened
¼ cup granulated sugar
1 large egg
2 tablespoons all-purpose flour
1 teaspoon vanilla bean paste
Creme Brulee Topping
¼ cup granulated sugar
Optional Garnish
Additional fresh vanilla bean seeds
Ingredient Notes
All-purpose flour gives the cupcakes structure. It is used in both the cupcake batter and the cheesecake filling.
Granulated sugar sweetens the cupcake batter, cheesecake filling, and caramelized topping. The sugar on top becomes the crème brûlée-style finish.
Salt balances the sweetness. It keeps the cupcake batter from tasting flat.
Baking powder helps the cupcakes rise. It gives the batter a lighter texture.
Softened unsalted butter adds richness to the cupcake batter. European-style butter can be used for extra creaminess.
Eggs help the cupcake batter and cheesecake filling set. The filling uses an additional egg to give it structure.
Buttermilk adds moisture to the cupcake batter. If you do not have it, a milk and vinegar mixture can work in a pinch.
Vanilla extract flavors the cupcake batter. Vanilla bean paste brings real vanilla flavor to the cheesecake filling.
Cream cheese creates the creamy cheesecake center. It should be softened and at room temperature for easy mixing.
Fresh vanilla bean seeds are optional for garnish. They make the cupcakes look prettier after caramelizing.
Optional Swaps, Variations, Add-Ins, and Serving Ideas
Raspberry Cheesecake Cupcakes
Add a swirl of raspberry puree into the cheesecake filling. This gives the cupcakes a fruity twist.
The raspberry flavor pairs well with vanilla and cream cheese. It also adds a pretty color to the filling.
Strawberry Cheesecake Cupcakes
Swirl strawberry puree into the cheesecake filling. This gives the cupcakes a soft berry flavor.
Strawberry makes the dessert feel bright and sweet. It is a lovely option for spring or summer gatherings.
Almond Flour Cupcakes
Substitute the all-purpose flour with almond flour for a gluten-free version. The texture and flavor may change.
This variation gives the cupcakes a different structure. Follow the same baking and filling method while watching the texture.
Reduced-Fat Cheesecake Filling
Use reduced-fat cream cheese in the filling for a lighter option. This changes the richness slightly.
The cheesecake center may taste a little lighter. It still keeps the creamy idea of the recipe.
Mocha Creme Brulee Cupcakes
Incorporate a splash of espresso or coffee into the batter for a mocha flavor. This gives the cupcakes a deeper taste.
Coffee pairs well with vanilla and caramelized sugar. It makes the cupcakes feel richer.
Fresh Berry Topping
Top with fresh berries instead of caramelized sugar for a fruity finish. This changes the dessert from crème brûlée-style to fresh and colorful.
Fresh berries add brightness. They are a good choice if you prefer not to torch the sugar topping.
Dairy-Free Cupcakes
Use plant-based cream cheese and non-dairy butter. You can also use dairy-free milk mixed with lemon juice or vinegar to replace buttermilk.
This makes the cupcakes dairy-free when the rest of the ingredients fit your needs. The texture and flavor may vary.
Chocolate Chip Cheesecake Filling
Mix chocolate chips into the cheesecake filling for added texture. This gives the creamy center little sweet bites.
Chocolate chips make the cupcakes more playful. They also pair well with vanilla.
Chopped Nut Cheesecake Filling
Add chopped nuts to the cheesecake filling for texture. Nuts give the soft filling a little crunch.
Use this variation when you want more contrast. Keep the pieces small enough so the filling still spoons easily.
Pumpkin Spice Cupcakes
Add pumpkin spice in the fall. This gives the cupcakes a seasonal flavor.
Pumpkin spice works well with vanilla, cream cheese, and caramelized sugar. It makes the dessert feel cozy.
Why These Vanilla Bean Creme Brulee Cheesecake Cupcakes Work
These cupcakes work because they combine three dessert experiences in one. You get soft cupcake, creamy cheesecake, and crisp caramelized sugar.
The cupcake batter stays simple and moist. Butter, eggs, buttermilk, vanilla, and flour create a soft base for the filling.
The cheesecake filling brings richness. Cream cheese, sugar, egg, flour, and vanilla bean paste bake into a smooth center.
The vanilla bean paste gives the filling a deeper vanilla flavor. If needed, regular vanilla extract can still be used.
The caramelized topping adds contrast. It turns simple granulated sugar into a golden, crisp finish right before serving.
Cooling the cupcakes completely before caramelizing matters. A cool cupcake holds its shape better under the sugar topping.
Directions
Step 1: Preheat the Oven
Preheat your oven to 350°F (175°C). This gives the cupcakes a steady temperature for even baking.
A properly heated oven helps the cupcakes rise and set. It also helps the cheesecake filling bake into the center.
Let the oven fully warm before the cupcake tray goes in. While it preheats, prepare the pan and ingredients.
Step 2: Line the Cupcake Pan
Line a cupcake pan with cupcake liners. Use any liners you like, including colorful ones if you want a festive look.
The liners make the cupcakes easier to remove and serve. They also help the cupcakes hold their shape.
Set the lined pan aside. It will be ready when the batter and cheesecake filling are mixed.
Step 3: Soften the Butter and Cream Cheese
Make sure the ½ cup unsalted butter and 8 ounces cream cheese are softened. Soft ingredients blend more easily.
The butter is for the cupcake batter. The cream cheese is for the cheesecake filling.
Do not use cold cream cheese if you want a smooth filling. Room-temperature cream cheese mixes much better.
Step 4: Start the Cupcake Batter
In a large mixing bowl, add the softened butter and 1 cup granulated sugar. Cream them together until light and fluffy.
This step begins the texture of the cupcakes. Do not rush it, because the mixture should become smooth and airy.
The butter and sugar should look creamy. Once they do, the eggs and liquids can be added.
Step 5: Add the Eggs
Add 2 large eggs to the butter and sugar mixture. Mix until they are fully combined.
The eggs help the cupcake batter become smooth and structured. They should disappear into the batter evenly.
Scrape the bowl if needed. A smooth mixture helps the dry ingredients blend more easily later.
Step 6: Add the Buttermilk
Pour in ½ cup buttermilk. Mix until it is incorporated into the batter.
Buttermilk helps make the cupcakes moist. It also gives the batter a soft texture.
If you do not have buttermilk, use the milk-and-vinegar option given in the recipe. Mix 1 tablespoon white vinegar or lemon juice with enough milk to make 1 cup, let it sit for about 5 minutes, and use what you need.
Step 7: Add the Vanilla Extract
Add 1 teaspoon vanilla extract to the cupcake batter. Mix until blended.
Vanilla brings warmth and sweetness to the cake. It also supports the vanilla bean cheesecake filling.
The wet mixture should now look smooth and inviting. It is ready for the dry ingredients.
Step 8: Whisk the Dry Ingredients
In another bowl, whisk together 1 ½ cups all-purpose flour, ½ teaspoon salt, and 1 teaspoon baking powder. This creates the dry mix.
Whisking helps distribute the salt and baking powder evenly. That supports a better cupcake texture.
Make sure there are no large clumps. The dry ingredients should look evenly blended.
Step 9: Combine the Wet and Dry Mixtures
Slowly add the dry ingredients to the wet mixture. Stir gently as you add them.
Mix until just combined. Do not overmix, because the cupcakes should stay light and airy.
The batter should come together softly. Stop once no dry flour streaks remain.
Step 10: Make the Cheesecake Filling
In a separate bowl, add 8 ounces softened cream cheese, ¼ cup granulated sugar, 1 large egg, 2 tablespoons all-purpose flour, and 1 teaspoon vanilla bean paste.
Mix until smooth and velvety. A hand mixer or whisk can help create a creamy texture.
The filling should look thick but smooth. If you cannot find vanilla bean paste, regular vanilla extract works too.
Step 11: Check the Cheesecake Texture
Look closely at the cheesecake filling. It should not have cream cheese lumps.
If it looks uneven, keep mixing a little longer. Softened cream cheese makes this step much easier.
A smooth filling gives the cupcakes a better center. This is the creamy part of the dessert, so texture matters.
Step 12: Fill the Cupcake Liners
Spoon the cupcake batter into the prepared liners. Fill each liner about ⅔ full.
This amount gives the cupcakes room to rise. Filling them too high can cause overflow.
Use a spoon or scoop if helpful. Try to divide the batter evenly.
Step 13: Add the Cheesecake Filling
Spoon the cheesecake filling into each cupcake. Distribute it evenly among the liners.
A small cookie scoop works well, but a spoon also works. The goal is for each cupcake to have a creamy center.
Do not worry if the filling sits slightly on top. It will bake into the cupcake.
Step 14: Bake the Cupcakes
Place the cupcake tray in the preheated oven. Bake for 20–25 minutes.
Watch the cupcakes near the end of baking. They are done when a toothpick inserted into the center comes out clean.
The kitchen should smell sweet and warm. The cupcakes should look set and lightly baked.
Step 15: Cool in the Pan
Remove the cupcakes from the oven. Let them cool in the pan for about 5 minutes.
This short rest helps them settle. It also makes them easier to move without breaking.
Do not add the sugar topping yet. The cupcakes need to cool completely first.
Step 16: Transfer to a Wire Rack
After about 5 minutes, move the cupcakes to a wire rack. Let them cool completely.
Cooling completely is important before caramelizing the topping. Warm cupcakes can soften too much during finishing.
Be patient with this step. The caramelized sugar topping is best added to cooled cupcakes before serving.
Step 17: Sprinkle the Sugar Topping
Before serving, sprinkle a thin layer of granulated sugar on top of each cooled cupcake. Use the ¼ cup granulated sugar reserved for caramelizing.
Keep the layer thin and even. This helps it caramelize smoothly.
Too much sugar can melt unevenly. A light layer gives the best crisp topping.
Step 18: Caramelize With a Kitchen Torch
Using a kitchen torch, carefully caramelize the sugar until it is golden brown and bubbly. Watch closely as the sugar changes color.
Move carefully so the sugar caramelizes evenly. Do not hold the heat too long in one spot.
The topping should become golden and crisp. Avoid burning the sugar.
Step 19: Add Optional Vanilla Bean Seeds
If desired, garnish with additional fresh vanilla bean seeds after caramelizing. This makes the cupcakes look extra pretty.
The seeds add a beautiful vanilla finish. They also make the cupcakes look more elegant.
This garnish is optional. The cupcakes are already flavorful without it.
Step 20: Serve and Store
Serve the cupcakes at room temperature. This gives the cupcake, cheesecake filling, and caramelized topping the best balance.
Pair them with vanilla ice cream or fresh whipped cream if desired. They are also lovely on their own.
Store leftovers in an airtight container in the refrigerator for up to 3 days. For longer storage, freeze cooled cupcakes for up to 1 month and thaw in the refrigerator when ready to enjoy.
Serving Ideas
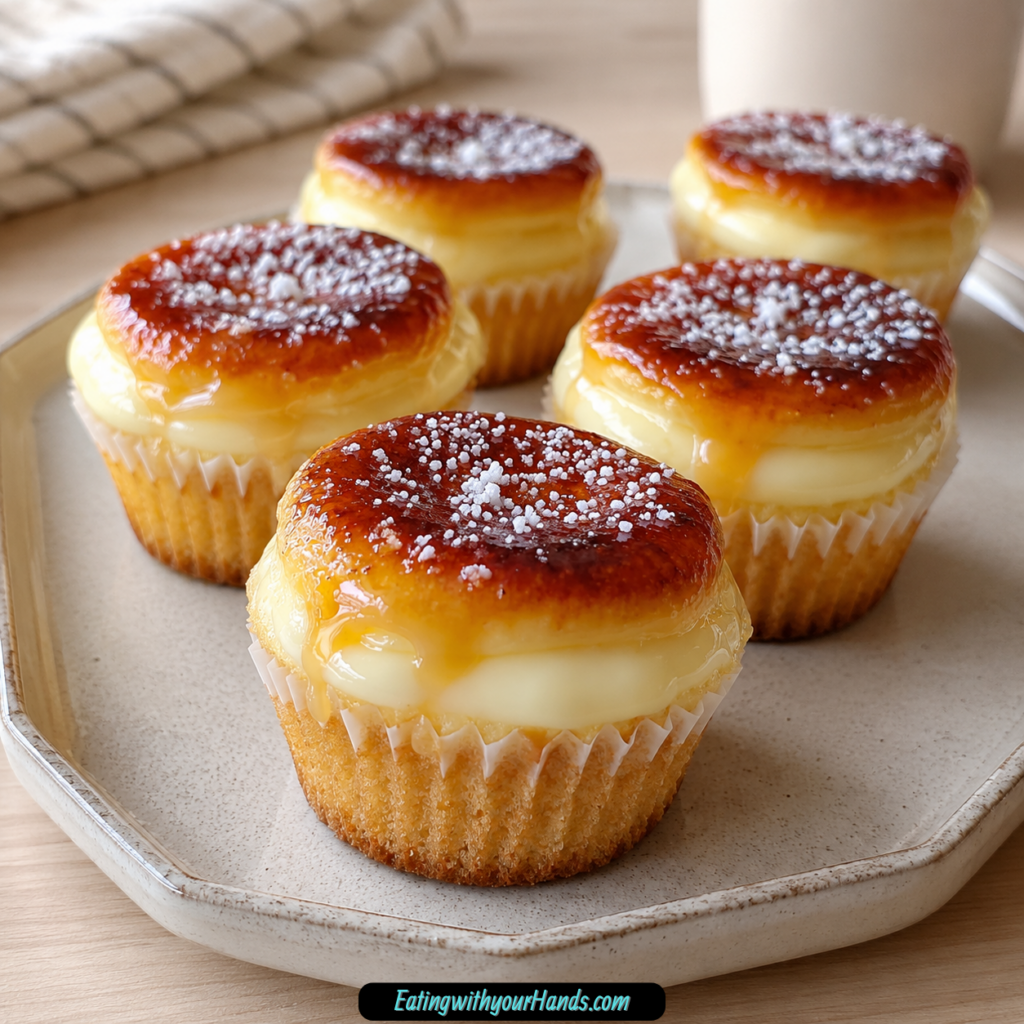
Serve Vanilla Bean Creme Brulee Cheesecake Cupcakes at room temperature. This helps the cupcake feel soft and the cheesecake center taste creamy.
They are beautiful on their own. The caramelized top gives them a polished finish.
Pair them with a scoop of vanilla ice cream for an extra special dessert. The cold ice cream works nicely with the rich cupcake.
Fresh whipped cream is another lovely serving option. It adds softness beside the caramelized sugar topping.
Serve these cupcakes for birthdays, dinner parties, family gatherings, casual weeknight desserts, or special celebrations. They feel fancy but still warm and approachable.
If using fresh berries instead of caramelized sugar, serve them chilled or at room temperature. The fruit gives the cupcakes a brighter finish.
Storage
Store leftover cupcakes in an airtight container in the refrigerator. They will keep for up to 3 days.
Let the cupcakes cool completely before storing. This protects the texture.
If possible, caramelize the sugar topping close to serving time. The crisp topping is best when fresh.
Keep the container sealed. This helps the cupcakes stay moist and flavorful.
Reheating
These cupcakes do not need reheating. They are best served at room temperature.
If refrigerated, let them sit until they are no longer too cold. This helps the cupcake texture soften.
Do not microwave cupcakes with a caramelized sugar topping. Heat can soften the topping and change the texture.
Serve them gently warmed only by room temperature. That gives the best balance of cake and cheesecake filling.
Freezing
These cupcakes can be frozen for up to 1 month. Make sure they are completely cooled before freezing.
Wrap them tightly in plastic wrap and place them in an airtight container. This helps protect them in the freezer.
Thaw them in the refrigerator overnight when ready to enjoy. This keeps the cheesecake filling safe and smooth.
For the best topping, caramelize the sugar after thawing and before serving. That keeps the crème brûlée finish crisp.
Make-Ahead
These cupcakes can be made ahead. Bake and cool them completely, then store them in the refrigerator or freezer.
For short-term storage, keep them in an airtight container in the fridge for up to 3 days. This works well before gatherings.
For longer storage, freeze them for up to 1 month. Thaw overnight in the refrigerator before serving.
Add the caramelized sugar topping close to serving time. It gives the freshest texture and best presentation.
Helpful Notes for Best Results
Use softened butter and softened cream cheese. Soft ingredients mix more smoothly.
Do not overmix the cupcake batter after adding the dry ingredients. Gentle mixing keeps the cupcakes light and airy.
Use room-temperature cream cheese for the filling. It helps prevent lumps.
If you do not have vanilla bean paste, regular vanilla extract works great. The flavor will still be delicious.
Use a thin, even layer of sugar for caramelizing. Watch the kitchen torch carefully so the sugar turns golden rather than burnt.
For a dairy-free version, use plant-based cream cheese and non-dairy butter. Dairy-free milk mixed with lemon juice or vinegar can replace buttermilk.
Adjust the sugar in the cheesecake filling if you prefer a less sweet taste. Keep the filling balanced and smooth.
Chocolate chips, chopped nuts, or pumpkin spice can be added for texture or seasonal flavor. These options make the cupcakes easy to customize.
Variations
Raspberry Creme Brulee Cheesecake Cupcakes
Add a swirl of raspberry puree into the cheesecake filling. This gives the cupcakes a fruity twist.
Raspberry adds color and a sweet-tart flavor. It pairs beautifully with vanilla cheesecake.
Strawberry Creme Brulee Cheesecake Cupcakes
Use strawberry puree in the cheesecake filling. This creates a soft berry flavor.
Strawberry makes the cupcakes feel bright and festive. It is a lovely option for celebrations.
Almond Flour Cheesecake Cupcakes
Substitute all-purpose flour with almond flour for a gluten-free version. The texture may change.
This variation gives the cupcakes a different flavor and crumb. Watch the bake carefully.
Reduced-Fat Cheesecake Cupcakes
Use reduced-fat cream cheese in the filling. This makes the cheesecake layer lighter.
The texture may be slightly different. It still gives a creamy center.
Mocha Cheesecake Cupcakes
Add a splash of espresso or coffee to the batter. This creates a mocha flavor.
Coffee deepens the vanilla and caramelized sugar notes. It makes the cupcakes taste richer.
Fresh Berry Cheesecake Cupcakes
Top with fresh berries instead of caramelized sugar. This gives a fruity finish.
This variation skips the torch step. It is a bright and simple option.
Dairy-Free Cheesecake Cupcakes
Use plant-based cream cheese, non-dairy butter, and dairy-free milk with lemon juice or vinegar. This makes the cupcakes dairy-free.
The texture and flavor may vary. Choose products that blend well.
Chocolate Chip Cheesecake Cupcakes
Mix chocolate chips into the cheesecake filling. This gives the center added texture.
Chocolate and vanilla work well together. This variation is fun for kids and adults.
Chopped Nut Cheesecake Cupcakes
Add chopped nuts to the cheesecake filling. They bring a little crunch.
This variation gives more texture to the creamy center. Keep the nuts small.
Pumpkin Spice Cheesecake Cupcakes
Add pumpkin spice in the fall. This gives the cupcakes a seasonal flavor.
Pumpkin spice pairs well with cream cheese and vanilla. It makes the cupcakes cozy.
Mascarpone Cheesecake Cupcakes
Use mascarpone cheese as a substitute for cream cheese. It gives a similar creamy texture.
The flavor will be slightly different. This option keeps the filling smooth and rich.
Greek Yogurt Cheesecake Cupcakes
Use thick Greek yogurt as a lighter option. Make sure it is thick and not overly tangy.
The flavor may change slightly. The texture may also be lighter.
Troubleshooting
Why Are My Cupcakes Dense?
The batter may have been overmixed after the dry ingredients were added. Mix gently until just combined.
The oven should also be fully preheated. A steady temperature helps the cupcakes rise properly.
Why Is My Cheesecake Filling Lumpy?
The cream cheese may not have been softened enough. Room-temperature cream cheese blends much more smoothly.
Mix the filling until velvety before adding it to the cupcakes. Scrape the bowl if needed.
Why Did My Cupcakes Overflow?
The liners may have been filled too high. Fill each one about ⅔ full with cupcake batter.
The cheesecake filling also needs space. Do not overfill the liners.
Why Did My Sugar Topping Burn?
The kitchen torch may have stayed too long in one spot. Move the torch carefully and watch the sugar closely.
The sugar should become golden brown and bubbly. Stop before it turns too dark.
Why Is My Sugar Topping Not Crisp?
The sugar layer may have been too thick or uneven. Use a thin, even layer.
The topping is best caramelized before serving. If stored too long, it can soften.
Why Did the Cheesecake Center Sink?
The filling may have settled as the cupcakes baked. This can happen with a creamy center.
Make sure the batter and filling are distributed evenly. Bake until a toothpick inserted into the center comes out clean.
Frequently Asked Questions
Can I Freeze Vanilla Bean Creme Brulee Cheesecake Cupcakes?
Yes, these cupcakes can be frozen. Make sure they are completely cooled before wrapping them tightly in plastic wrap and placing them in an airtight container.
They will stay fresh in the freezer for up to 1 month. Thaw them in the refrigerator overnight when ready to enjoy.
How Can I Substitute the Cream Cheese?
Mascarpone cheese can be used for a similar creamy texture. Greek yogurt can also work for a lighter option.
If using Greek yogurt, make sure it is thick and not overly tangy. The flavor may change slightly.
What Can I Use Instead of Buttermilk?
You can make your own buttermilk by mixing 1 tablespoon white vinegar or lemon juice with enough milk to make 1 cup. Let it sit for about 5 minutes.
This homemade version works in a pinch. Use the amount needed for the cupcake batter.
Can I Make These Cupcakes Dairy-Free?
Yes, replace the cream cheese with plant-based cream cheese and use dairy-free butter in the cupcake batter. You can also substitute buttermilk with dairy-free milk mixed with a bit of lemon juice or vinegar.
The texture and flavor may vary depending on the products used. Follow the same mixing and baking steps.
Can I Use Vanilla Extract Instead of Vanilla Bean Paste?
Yes, regular vanilla extract works if you cannot find vanilla bean paste. The flavor will still be sweet and vanilla-forward.
Vanilla bean paste gives a stronger real vanilla flavor. Use what you have.
Can I Add Fruit to the Cheesecake Filling?
Yes, raspberry or strawberry puree can be swirled into the cheesecake filling. This gives the cupcakes a fruity twist.
Do not overmix if you want a visible swirl. The fruit flavor should complement the vanilla cheesecake.
Should I Caramelize the Sugar Before Storing?
The caramelized topping is best added before serving. This keeps the sugar crisp.
If stored after caramelizing, the topping may soften. For the best texture, torch the sugar close to serving time.
Why This Recipe Works So Well
Vanilla Bean Creme Brulee Cheesecake Cupcakes work because they combine three layers of flavor and texture. The cupcake is soft, the cheesecake filling is creamy, and the caramelized topping is crisp and sweet.
The buttermilk helps keep the cupcake batter moist. Butter gives richness, and vanilla extract makes the cake taste warm and familiar.
The cheesecake filling gives every cupcake a creamy center. Cream cheese, sugar, egg, flour, and vanilla bean paste bake into a smooth, rich layer.
The caramelized sugar topping makes the dessert feel elegant. It adds the crème brûlée effect without changing the cupcake format.
The recipe also works because it can be customized. Fruit puree, almond flour, reduced-fat cream cheese, espresso, fresh berries, dairy-free ingredients, chocolate chips, chopped nuts, pumpkin spice, mascarpone, and Greek yogurt all offer different directions.
Most of all, these cupcakes work because they feel special without feeling intimidating. They are small, pretty, creamy, and sweet enough to make any table feel celebratory.
Final Thoughts
Vanilla Bean Creme Brulee Cheesecake Cupcakes are soft, creamy, elegant, and full of rich vanilla flavor. They turn simple cupcake batter, a smooth cheesecake filling, and caramelized sugar into a dessert that feels both cozy and impressive.
I love how each part of this recipe brings its own little moment. The batter feels simple and familiar, the cheesecake filling turns smooth and velvety, and the final torching step gives the tops that golden sparkle.
Serve these cupcakes at room temperature with vanilla ice cream, fresh whipped cream, or a clean caramelized finish right before serving. Whether you make them for a birthday, dinner party, family celebration, or a quiet treat just because, Vanilla Bean Creme Brulee Cheesecake Cupcakes bring creamy vanilla sweetness to every bite.
Vanilla Bean Creme Brulee Cheesecake Cupcakes
These Vanilla Bean Creme Brulee Cheesecake Cupcakes are soft, creamy, rich, and finished with a delicate caramelized sugar topping. With a moist cupcake base, smooth vanilla bean cheesecake filling, and golden creme brulee-style crunch, they make a beautiful dessert for parties, holidays, showers, or any occasion that needs something elegant and sweet.
Recipe Details
- Prep Time: 20 minutes
- Cook Time: 25 minutes
- Total Time: 45 minutes
- Course: Dessert
- Cuisine: American
- Servings: 12 cupcakes
- Calories: 320 kcal
Equipment
- oven
- Mixer
Ingredients
For the Cupcake Base
- 1 teaspoon vanilla extract
- ½ cup buttermilk
- 2 large eggs
- ½ cup unsalted butter, softened
- 1 cup granulated sugar
- 1 teaspoon baking powder
- ½ teaspoon salt
- 1 ½ cups all-purpose flour
For the Cheesecake Filling
- 1 teaspoon vanilla bean paste
- 2 tablespoons all-purpose flour
- 1 large egg
- ¼ cup granulated sugar
- 8 oz cream cheese, softened
For the Creme Brulee Topping
- Additional fresh vanilla bean seeds optional for garnish
- ¼ cup granulated sugar (for caramelizing)
Instructions
Step 1: Prepare the Oven and Cupcake Pan
Preheat your oven to 350°F (175°C) and line a cupcake pan with liners.
Step 2: Cream the Butter and Sugar
In a bowl, cream together the softened unsalted butter and granulated sugar until smooth.
Step 3: Add the Wet Cupcake Ingredients
Add the eggs, buttermilk, and vanilla extract, then mix until combined.
Step 4: Whisk the Dry Ingredients
In another bowl, whisk together the all-purpose flour, salt, and baking powder.
Step 5: Finish the Cupcake Batter
Gradually add the dry ingredients to the wet mixture, mixing until just combined.
Step 6: Fill the Cupcake Liners
Pour the batter into the prepared cupcake liners, filling them about ⅔ full.
Step 7: Make the Cheesecake Filling
In a separate bowl, mix the softened cream cheese, granulated sugar, egg, flour, and vanilla bean paste until smooth.
Step 8: Add the Filling
Spoon the cheesecake filling into each cupcake.
Step 9: Bake the Cupcakes
Bake in the preheated oven for 20-25 minutes, or until a toothpick comes out clean.
Step 10: Cool the Cupcakes
Let the cupcakes cool before adding the caramelized topping.
Step 11: Add the Sugar Topping
Before serving, sprinkle granulated sugar on top of each cupcake.
Step 12: Caramelize the Sugar
Use a kitchen torch to caramelize the sugar until golden brown.
Step 13: Garnish and Serve
For added flavor, garnish with fresh vanilla bean seeds on top after caramelizing the sugar.
Notes
For added flavor, garnish with fresh vanilla bean seeds on top after caramelizing the sugar.
Serving Suggestions
- Serve after the sugar topping has been caramelized for the best crunchy creme brulee finish.
- Add to dessert tables for birthdays, showers, holidays, or dinner parties.
- Pair with coffee, tea, cold milk, or espresso.
- Garnish with fresh vanilla bean seeds if you want a stronger vanilla aroma.
- Serve once the cupcakes are fully cooled so the cheesecake filling sets nicely.
Storage
How to Store
Store the cupcakes covered in the refrigerator to keep the cheesecake filling fresh.
Best Texture Tip
Caramelize the granulated sugar topping shortly before serving so the top stays crisp and golden.
Serving Tip
Let the cupcakes cool completely before adding the creme brulee topping so the sugar caramelizes cleanly on the surface.

Fernando is the creator and writer behind the food blog Eating with your Hands. Living and working in cities like Paris, Barcelona, and Berlin, and being married to a Canadian foodie, has given Fernando a passion and interest in food and inspired him to run EWYH.