
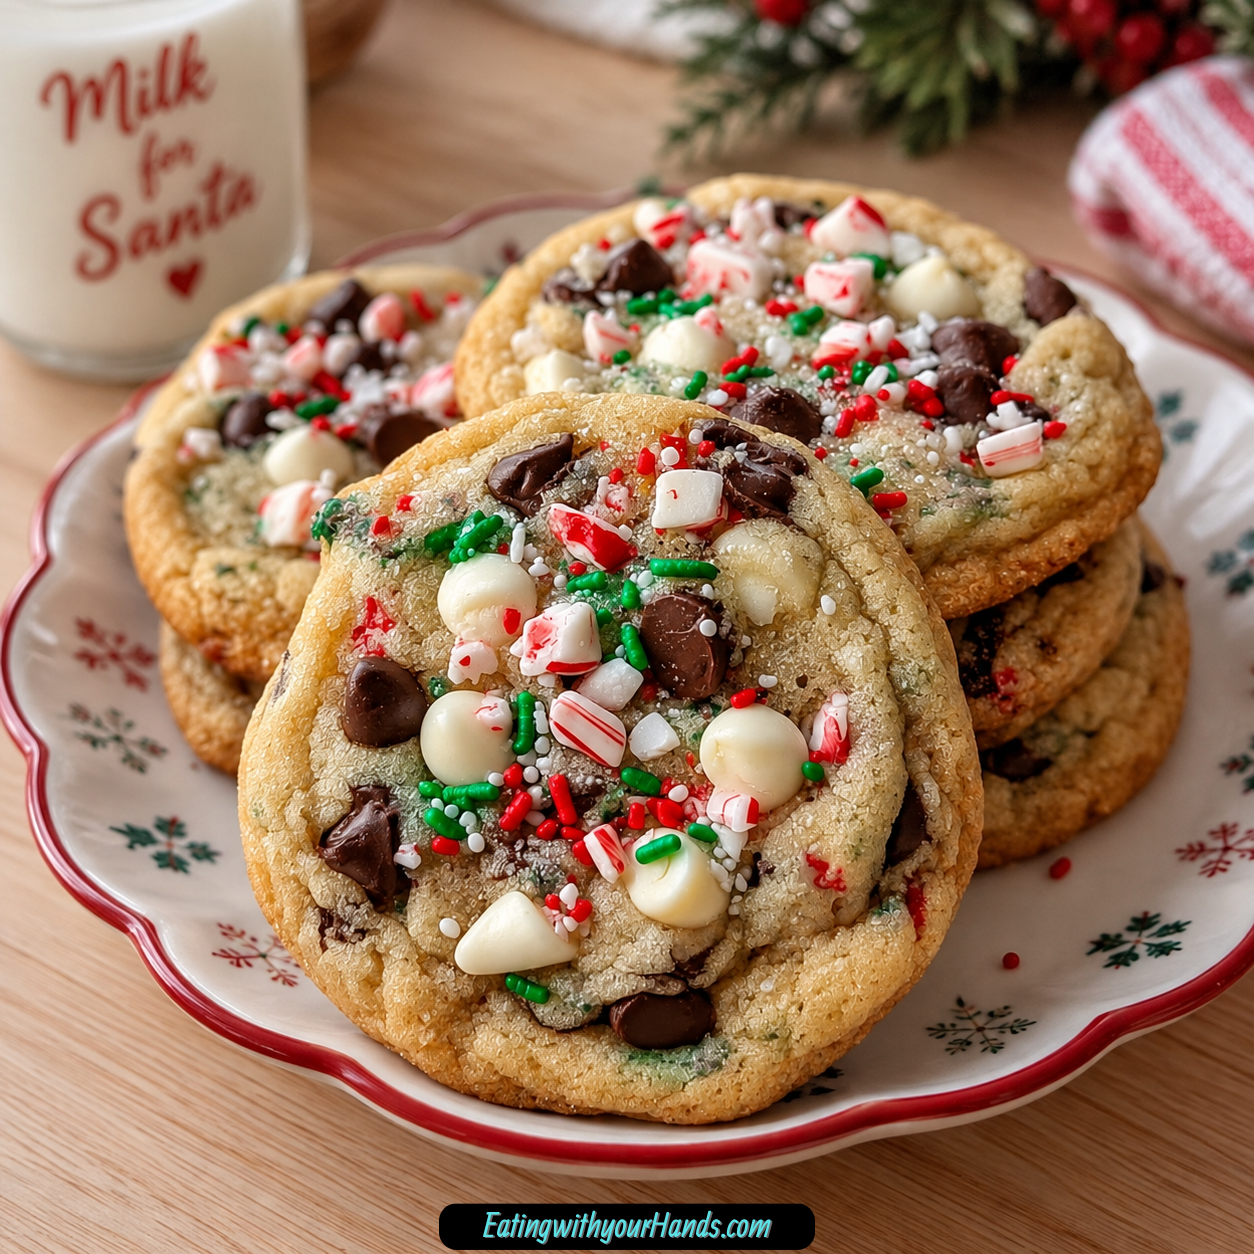
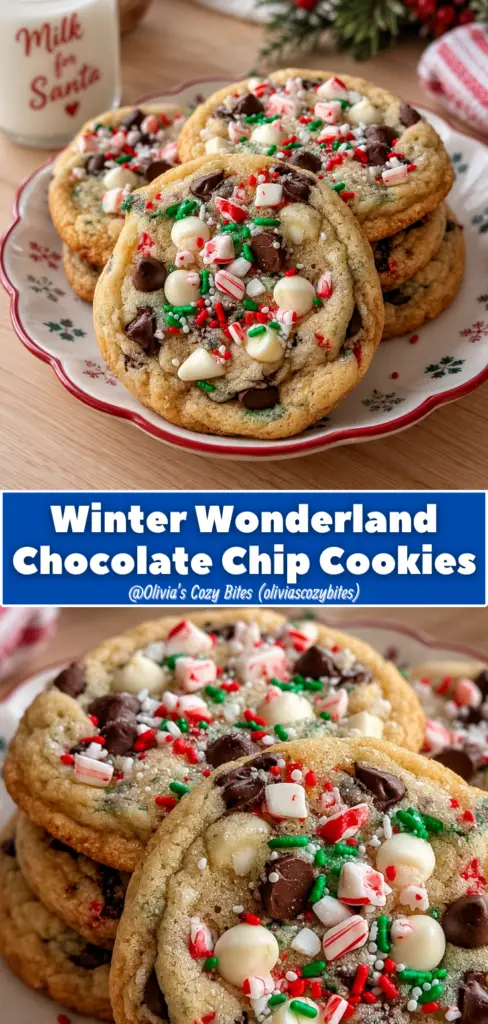
Winter Wonderland Chocolate Chip Cookies are the kind of holiday cookies that make the whole kitchen feel brighter. They are soft in the center, lightly golden around the edges, filled with white chocolate chips and dark chocolate chips, and finished with cheerful holiday sprinkles for a festive winter look.
These cookies feel like the sweet side of the season. Every batch brings together butter, brown sugar, vanilla, chocolate, a little cinnamon, and those colorful red, green, and white sprinkles that instantly make a plate look ready for sharing.
There is something special about baking cookies during the holidays. The counter gets messy, the dough bowl becomes the center of attention, and somehow even the smallest details feel like part of the memory.
This recipe has that cozy, family-kitchen feeling. It is simple enough for a busy December afternoon, but festive enough to bring to a gathering, wrap as a gift, or serve with warm drinks by the fire.
The dough starts with softened butter, granulated sugar, and packed brown sugar creamed until light and fluffy. Eggs and vanilla give the dough richness, while flour, baking soda, baking powder, salt, and cinnamon create the soft cookie base.
Then comes the fun part. White chocolate chips, dark chocolate chips, holiday sprinkles, and optional crushed candy canes turn the dough into something colorful, sweet, and full of winter charm.
These Winter Wonderland Chocolate Chip Cookies are perfect for holiday trays, cookie swaps, family gatherings, gift tins, or quiet evenings at home. They are warm, cheerful, customizable, and freezer-friendly, which makes them a dependable holiday baking favorite.
Table of Contents
- Why You’ll Love These Winter Wonderland Chocolate Chip Cookies
- Recipe Details
- Ingredients
- For the Cookie Dough
- For the Mix-Ins
- Ingredient Notes
- Optional Swaps, Variations, Add-Ins, and Serving Ideas
- Butterscotch Winter Cookies
- Peanut Butter Chip Cookies
- Extra Dark Chocolate Cookies
- Cookies-and-Cream Winter Cookies
- Gluten-Free Winter Cookies
- Extra Minty Cookies
- Dairy-Free Direction
- Salted Butter Option
- Coconut Sugar Option
- Sea Salt Finish
- Melted Chocolate Drizzle
- Holiday Gift Cookies
- Why This Recipe Works
- Directions
- Step 1: Preheat the Oven and Prepare the Baking Sheet
- Step 2: Cream the Butter and Sugars
- Step 3: Add the Eggs and Vanilla
- Step 4: Combine the Dry Ingredients
- Step 5: Mix the Dry Ingredients into the Wet Ingredients
- Step 6: Fold in the Chocolate and Holiday Mix-Ins
- Step 7: Scoop the Dough
- Step 8: Add Optional Finishing Touches
- Step 9: Bake the Cookies
- Step 10: Cool on the Baking Sheet
- Step 11: Transfer to a Wire Rack
- Step 12: Serve Warm or Arrange for Gatherings
- Step 13: Store Baked Cookies
- Step 14: Freeze Cookie Dough
- Step 15: Bake Frozen Dough
- Step 16: Freeze Baked Cookies
- Serving Ideas
- Storage
- Freezing
- Make-Ahead
- Helpful Notes for Best Results
- Variations
- Butterscotch Winter Wonderland Cookies
- Peanut Butter Chip Winter Cookies
- Extra Dark Chocolate Cookies
- Cookies-and-Cream Winter Cookies
- Gluten-Free Winter Wonderland Cookies
- Peppermint Chocolate Chip Cookies
- Coconut Oil Cookie Variation
- Coconut Sugar Cookie Variation
- Melted Chocolate Drizzle Cookies
- Sea Salt Winter Cookies
- Troubleshooting
- Frequently Asked Questions
- Why This Recipe Works So Well
- Final Thoughts
- Winter Wonderland Chocolate Chip Cookies
Why You’ll Love These Winter Wonderland Chocolate Chip Cookies
These cookies have a quick prep time of just 15 minutes. That makes them perfect for busy holiday schedules when you want something festive without a long project.
They use simple ingredients that you likely already have on hand. Butter, sugars, eggs, vanilla, flour, leaveners, salt, cinnamon, chocolate chips, and sprinkles create the whole cookie.
They are family-friendly and fun to bake. Kids, parents, grandparents, and holiday guests can all enjoy the colorful, chocolate-filled cookies.
The dough is freezer-friendly. You can freeze scooped dough and bake fresh cookies whenever a craving hits.
They are festive and colorful. Holiday sprinkles and optional crushed candy canes make them a delightful addition to Christmas gatherings.
They are easy to customize. You can change the chips, add peppermint, use crushed Oreos, try a gluten-free blend, or drizzle melted chocolate on top.
Recipe Details
Winter Wonderland Chocolate Chip Cookies bake at 350°F (175°C). The bake time is 10 to 12 minutes, or until the edges are lightly golden and the centers are soft and a little gooey.
The prep time is 15 minutes. The dough comes together quickly, then gets scooped onto a parchment-lined baking sheet.
The cookie base uses 1 cup softened unsalted butter, 1 cup granulated sugar, 1 cup packed brown sugar, 2 large eggs, and 1 tablespoon pure vanilla extract.
The dry ingredients include 3 cups all-purpose flour, 1 teaspoon baking soda, ½ teaspoon baking powder, 1 teaspoon salt, and ¼ teaspoon ground cinnamon. The cinnamon is a small but meaningful flavor note.
The mix-ins include 1 cup white chocolate chips, 1 cup dark chocolate chips, ¾ cup holiday sprinkles, and optional ½ cup crushed candy canes.
Dark chocolate chips can be replaced with semi-sweet chocolate chips if you prefer. White chocolate chips can also be replaced with butterscotch chips, peanut butter chips, or additional dark chocolate chips.
The cookies cool on the baking sheet for a few minutes before being moved to a wire rack. This helps create the best texture.
Store baked cookies in an airtight container at room temperature for about a week. Cookie dough can be frozen for up to 3 months, and baked cookies can also be frozen for up to 3 months.
Ingredients
For the Cookie Dough
- 1 cup unsalted butter, softened (room temperature is crucial here)
- 1 cup granulated sugar
- 1 cup brown sugar, packed tight
- 2 large eggs (room temperature for the best results)
- 1 tablespoon pure vanilla extract (don’t skimp on quality; it makes a difference!)
- 3 cups all-purpose flour
- 1 teaspoon baking soda
- ½ teaspoon baking powder
- 1 teaspoon salt (I know the original recipe said ½, but trust me on this)
- ¼ teaspoon ground cinnamon (secret weapon alert!)
For the Mix-Ins
- 1 cup white chocolate chips
- 1 cup dark chocolate chips (or semi-sweet if you prefer)
- ¾ cup holiday sprinkles (look for red, green, and white)
- ½ cup crushed candy canes (optional but amazing for that festive touch)
Ingredient Notes
Softened unsalted butter gives these cookies richness and helps create a tender texture. Room temperature butter is important because it creams smoothly with the sugars.
Granulated sugar adds sweetness and helps the cookies bake with lightly golden edges. Brown sugar adds deeper flavor and helps keep the centers soft.
Packed brown sugar gives the dough a richer, warmer sweetness. It works beautifully with vanilla, cinnamon, and chocolate.
Room-temperature eggs help the dough mix more evenly. They blend into the butter and sugar mixture better than cold eggs.
Pure vanilla extract gives the cookies their warm bakery-style flavor. The recipe specifically notes that quality makes a difference.
All-purpose flour creates the structure of the cookie. It holds the butter, sugar, eggs, and mix-ins together.
Baking soda and baking powder help the cookies bake properly. They work together with the dough to create a soft cookie texture.
Salt balances the sweetness. The ingredient list uses 1 teaspoon salt and keeps the flavor from tasting flat.
Ground cinnamon adds a quiet warm note. It is small, but it makes the cookies feel more seasonal.
White chocolate chips bring creamy sweetness. Dark chocolate chips bring richer chocolate flavor, though semi-sweet can be used if preferred.
Holiday sprinkles make the cookies festive. Red, green, and white sprinkles give them their winter wonderland look.
Crushed candy canes are optional but add a festive peppermint touch. They bring crunch, color, and holiday flavor.
Optional Swaps, Variations, Add-Ins, and Serving Ideas
Butterscotch Winter Cookies
Swap the white chocolate chips for butterscotch chips. This gives the cookies a deeper, caramel-like sweetness.
The butterscotch flavor works well with brown sugar and cinnamon. It creates a warmer variation of the original cookie.
Peanut Butter Chip Cookies
Use peanut butter chips instead of white chocolate chips. This gives the cookies a different flavor profile.
The peanut butter chips pair with the dark chocolate chips for a richer bite. It is a fun variation for anyone who loves peanut butter flavor.
Extra Dark Chocolate Cookies
Replace the white chocolate chips with additional dark chocolate chips. This makes the cookies more chocolate-forward.
The final cookie will look less snowy but taste richer. It is a good option for dark chocolate lovers.
Cookies-and-Cream Winter Cookies
Use crushed Oreos instead of candy canes. This creates a cookies-and-cream twist.
The Oreos add extra chocolate cookie texture. This variation changes the holiday peppermint feel into something more creamy and chocolatey.
Gluten-Free Winter Cookies
Use a 1:1 gluten-free baking blend instead of all-purpose flour. This creates a gluten-free version.
The texture may vary depending on the blend. Bake until the edges are lightly golden and the centers remain soft.
Extra Minty Cookies
Add 1 teaspoon peppermint extract for an extra minty kick. This strengthens the winter flavor.
This variation works especially well with crushed candy canes. It makes the cookies taste even more festive.
Dairy-Free Direction
Try using coconut oil instead of butter for a dairy-free option. This changes the texture and flavor of the cookie.
Use this option when it fits your needs. The final cookie may bake differently from the butter version.
Salted Butter Option
If you do not have unsalted butter, use salted butter and reduce the added salt slightly. This keeps the cookies from becoming too salty.
The recipe is written with unsalted butter for better control. Salted butter can work when adjusted.
Coconut Sugar Option
Replace brown sugar with coconut sugar for a lighter taste. This changes the flavor of the dough.
The cookies may taste slightly different. Use this option if you prefer that sweetness.
Sea Salt Finish
Add a pinch of sea salt on top before baking. This enhances the flavor beautifully.
The salt adds contrast to the chocolate and sprinkles. It gives the cookies a more finished taste.
Melted Chocolate Drizzle
Drizzle melted chocolate on top before serving. This adds an extra touch of decadence.
It also makes the cookies look special on a holiday plate. Use it when you want a more decorated finish.
Holiday Gift Cookies
Wrap the cookies in pretty cellophane for holiday gifting. They are perfect for sharing.
You can also stack them in a festive tin or arrange them on a decorative plate. The sprinkles make them look gift-ready.
Why This Recipe Works
Winter Wonderland Chocolate Chip Cookies work because they balance a classic chocolate chip cookie base with cheerful holiday mix-ins. The soft dough, two kinds of chocolate, sprinkles, and optional peppermint all come together naturally.
Creaming the butter and sugars helps create a smoother cookie base. This step makes the dough feel lighter before the eggs and vanilla are added.
The combination of granulated sugar and brown sugar gives the cookies sweetness and softness. Brown sugar especially helps the centers stay tender.
The cinnamon adds warmth without taking over. It gives the cookies a subtle winter flavor that supports the chocolate and peppermint.
White chocolate chips and dark chocolate chips create contrast. One is sweet and creamy, while the other is deeper and richer.
Holiday sprinkles make the cookies look festive before they even bake. Crushed candy canes add an optional peppermint crunch.
The short bake time keeps the cookies soft. Pulling them when the edges are lightly golden and the centers are still gooey gives them the best texture.
Directions
Step 1: Preheat the Oven and Prepare the Baking Sheet
Preheat your oven to 350°F (175°C). Line a baking sheet with parchment paper so the cookies release easily after baking.
This temperature helps the cookies bake with lightly golden edges while keeping the centers soft. The parchment also makes cleanup simple.
Step 2: Cream the Butter and Sugars
In a mixing bowl, combine 1 cup softened unsalted butter, 1 cup granulated sugar, and 1 cup packed brown sugar. Cream them together until smooth, light, and fluffy.
This usually takes about 2 to 3 minutes of mixing. The butter must be softened so it blends evenly with both sugars.
Step 3: Add the Eggs and Vanilla
Add 2 large room-temperature eggs and 1 tablespoon pure vanilla extract to the butter mixture. Mix until everything is well combined.
Scrape down the sides of the bowl so all the butter and sugar mixture gets incorporated. The wet mixture should look smooth and rich.
Step 4: Combine the Dry Ingredients
In another bowl, whisk together 3 cups all-purpose flour, 1 teaspoon baking soda, ½ teaspoon baking powder, 1 teaspoon salt, and ¼ teaspoon ground cinnamon. Whisking helps distribute the leavening agents, salt, and cinnamon evenly.
This step keeps the dough consistent from cookie to cookie. It also helps every bite carry the same warm flavor.
Step 5: Mix the Dry Ingredients into the Wet Ingredients
Gradually add the dry ingredients to the wet ingredients. Mix gently until just combined.
Do not overmix the dough. Stop once a soft cookie dough forms and no large dry streaks remain.
Step 6: Fold in the Chocolate and Holiday Mix-Ins
Fold in 1 cup white chocolate chips, 1 cup dark chocolate chips, ¾ cup holiday sprinkles, and ½ cup crushed candy canes if using them. Use a spatula or slow mixing speed so the add-ins stay evenly distributed.
The dough should look colorful and full of chocolate. This is where the cookies become festive.
Step 7: Scoop the Dough
Drop spoonfuls of dough onto the parchment-lined baking sheet. Leave space between each cookie because they will spread a little while baking.
Try to make the portions similar in size. This helps the cookies bake evenly.
Step 8: Add Optional Finishing Touches
If desired, add a pinch of sea salt on top before baking. This enhances the flavor beautifully.
You can also press a few extra sprinkles or chocolate chips on top for a more decorative look. Keep any nut-based add-ins or toppings out if nut allergies are a concern.
Step 9: Bake the Cookies
Bake the cookies for 10 to 12 minutes. Watch them closely near the end of baking.
They are ready when the edges are lightly golden. The centers should still look soft and a little gooey.
Step 10: Cool on the Baking Sheet
Let the cookies cool on the baking sheet for a few minutes. This helps them finish setting without drying out.
Do not move them immediately because soft cookies can break when hot. A short rest gives them the right texture.
Step 11: Transfer to a Wire Rack
Move the cookies to a wire rack to cool completely. This keeps the bottoms from steaming too much.
The cookies can be enjoyed warm or cooled to room temperature. Both textures are delightful.
Step 12: Serve Warm or Arrange for Gatherings
Serve the cookies warm right out of the oven if you want the softest centers. They are also wonderful at room temperature.
For holiday gatherings, stack them in a festive tin or arrange them on a decorative plate. A drizzle of melted chocolate adds extra decadence.
Step 13: Store Baked Cookies
Store cooled cookies in an airtight container at room temperature. They will stay soft and fresh for about a week.
Make sure the cookies are completely cool before storing. This helps maintain their texture.
Step 14: Freeze Cookie Dough
To freeze the dough, scoop it into balls and place them on a baking sheet. Freeze individually until firm.
Once frozen, transfer the dough balls to an airtight container or zip-top bag. They will last for up to 3 months in the freezer.
Step 15: Bake Frozen Dough
When ready to bake frozen dough, place the dough balls straight into the oven without thawing. Add 1 to 2 minutes to the baking time.
This lets you bake fresh cookies whenever the craving hits. It is one of the easiest ways to plan ahead for the holidays.
Step 16: Freeze Baked Cookies
Baked cookies can also be frozen for up to 3 months. Make sure they are completely cooled before freezing.
Store them well wrapped or in an airtight container. This helps maintain their texture after freezing.
Serving Ideas
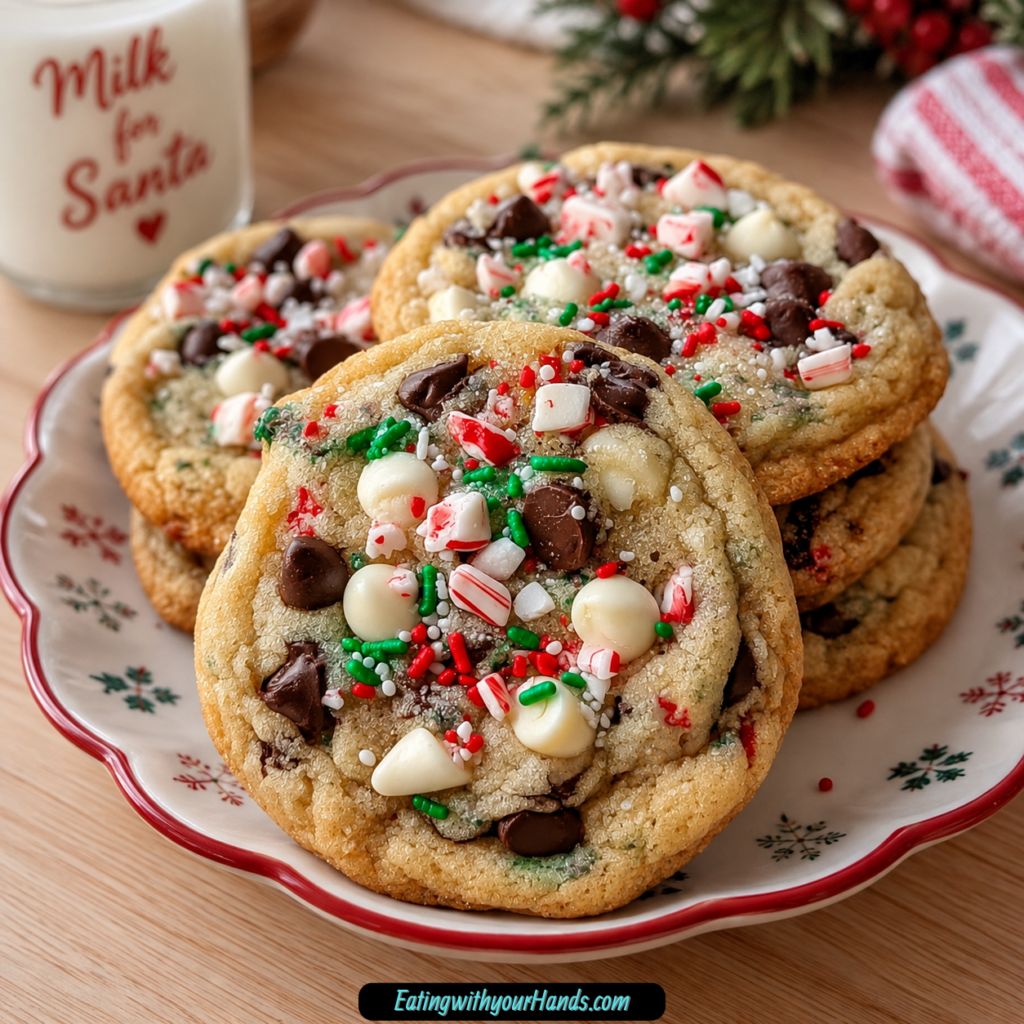
Winter Wonderland Chocolate Chip Cookies are best served warm, especially when the centers are still soft and a little gooey. The chocolate chips feel extra rich when the cookies are fresh from the oven.
They are also delightful at room temperature. This makes them easy to serve on cookie trays, dessert boards, or holiday platters.
For gatherings, stack them in a festive tin. The red, green, and white sprinkles make them look cheerful without much extra work.
A decorative plate also works beautifully. These cookies bring color to the table and look lovely beside other Christmas treats.
For extra decadence, drizzle melted chocolate over the tops. This gives the cookies a more dressed-up finish.
These cookies are also perfect for holiday gifting. Wrap them in pretty cellophane and share them with friends, family, neighbors, or anyone who needs a sweet winter surprise.
Storage
Store Winter Wonderland Chocolate Chip Cookies in an airtight container at room temperature. They will stay soft and fresh for about a week.
Let the cookies cool completely before placing them in the container. This protects the texture and keeps them from becoming too steamy.
Keep the container sealed between servings. This helps the cookies stay tender and ready for snacking.
Freezing
The cookie dough can be frozen for up to 3 months. Scoop the dough into balls, freeze them individually on a baking sheet, then transfer them to an airtight container or zip-top bag.
When ready to bake, place frozen dough straight into the oven without thawing. Add a minute or two to the baking time.
Baked cookies can also be frozen for up to 3 months. Make sure they are completely cooled before freezing so they keep their texture.
Make-Ahead
These cookies are a wonderful make-ahead holiday treat. The dough can be frozen in scooped portions, which makes it easy to bake fresh cookies whenever you want them.
You can also bake the cookies ahead and store them at room temperature for about a week. This is helpful for cookie trays, school events, parties, and gift tins.
For the freshest warm-cookie experience, freeze the dough and bake only what you need. The cookies can go straight from freezer to oven with just a little extra baking time.
Helpful Notes for Best Results
Use room-temperature butter and eggs. This helps the dough mix smoothly and evenly.
Cream the butter and sugars for about 2 to 3 minutes. The mixture should be light and fluffy before you add the eggs.
Do not overmix after adding the dry ingredients. Mix just until a soft dough forms.
Keep an eye on the cookies while they bake. The edges should be lightly golden, and the centers should remain soft.
If you do not have unsalted butter, use salted butter and reduce the added salt slightly. This helps balance the flavor.
For nut allergies, skip any nut-based add-ins or toppings. The cookie already has plenty of texture from chocolate chips, sprinkles, and optional crushed candy canes.
Adding a pinch of sea salt on top before baking enhances the flavor beautifully. These cookies are also perfect for gifting when wrapped in pretty cellophane.
Variations
Butterscotch Winter Wonderland Cookies
Swap the white chocolate chips for butterscotch chips. This gives the cookies a different flavor profile.
The butterscotch adds a warmer sweetness. It pairs nicely with the brown sugar and cinnamon.
Peanut Butter Chip Winter Cookies
Use peanut butter chips instead of white chocolate chips. This makes the cookies richer and nuttier in flavor.
The peanut butter chips work well with dark chocolate chips. It is a fun variation for a holiday cookie platter.
Extra Dark Chocolate Cookies
Use additional dark chocolate chips instead of white chocolate chips. This creates a deeper chocolate flavor.
The cookies will taste less creamy and more chocolate-forward. Use semi-sweet if you prefer a softer chocolate flavor.
Cookies-and-Cream Winter Cookies
Use crushed Oreos instead of crushed candy canes. This gives the cookies a cookies-and-cream twist.
The Oreos add crumbly chocolate cookie pieces. It changes the peppermint-style holiday flavor into a richer cookie flavor.
Gluten-Free Winter Wonderland Cookies
Substitute the all-purpose flour with a 1:1 gluten-free baking blend. This makes a gluten-free version.
The texture may vary depending on the blend. Bake until the edges are lightly golden and the centers are soft.
Peppermint Chocolate Chip Cookies
Add 1 teaspoon peppermint extract for an extra minty kick. This pairs especially well with crushed candy canes.
The peppermint flavor makes the cookies feel even more wintery. Use this variation when you want a stronger holiday taste.
Coconut Oil Cookie Variation
Try using coconut oil instead of butter for a dairy-free option. This changes the dough texture and flavor.
The cookies may bake differently. Use this option if it fits your needs.
Coconut Sugar Cookie Variation
Replace brown sugar with coconut sugar for a lighter taste. This changes the sweetness and flavor of the cookies.
The final texture may vary. The cookie will still keep its festive mix-ins.
Melted Chocolate Drizzle Cookies
Add a drizzle of melted chocolate on top after the cookies cool. This gives them an extra touch of decadence.
It also makes the cookies look more polished. Use this for parties or gift tins.
Sea Salt Winter Cookies
Sprinkle a pinch of sea salt on top before baking. This enhances the chocolate and balances the sweetness.
The salty finish works beautifully with both white and dark chocolate. It is simple but memorable.
Troubleshooting
The Dough Is Too Soft
Make sure the butter is softened, not melted. Melted butter can make the dough looser.
If the dough feels difficult to scoop, let it rest briefly before portioning. The dough should still be soft enough to drop by spoonfuls.
The Cookies Spread Too Much
Leave enough space between each cookie because they will spread a little. Parchment paper also helps with even baking.
Check that the dry ingredients were measured and mixed correctly. The dough should be soft but not runny.
The Cookies Are Dry
Do not overbake the cookies. Pull them when the edges are lightly golden and the centers still look soft.
They will continue setting on the baking sheet for a few minutes. This helps keep the texture tender.
The Centers Look Too Soft
Soft, slightly gooey centers are part of this cookie. Let the cookies cool on the baking sheet for a few minutes before moving them.
That short rest helps the centers set. Then transfer them to a wire rack to cool completely.
The Mix-Ins Are Uneven
Fold the chocolate chips, sprinkles, and candy canes gently but thoroughly. Scrape the bottom of the bowl as you fold.
Even mixing gives every cookie chocolate and color. Do not overmix the dough while doing this.
The Sprinkles Bleed Color
Use holiday sprinkles meant for baking if possible. Red, green, and white sprinkles are suggested for the festive look.
Fold them gently into the dough. Overmixing can smear colors.
The Candy Canes Feel Too Minty
The crushed candy canes are optional. Leave them out if you want the cookies to taste more like classic chocolate chip cookies.
You can use crushed Oreos instead for a cookies-and-cream twist. That keeps the texture without the peppermint flavor.
The Cookies Need to Be Gluten-Free
Use a 1:1 gluten-free baking blend in place of all-purpose flour. This is the listed gluten-free option.
The final texture may change depending on the blend. Bake by the same visual cues.
The Cookies Need a Dairy-Free Direction
Try coconut oil instead of butter. This is the listed dairy-free option.
The flavor and texture may vary. Choose this variation if it works for your needs.
The Cookies Need More Holiday Flavor
Add crushed candy canes or 1 teaspoon peppermint extract. Both give the cookies a stronger winter flavor.
A pinch of cinnamon is already included in the dough. Holiday sprinkles and a chocolate drizzle also make them feel festive.
Frequently Asked Questions
Yes, you can freeze the cookie dough. Scoop the dough into balls and place them on a baking sheet to freeze individually.
Once frozen, transfer the dough balls to an airtight container or zip-top bag. They will last for up to 3 months in the freezer.
Can I bake the dough from frozen?
Yes, the frozen dough can go straight into the oven without thawing. Add a minute or two to the baking time.
This makes it easy to bake fresh cookies whenever you want them. It is especially helpful during the holiday season.
What can I substitute for white chocolate chips?
If you do not want to use white chocolate chips, you can substitute butterscotch chips, peanut butter chips, or additional dark chocolate chips. Each option gives the cookies a different flavor.
Dark chocolate makes them richer, while butterscotch and peanut butter chips bring their own sweet twist. Use the option you like best.
These cookies stay fresh in an airtight container at room temperature for about a week. Keep them sealed so they stay soft.
If you want to keep them longer, freeze the baked cookies for up to 3 months. Make sure they are completely cooled before freezing.
Yes, baked cookies can be frozen for up to 3 months. Cool them completely first.
Store them in an airtight container or wrap them well. This helps maintain their texture.
Can I make these gluten-free?
Yes, use a 1:1 gluten-free baking blend instead of all-purpose flour. This creates a gluten-free version.
The texture may vary depending on the blend. Bake until the edges are lightly golden.
Can I use semi-sweet chocolate chips?
Yes, semi-sweet chocolate chips can be used instead of dark chocolate chips. The recipe lists dark chocolate chips or semi-sweet if you prefer.
Semi-sweet chocolate gives a slightly different flavor. It is a good option if you want a more familiar chocolate chip cookie taste.
Serve them warm for the softest, gooey centers. They are also delicious at room temperature.
For holiday gatherings, place them on a decorative plate or in a festive tin. A melted chocolate drizzle can add extra decadence.
Why This Recipe Works So Well
Winter Wonderland Chocolate Chip Cookies work so well because they begin with a dependable soft cookie dough and then dress it up for the holidays. The base is buttery, sweet, and rich, while the mix-ins bring color, chocolate, and festive flavor.
The combination of granulated sugar and brown sugar gives the cookies balance. Granulated sugar supports lightly golden edges, while brown sugar helps create a softer center.
The vanilla extract gives warmth and depth. The cinnamon adds a small winter note that makes the cookies feel more seasonal.
White chocolate chips and dark chocolate chips give contrast in both color and flavor. The white chocolate looks snowy, while the dark chocolate adds richness.
The holiday sprinkles make the cookies instantly festive. Crushed candy canes add optional peppermint flavor and a little crunch.
The recipe is also flexible. Butterscotch chips, peanut butter chips, extra dark chocolate chips, crushed Oreos, gluten-free baking blend, peppermint extract, coconut oil, salted butter, coconut sugar, sea salt, melted chocolate drizzle, and holiday gift wrapping all give you ways to make the cookies fit the moment.
Most of all, these cookies work because they feel joyful without being difficult. They are colorful, soft, chocolatey, freezer-friendly, and made for the kind of holiday baking that leaves a little flour on the counter and a lot of sweetness on the table.
Final Thoughts
Winter Wonderland Chocolate Chip Cookies are festive holiday cookies made with softened butter, granulated sugar, brown sugar, eggs, vanilla, flour, baking soda, baking powder, salt, cinnamon, white chocolate chips, dark chocolate chips, holiday sprinkles, and optional crushed candy canes. They bake at 350°F for 10 to 12 minutes, until the edges are lightly golden and the centers stay soft and gooey.
Serve them warm, stack them in a festive tin, arrange them on a decorative plate, drizzle them with melted chocolate, or wrap them in pretty cellophane for holiday gifting. With their colorful sprinkles, rich chocolate, soft centers, freezer-friendly dough, and cozy winter flavor, these cookies bring a cheerful little piece of the season to every bite.
Winter Wonderland Chocolate Chip Cookies

Festive, buttery, chocolate-filled, and full of holiday color, these Winter Wonderland Chocolate Chip Cookies combine white chocolate chips, dark chocolate chips, red, green, and white sprinkles, and optional crushed candy canes. With a soft cookie base, a touch of cinnamon, and plenty of cheerful mix-ins, they make a bright American dessert for Christmas trays, winter baking, or holiday sharing.
Recipe Details
- Prep Time: 15 minutes
- Cook Time: 10 minutes
- Total Time: 25 minutes
- Course: Dessert
- Cuisine: American
- Servings: 24 cookies
- Calories: 150 kcal
Equipment
- Mixing bowl
- Baking sheet
Ingredients
The Fun Stuff
- 1 cup white chocolate chips
- 1 cup dark chocolate chips or semi-sweet if you prefer
- ¾ cup holiday sprinkles red, green, and white
- ½ cup crushed candy canes optional but amazing
The Dry Team
- 3 cups all-purpose flour
- 1 teaspoon baking soda
- ½ teaspoon baking powder
- 1 teaspoon salt I know the original said ½, but trust me on this
- ¼ teaspoon ground cinnamon secret weapon alert!
The Base
- 1 cup unsalted butter, softened room temp is crucial here
- 1 cup granulated sugar
- 1 cup brown sugar, packed tight
- 2 large eggs room temperature
- 1 tablespoon pure vanilla extract don’t skimp on quality
Instructions
Step 1: Preheat the Oven
Preheat your oven to 350°F (175°C).
Step 2: Cream the Butter and Sugars
In a mixing bowl, cream together the softened butter, granulated sugar, and brown sugar until smooth. Keep mixing until the base looks evenly combined.
Step 3: Add the Eggs and Vanilla
Add the eggs and vanilla extract. Mix until well combined.
Step 4: Whisk the Dry Ingredients
In another bowl, whisk together the flour, baking soda, baking powder, salt, and ground cinnamon. Stir until the dry ingredients are evenly blended.
Step 5: Combine the Dough
Gradually add the dry ingredients to the wet ingredients. Mix until just combined.
Step 6: Fold in the Chocolate and Holiday Mix-Ins
Fold in the white chocolate chips, dark chocolate chips, holiday sprinkles, and crushed candy canes if using. Mix gently so the chips, sprinkles, and candy canes are distributed through the dough.
Step 7: Portion the Cookies
Drop spoonfuls of dough onto a baking sheet lined with parchment paper. Space them apart so the cookies can bake evenly.
Step 8: Bake Until Lightly Golden
Bake for 10-12 minutes or until the edges are lightly golden.
Step 9: Cool the Cookies
Allow the cookies to cool on the baking sheet for a few minutes. Transfer them to a wire rack to cool completely.
Notes
- Store cookies in an airtight container for up to a week.
- You can also freeze the dough for later use.
Serving Suggestions
Serve these Winter Wonderland Chocolate Chip Cookies after they have cooled completely on a wire rack. The white chocolate chips, dark chocolate chips, holiday sprinkles, and optional crushed candy canes make them colorful, sweet, and festive.
These cookies work well for Christmas cookie trays, winter parties, holiday dessert boxes, or simple seasonal baking at home. Use the crushed candy canes if you want an extra festive finish, or leave them out since they are optional.
Storage
How to Store
Store cookies in an airtight container for up to a week. This helps keep the baked cookies fresh after cooling.
Freezer Tip
You can also freeze the dough for later use. The recipe does not provide a specific freezer duration or thawing method, so no extra details are added here.
Best Texture Tip
Mix the dough until just combined after adding the dry ingredients. This keeps the cookie dough from being overmixed before the chocolate chips, sprinkles, and optional candy canes are folded in.
Baking Tip
Bake for 10-12 minutes or until the edges are lightly golden. The listed Cook Time is 10 minutes, and the baking range from the Instructions is preserved exactly.
Cooling Tip
Let the cookies cool on the baking sheet for a few minutes before transferring them to a wire rack. This helps them settle before cooling completely.

Fernando is the creator and writer behind the food blog Eating with your Hands. Living and working in cities like Paris, Barcelona, and Berlin, and being married to a Canadian foodie, has given Fernando a passion and interest in food and inspired him to run EWYH.